Managing your posts
Wix Blog: Adding and Setting Up a Post List
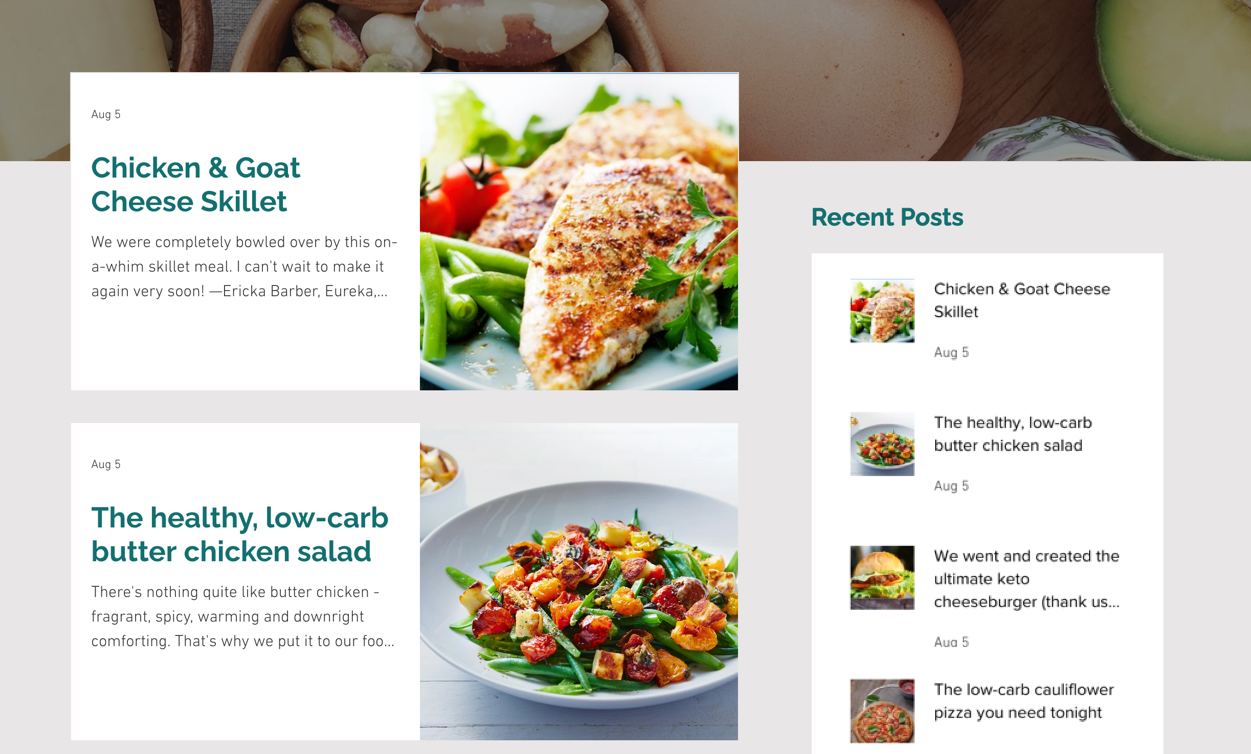
A post list element is a great way to give your visitors snippets of some of your blog posts in other areas of your site. The post list element is fully customizable. You can choose from various layouts and edit the design and display to match your site.
Step 1 | Add a post list element to your site
Adding a post list element to your site lets you display your blog posts exactly where you want them. Whether it’s your homepage, a landing page, or a portfolio, this element makes it easy for visitors to explore your content.
Tip:
Make sure you're on the page you want to add the post list to. You can add a post list to as many pages as you want.
Wix Editor
Studio Editor
Click Add Elements
 on the left side of the editor.
Click Blog.
Click the post list you want to use, or drag it to position it on the page.

Step 2 | Adjust the settings
Once you've added the post list to your site, you can change some of the settings to suit your needs. Choose what category you want the posts to be displayed from and how many posts appear in the list.
Wix Editor
Studio Editor
Click the post list element in your editor.
Click Settings.
Click the Settings tab.
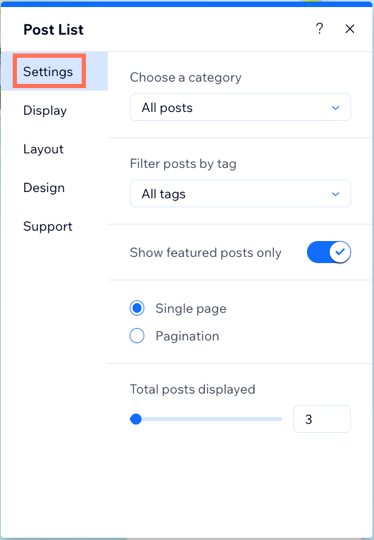
Set up your post list element:Choose a category: Click the drop-down to choose which blog category you want to display in the list.
Filter posts by tag: Click the drop-down to filter posts by tag.
Show Featured Posts only: Click the toggle to choose the type of posts you want to display:Enabled: The post list only shows featured posts.
Disabled: The post list shows all your blog posts, not just featured posts.
How should posts be displayed?: Choose how you'd like your posts to display:Single page: Drag the Total posts displayed slider below to choose the total amount of posts to display on your post list.
Pagination: Drag the Posts per page slider below to choose how many posts display per page in your post list.
Step 3 | Edit the display
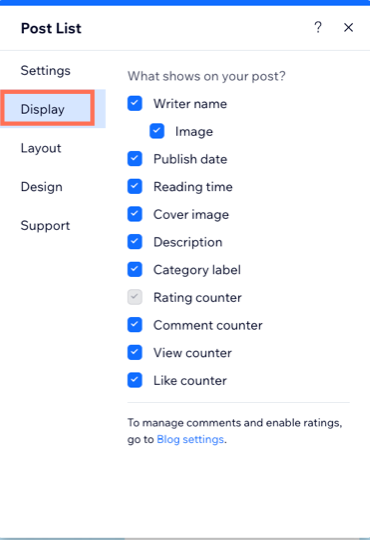
Choose what additional icons and information appear in your post list. For example, would you like to show the author name on each post, or enable a like counter that identifies how many "likes" the post has received?
Wix Editor
Studio Editor
Click the post list element in your editor.
Click Settings.
Click the Display tab.
Select the checkbox next to each item you want to show on your feed.
Step 4 | Change the layout
Choose a layout that highlights your blog posts and matches your site’s design. You can customize the settings further, with options that vary depending on the layout you choose.
Wix Editor
Studio Editor
Click the post list element in your editor.
Click Settings.
Click the Layout tab.
Choose what you want to customize:Posts: Select a layout for your posts, such as Side-by-side or Magazine. Resize your image (crop or fit), adjust the image ratio (e.g., 16:9, 4:3), and choose how your text is aligned (left, center, or right) to suit your design.
Layout settings: Choose how posts are displayed by setting the number of cards per row, adjusting the post size, spacing, and height. Customize the text side padding, and select the number of visible lines for the titles and descriptions to refine your design.

Step 5 | Customize the design
Customize the design of your post list to match your site’s style. Adjust individual elements, like text, spacing, and borders, to make it stand out.
Wix Editor
Studio Editor
Click the post list element in your editor.
Click Settings.
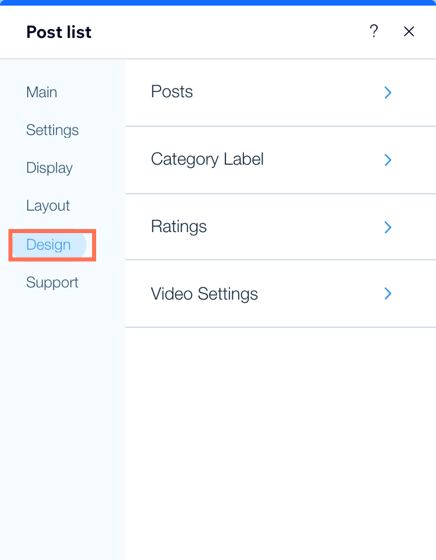
Click the Design tab.
Choose what you want to customize:Posts: Customize the style and color of your post title and description, change the text color on hover, and customize the opacity and color of your border and background.
Category Label: Choose a layout for your category label and customize the category style.
Ratings: Customize the colors for the star that shows the rating for each post. Change the font style, size and color for your rating display.
Video Settings: Customize how your videos play in the post list. Do you want them to autoplay, play on click, or on hover? You can also choose the speed at which your videos play and if you want to have them play on loop.
FAQs
Click a question below to learn more about the post list element.
How can I display only selected blog posts on the homepage?
Categories and tags determine which posts appear in your post list, helping you control and organize the content displayed.
Click Add Elements
 on the left side of the editor.
Click Blog.
Click the post list you want to use, or drag it to position it on the homepage.
Click Settings.
Click the Settings tab.
Click the Choose a category drop-down and select a category to display in your post list. Note: Selecting All categories displays posts from all your categories. Selecting a specific category displays posts from that category only.
Click the Filter posts by tag drop-down and select a tag associated with your posts.
Note: Selecting All tags displays every post, regardless of its tag. Selecting specific tags shows only the posts linked to those tags.
My post list is not displaying correctly, what can I do?
If you post list is not displaying correctly, try the following solutions:
Ensure your site is published.
Try viewing your post list using Incognito mode.
Review your filters to ensure the correct categories and tags are selected.
Can I change the number of posts displayed in a post list?
Yes. You can change the number of posts displayed in your post list.
Click the post list element in your editor.
Click Settings.
Click the Settings tab.
Choose how you want posts displayed:
Single Page:Drag the Total posts displayed slider to increase or decrease the total amount of posts displayed on a single page.
Pagination:Drag the Posts per page slider to set how many posts display per page. Visitors can navigate to view additional posts using the page controls.
How can I customize the layout of my post list for mobile?
Customize settings like the number of posts displayed, spacing, and columns directly in the mobile view of your editor. The changes you make in the mobile view do not affect your desktop layout. This allows you to optimize specifically for mobile visitors.
Note: The options may vary depending on which layout you choose.
Switch to the mobile editor.Wix Editor: Click the Switch to mobile icon
 at the top of the editor.
Studio Editor: Click the mobile breakpoint at the top of the editor.
Click the post list element.
Click Settings.
Click the Layout tab.
Enable the mobile settings toggle to access the available settings.
Customize the layout using the options available:Mobile layout: Select a layout that best fits your site’s design, such as One column, Magazine, Slider, or Side by side.
Image settings: Resize your image (crop or fit), adjust the image ratio (e.g.16:9, 4:3), choose how your text is aligned (left, center, or right).
Layout settings: Adjust the spacing between posts to refine the layout.
Card settings: Customize aspects such as, cards per row, post height, text padding and more.
Slider settings: Customize the slider settings such as, autoplay, number of seconds shown per post and arrow appearance.
