Monetizing your blog
Wix Blog: Creating Blog Post Subscriptions
Adding a paywall is a great way to separate your public and premium content. By adding that extra layer to your blog content, you can enhance engagement and boost your monetization efforts.
Before you begin:
You need to have payment method set up in order to set up a subscription. Learn more.
Step 1 | Choose which posts to monetize
The first step is to choose which posts you want to monetize. When choosing posts, consider their value and uniqueness. Highlight in-depth, insightful, or exclusive content that receives high engagement from your followers. Ensure a balance of monetized and freely accessible content for a mutually beneficial arrangement.
Note:
In the following steps, we'll be choosing a single blog post to start from, however, you can add as many posts as you like to the plan you're about to create.
To choose a blog post:
Go to the Blog tab in your site's dashboard.
Click Create New Post.
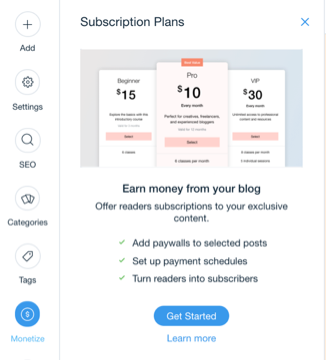
Click Monetize in the toolbar on the left.
Click Get Started.
Step 2 | Create a pricing plan for your post
Wix Blog works with Pricing Plans to allow you to create a subscription paywall to your readers. After clicking Get Started in step 1, you'll be directed to create your first plan.
To create a plan:
Click Create Plan in the popup.
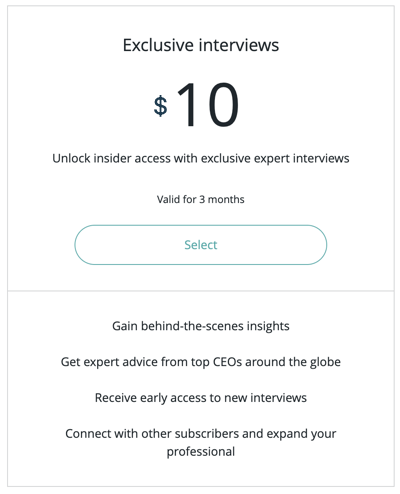
Enter the plan details:Plan name: Choose a descriptive name for your plan.
Tagline: Write a concise and appealing tagline that summarizes the plan's benefits.
List of benefits: Detail the benefits that subscribers receive as part of the plan.
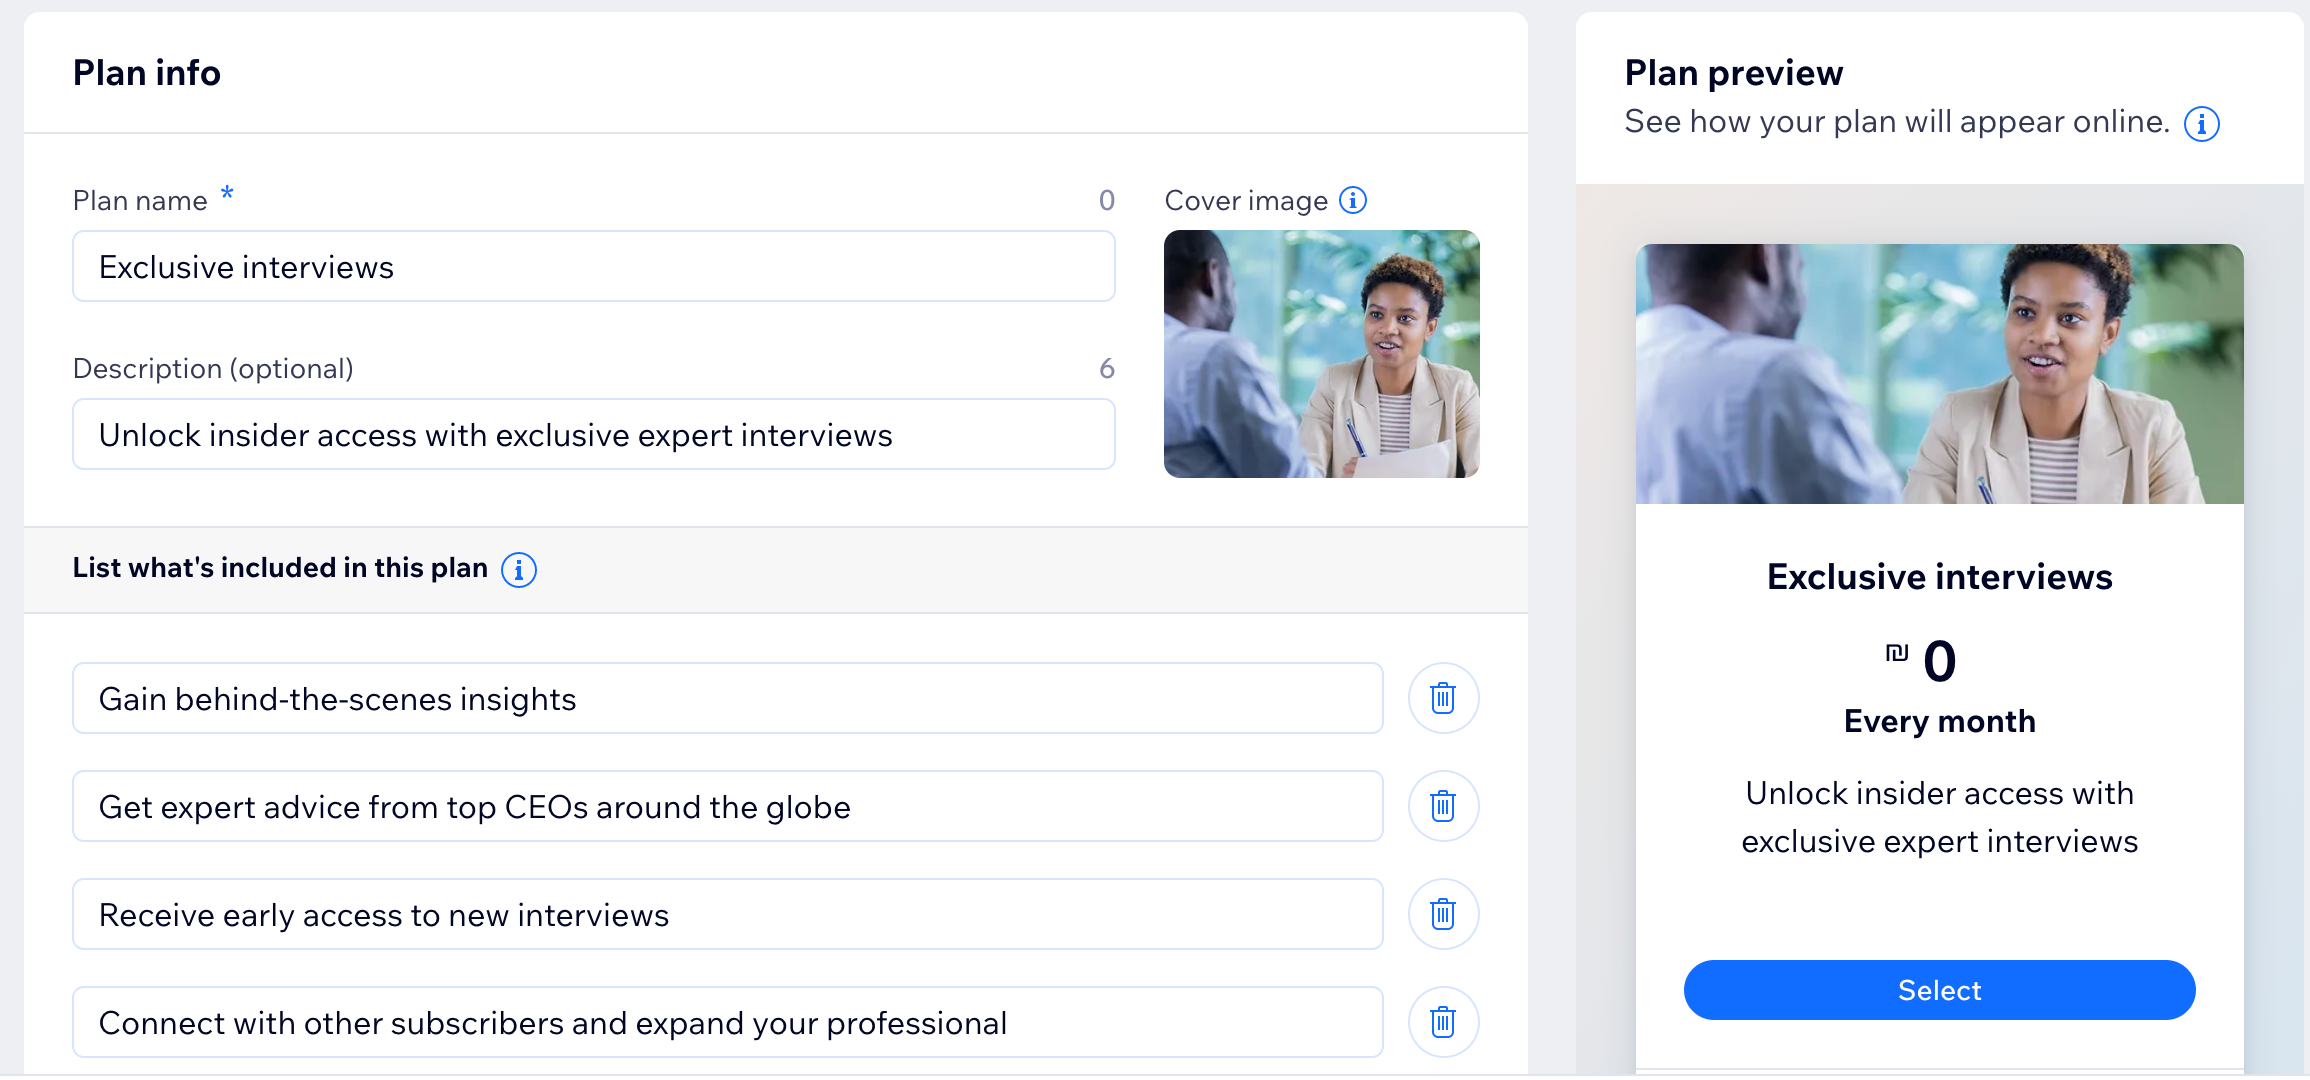
Under Other Benefits, choose which posts you want to include:Click Choose Posts under Posts included.
Select the posts you want to include.
Click Done.
Under Pricing Options, set the pricing and duration of the subscription. You can choose from the following options:Free Plan: Offer your blog readers access to your subscription content for free. Click the drop-down to select the duration.
One Time Payment: Offer your readers access to your subscription content for a one time payment. Enter the price and select the length of the plan.
Recurring Payments: Offer your readers access to your subscription content when they set up a recurring payment plan. Enter the payment frequency and the price of each payment.
(Optional) Under Settings, provide details of the plan policy:
Click the One purchase per person toggle to choose how you want to allow visitors to purchase this plan:Enabled: Visitors can only purchase this plan once.
Disabled: Visitors can purchase this plan more than once.
Provide any important information about the plan, e.g., renewals, cancellations and refunds.
When you're ready to create your plan, click Save.
FAQs
How do I add more posts to a specific subscription plan?
To add another post to a plan:
Go to the Blog tab in your site's dashboard.
Select the post you want to add.
Click Monetize in the toolbar on the left.
Enable the toggle/s next to the relevant plan/s

Can I create more than 1 subscription plan?
Yes, you can create a new plan directly from a specific post, just as you created the first plan.
To create a new plan:
Go to the Blog tab in your site's dashboard.
Select the post you want to monetize.
Click Monetize in the toolbar on the left.
Click Create Plan.

Alternatively, go directly to Pricing Plans in your site's dashboard and create the plan from there.
How do I remove a post from a plan?
To remove a post from a plan:
Go to the Blog tab in your site's dashboard.
Select the post you want to remove (or switch).
Click Monetize in the toolbar on the left.
Disable the toggle next to the plan you want to remove the post from.
Tip: You can add the post to another plan, create a new one, or keep it free.
Can I change the position of the subscription box on my post?
Yes, you can choose exactly how much of your blog post you want unsubscribed readers to see. Anything under the subscription box cannot be seen unless the reader is subscribed.
To change the position of the subscription box:
Go to the Blog tab in your site's dashboard.
Select the relevant post.
Click Monetize in the toolbar on the left.
Click Move Up or Move Down to place the subscription box.
Tip: See the previous on the right to see where the box appears.

