Managing your posts
Wix Blog: Adding Media to a Blog Post
Make your blog posts more engaging by adding images, GIFs, videos, galleries, or files. You can add media to your posts from your site's dashboard, your live site, or from the Wix app.
Adding media to a post from your dashboard
You can add media to your posts in the Blog section of your site's dashboard.
To add media to a post:
Go to Blog in your site's dashboard.
Select the post that you want to add media to.
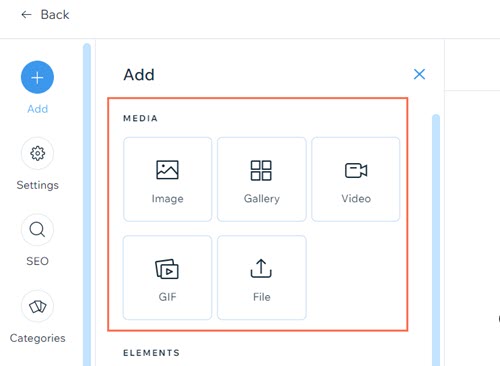
Click the Add icon
 beside the section where you want to add the media.
Select the type of media that you want to add under Media.
Image
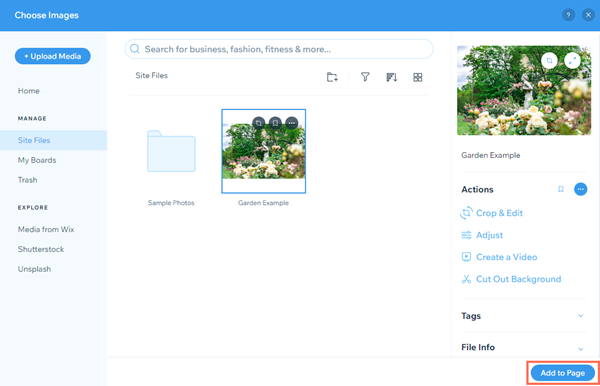
Click Image.
Select an image, or click +Upload Media to add a new image.
Click Add to Page.
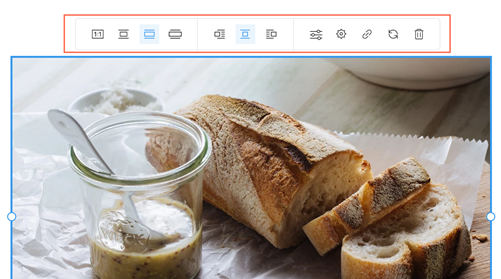
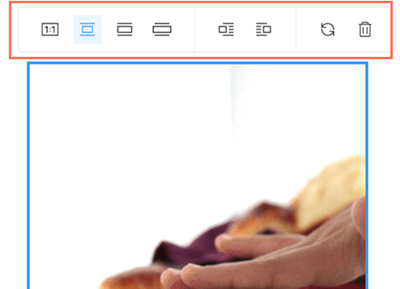
Use the options in the toolbar above your image to customize it.Select a size for your image: Original Size, Small Fit, Best Fit, or Full Width.
Select an alignment for your image: Left, Center, or Right.
Click the Edit Image icon to customize the image in the Wix Photo Studio.
Click the Link icon to add a link to your image. You can link to a web address or a section on your site.
Click the Replace icon to choose a different image.
Click the Delete icon to remove your image.
Click Publish.
Tips:
Make sure to add images of the recommended size.
If you align media to the left or right, you can add text beside it.
Gallery
Click Gallery.
Select the images you want to include, or click +Upload Media to add new images.
Click Add to Page.
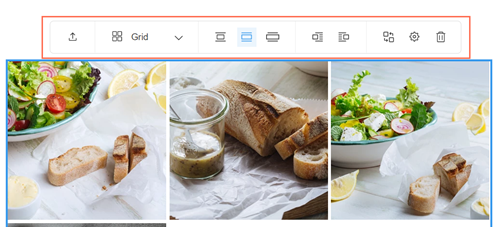
Use the options in the toolbar above your gallery to customize it.Click the Upload Media icon
 to add more images.
Use the drop-down to select a layout for your gallery.
Select a size for your gallery: Small Fit, Best Fit, or Full Width.
Select an alignment for your image: Left or Right.
Click the Organize Media icon to rearrange or edit your images.
Click the Settings icon to customize your gallery's Expand Mode and download settings.
Click the Delete icon to remove your gallery.
Click Publish.
Video
Click Video.
Choose a method for adding a video:Paste a URL from YouTube, Vimeo, or Facebook and click Add.
Click +Upload Video to add your own video.
Note: It is not possible to embed YouTube Shorts URLs. To embed a YouTube Short, change "/shorts/" in the URL to "/watch?v=".
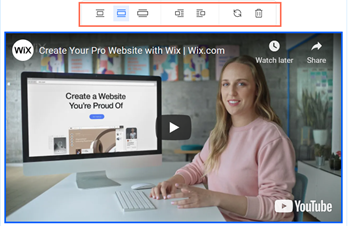
Use the options in the toolbar above your video to customize it.Select a size for your video: Small Fit, Best Fit, or Full Width.
Select an alignment for your video: Left, or Right.
Click the Replace icon to choose a different video.
Click the Delete icon to remove your video.
Click Publish.
GIF
Click GIF.
Enter a term in the search box.
Select a GIF.
Use the options in the toolbar above your GIF to customize it.Select a size for your GIF: Original Size, Small Fit, Best Fit, or Full Width.
Select an alignment for your GIF: Left, or Right.
Click the Replace icon to choose a different GIF.
Click the Delete icon to remove your GIF.
Click Publish.
File
Click File.
Select a file, or click +Upload Media to add a new file.
Note: You can only upload DOC or ZIP files.Click Add to Page.
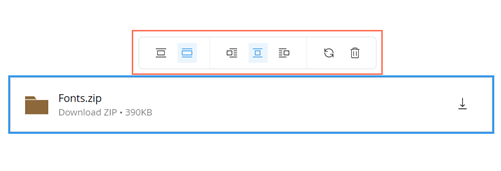
Use the options in the toolbar above your file to customize it.Select a size for your file : Small Fit or Best Fit.
Select an alignment for your file: Left, Center, or Right.
Click the Replace icon to choose a different file.
Click the Delete icon to remove your file.
Click Publish.
Adding media to a post from your live site
You can add image, videos, galleries, GIFs, and files to your posts on your live site.
Note:
You must be signed in to your site's Members Area to edit posts on your live site.
It is not possible to add Media by Wix to your posts on your live site. You can add Media by Wix to posts in your site's dashboard.
To add media to a post:
Log in to your live site using the email address associated with your Wix account.
Go to the page of the post that you want to edit.
Click the More Actions icon
 on the post.
Select Edit Post.
Click the Add icon
beside the section where you want to add the media.Select the media that you want to add from the toolbar.

Image
Click the Image icon
 .
.Select an image, or click +Upload Media to add a new image.
Click Add to Page.
Use the options in the toolbar above your image to customize it.Select a size for your image: Original Size, Small Fit, Best Fit, or Full Width.
Select an alignment for your image: Left, Center, or Right.
Click the Edit Image icon to customize the image in the Wix Photo Studio.
Click the Link icon to add a link to your image. You can link to a web address or a section on your site.
Click the Replace icon to choose a different image.
Click the Delete icon to remove your image.
Click Publish Changes at the bottom of the post.
Tips:
Make sure to add images of the recommended size.
If you align media to the left or right, you can add text beside it.
Gallery
Click the Gallery icon
 .
.Select the images on your computer that you want to include.
Click Open.
Use the options in the toolbar above your gallery to customize it.Click the Upload Media icon
to add more images.
Use the drop-down to select a layout for your gallery.
Select a size for your gallery: Small Fit, Best Fit, or Full Width.
Select an alignment for your image: Left or Right.
Click the Organize Media icon to rearrange or edit your images.
Click the Settings icon to customize your gallery's Expand Mode and download settings.
Click the Delete icon to remove your gallery. Click Publish Changes at the bottom of your post.
Video
Click the Video icon
 .
.Choose a method for adding a video:Paste a URL from YouTube, Vimeo, or Facebook and click Add.
Click +Upload Video to add your own video.
Note: It is not possible to embed YouTube Shorts URLs. To embed a YouTube Short, change "/shorts/" in the URL to "/watch?v=".
Use the options in the toolbar above your video to customize it.Select a size for your video: Small Fit, Best Fit, or Full Width.
Select an alignment for your video: Left, or Right.
Click the Replace icon to choose a different video.
Click the Delete icon to remove your video.
Click Publish Changes at the bottom of your post.
GIF
Click the GIF icon
 .
.Enter a term in the search box.
Select a GIF.
Use the options in the toolbar above your GIF to customize it.Select a size for your GIF: Original Size, Small Fit, Best Fit, or Full Width.
Select an alignment for your GIF: Left, or Right.
Click the Replace icon to choose a different GIF.
Click the Delete icon to remove your GIF.
Click Publish Changes at the bottom of the post.
File
Click the File icon
 .
.Select a file, or click +Upload Media to add a new file.
Note: You can only upload DOC or ZIP files.Click Add to Page.
Use the options in the toolbar above your file to customize it.Select a size for your file : Small Fit or Best Fit.
Select an alignment for your file: Left, Center, or Right.
Click the Replace icon to choose a different file.
Click the Delete icon to remove your file.
Click Publish Changes at the bottom of the post.
Adding media to a post from the Wix app
You can add image, videos, galleries, and GIFs to your posts using the Wix app.
Note:
It is not possible to add files to your posts in the Wix app. You can add galleries and files to your posts in your site's dashboard or on your live site.
To add media to a post:
Go to your site in the Wix app.
Tap Manage
 at the bottom.
Tap Blog under Content & Community.
Tap Posts.
Select the post that you want to add media to.
Tap the Add icon
in the bottom left.Select the media that you want to add.
Image
Tap Image.
Tap the image that you want to add.
Tap the Edit icon
 to edit the image.
Tap Next.
Tap Next.
Tap Save and publish.
Gallery
Tap Gallery.
Tap the first image that you want to add.
Tap the Add icon
to add more images.Tap all of the images that you want to add to select them.
Tap Done.
Tap an image and tap the Edit icon
to edit the image.Tap Next.
Tap Next.
Tap Save and publish.
Video
Tap Video.
Tap the video that you want to add.
Tip: You can also tap Create a video to create your own video, or tap URL to add a video from YouTube, Vimeo, Soundcloud, or Facebook.Tap Next.
Tap Next.
Tap Save and publish.
Note:
It is not possible to embed YouTube Shorts URLs. To embed a YouTube Short, change "/shorts/" in the URL to "/watch?v=".
GIF
Tap GIF.
Enter a term in the search box.
Tap a GIF to add it to your post.
Tap Next.
Tap Save and publish.
