Managing CMS collections
CMS: Managing Your Collection Content
Manage your CMS (Content Management System) collection content from your site's dashboard or editor. Your collection consists of distinct fields and items, with each item's content stored in its fields. As you work within a table, list, or gallery layout, you can add or edit the fields and field values of your collection items.
In this tutorial we use the default table layout of your collection. Keep in mind that only the list layout is available in single item collections. If you're using sandbox collections, make sure to access them from the CMS in your site's editor.
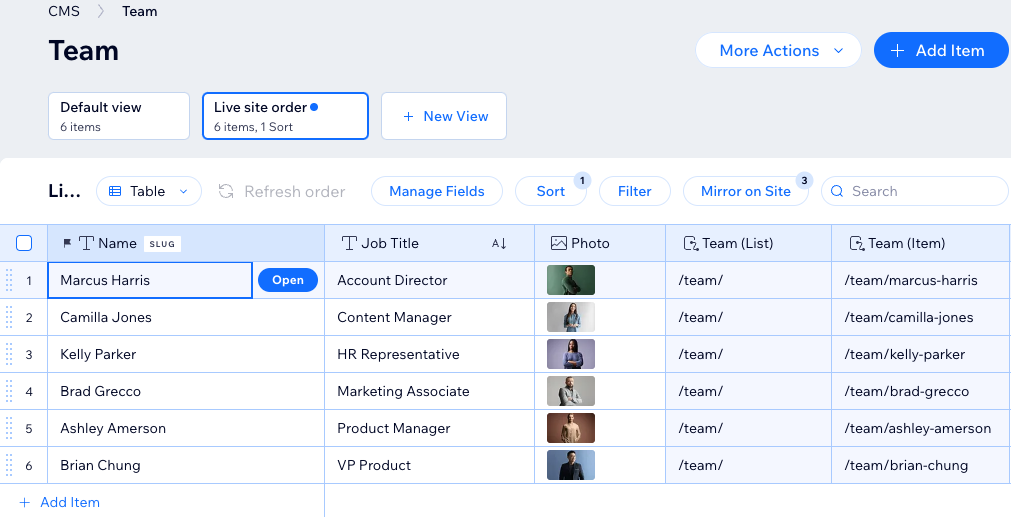
Managing your CMS collection content
Access your collection from your site's dashboard or editor to start managing the content.
To manage content in your collection:
Go to CMS in your site's dashboard. Alternatively, you can click CMS
 in your editor, then click Your Collections.
Click the relevant collection.
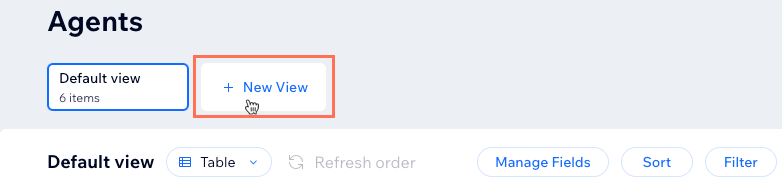
(Optional) Create a custom collection view for you and site collaborators to use:Click + New View at the top.
Enter a name for the collection view and press Enter on your keyboard.
(Optional) Click the Layout drop-down and choose a layout to use:Table: View the collection in an editable table with items as rows and fields as columns.
List: View the collection items in a list where you click to open individual items to edit their field values.
Gallery: View the items in a gallery where you click to open individual items to edit their field values.

Choose what you want to do:
Manage the collection fields
Click Manage Fields.
Choose what you want to do:Add Field: Click + Add Field, choose the relevant field type and click Choose Field Type. Then enter the Field name and click Save. Learn more about adding fields to your collection.
Show or hide fields: Click the checkboxes next to the relevant fields to show or hide them from the collection view. If you hide a field, you can still connect it in datasets.
Reorder fields: Click and drag the Reorder icons next to the fields to change the order in which they appear in your collection view.
  Edit field: Click the relevant field to edit its name, validations, or default values.
Note: It is not possible to change the field type. If you need to use a different field type, add a new field with the required type and copy and paste your data from the old field to the new one.
Duplicate field: Hover over the relevant field and click the More Actions icon . Then select an option:Duplicate field: Create a copy of the field without any values in the fields.
Duplicate field with content: Create a copy of the field with all the same values.
Make primary: Hover over the relevant field and click the More Actions icon. Then select Make primary to make it the Primary collection field.
Delete field: Hover over the relevant field, click the More Actions icon and select Delete. Click the Yes, delete field checkbox to confirm, then click Delete.
Note: Before deleting a field, make sure it is not connected to any page elements. Once deleted, any connections to the field will break. You can hide the field if you're not sure if it's connected.
Add, edit, or select items
Choose what you want to do:
Add item: Click + Add Item and enter values for the item in each of its fields.
Edit item: Click the relevant item's fields and edit their values.
Select items: Hover over the relevant item and click the checkbox on the left. Click the checkbox at the top left of the table to select all the items.
Delete items: Select the relevant item(s) and click Delete at the top right. Click Delete again to confirm.
Note: Before deleting an item, make sure you don't have any dynamic pages or references in another collection connected to the item. Once the item is deleted, these links or references will break.
Sort the items automatically
Click Sort at the top of your collection.
Click + Add a Sort.
Click the Sort by drop-down and choose the field you want to sort.
Select a sorting option under Select the order (e.g. A-Z, Low-High, Oldest-Newest). The options vary depending on the field type.
Click Add Sort.
Note: From the Table layout, you can sort the items manually. Click and drag the Reorder icon  next to the relevant items to change their order.
Tip: Enable the Mirror on Site toggle to use this same item order in your site's connected elements (e.g. repeaters, galleries). Learn more about the Mirror on site feature.
Filter the items by field value
Click Filter at the top right.
Click + New Filter.
Click the Select Field drop-down and choose the field you want to filter.
Click the Choose a Condition drop-down and select the criteria for your filter. The options vary depending on the field type.
(If necessary) Click the Enter a value field and enter the value you want to use for the condition.
Click Add Filter.
Notes:
These collection view filters do not filter items from your live site. Add filters to datasets to include or exclude items in your live site's connected elements.
You cannot add filters to a collection view if it has the 'Mirror on Site' feature enabled. Likewise, you cannot mirror the collection view’s order if the view contains a filter.
Mirror the item order on your live site
Use the same item order on your live site's connected elements (e.g. repeaters, galleries). Learn more about mirroring your collection view's item order with your live site.
Notes:
Any sorts you've added to datasets will override the order you set in your mirrored collection view.
You cannot add filters to a collection view if it has the 'Mirror on Site' feature enabled. Likewise, you cannot mirror the collection view’s order if the view contains a filter.
To use your collection view's item order on your site's connected elements:
Click Mirror on Site at the top of the collection.
Enable the toggle next to Mirror item order on the site.

More actions
Click More Actions at the top right and choose an option:
Import items: Upload a CSV file to use as items and fields in your collection.
Export to CSV: Export your collection to a CSV file to use elsewhere.
Collection settings: Change the collection name, control live site item visibility from your collection, or hide the table layout.
Permissions & privacy: Choose who can view, add, delete, or update content. Learn more about setting collection permissions.
Indexes: (Advanced) Add an index to speed up collection queries and prevent duplicates in your collection.
Add dynamic page: (When viewing the collection from your editor only) Create dynamic pages to showcase your collection content.
View connections: See a list of all the dynamic and static pages on your site that connect to your collection. This is a great place to troubleshoot CMS connection issues.
Manage translations: Translate CMS collection content that appears on your live site with Wix Multilingual.
Edit on mobile: Make changes to your collection content on the go with the Wix app.
Keyboard shortcuts: View a list of keyboard shortcuts available in the table layout.
Submit feedback: Send us your thoughts and suggestions to help us improve the CMS.
FAQs
Click the questions below for answers to common questions about managing collection content.
What content can I store in each field type?
The field type you choose determines what kind of content you can store in the field. Choose from the following CMS field types:
Essentials:Text: Store plain text for use with titles, descriptions, and other text-based content.
Rich Text: Create and manage text using formatting options, directly in your CMS.
Rich Content: Create and manage content with rich text formatting, media embeds, and other advanced features directly in your CMS.
URL: Store web addresses for use with creating hyperlinks and navigational links. You can use the following formats only: http://, https://, ftp://, mailto:, sms:, tel:
Note: Web addresses must be in the format http:// or https://. Entries that start with www. are automatically converted to http://.
Number: Store numerical data for various purposes (e.g. quantity, price, dimensions).
Tags: Manage and categorize content items using keywords or descriptive labels.
Boolean: Store binary "true" or "false" values that appear as checkboxes in the collection fields.
Reference: Create a relationship between content items by referencing another content item.
Multi-Reference: Create many relationships between content items by referencing multiple other content items. Those references can also be linked to multiple sources.
Color: Save HEX numbers that represent colors. You can use the colors in connected text elements, buttons, and section backgrounds.
Media:Image: Store image files such as JPG, PNG, and GIF file types.
Tip: You can add images to fields by pasting their image URLs in the fields.
Media Gallery: Store multiple images or videos in each field.
Video: Store single video files for each item using file types such as AVI, MPEG, MOV and more.
Audio: Store single audio files for each item using file types such as MP3, WAV, FLAC, and more.
Document: Store single document files for each item such as PDFs, CSVs, and more. Tip: You can add documents to fields by pasting their document URLs in the fields.
Multiple documents: Store multiple document files for each item. You can also add multiple documents to fields by pasting their URLs in the fields.
Time and location:Date: Store date and optional time values associated with content items.
Time: Store time information for associated items independently of the date.
Address: Store structured data for physical addresses such as street names, city, state/province, postal code, and country.
Javascript (Velo code):Object: Manage complex and structured data using custom objects or data structures. You can use the object field type to store and organize multiple related pieces of data as a single unit.
Array: Input and manage multiple values within a single field. You can use the array field type to handle a collection of related data, such as a list of options, tags, or other sets of related values.
Learn more about supported field types and their limitations.
How do page elements connect to collections?
After adding the CMS to your site, you can connect page elements to datasets which connect to the relevant collections. Once connected, you decide which collection fields connect to each part of the page elements.
For example, with image elements, you can:
Connect the image source to an image field type in your collection.
Connect the alt text source to a text field type in your collection.
Connect the link (when clicked) to a URL field type, a dynamic item page, or various click actions such as Submit, Load more, or Next item.
Learn more about connecting page elements to datasets.
Can I hide items in my collection to prevent them from appearing on the page?
Yes. In your collection settings, you can toggle on Control item visibility. This adds a new field in your collection where you can set individual items as "Hidden". These items do not get read by the dataset, so they cannot appear on your live site. With this feature, you can also set schedules that automatically show or hide collection items at specific dates and times.
Learn more about controlling item visibility from your collection itself.
Keep in mind that hiding, showing, or reordering fields in your collection view, does not affect whether they can be connected to your page elements.
Can I control the order in which the items display on my live site from my collection?
Yes. You can enable the 'Mirror on Site' feature to apply the order of your collection view to connected site elements. Keep in mind:
Any sorts added to datasets override the order set in the mirrored collection view.
You cannot add a filter to a collection view if the view has 'Mirror on Site' enabled. Likewise, you cannot mirror the collection view’s order if the view contains a filter.
Can I add a filter to my collection view if it has 'Mirror on Site' enabled?
No, you cannot add a filter to a collection view that has the 'Mirror on Site' feature enabled. Similarly, if the collection view contains a filter, you can't enable 'Mirror on Site' for it. However, you can create a new collection view without any filters and enable 'Mirror on Site'.
Can I make fields 'required', limit their characters, or set them to accept specific values only?
Yes. Edit a field in your collection and go to its Validations tab to set these types of field validations. Learn more about setting field validations in your collection.
Can I add default values to fields?
Yes. You can add default field values that populate automatically whenever you add new items to your collection.
Important: Default field values are not applied to items added via input elements or the Wix app. These default fields only apply to items that you or site collaborators add within your CMS collections from desktop computers.
Can I view a list of all the pages that connect to my collection?
Yes. From your collection, click More Actions at the top right and select View connections. You'll see a breakdown of all the dynamic and static pages that connect to your collection content. In the list of pages, you can view the dynamic page type, URL, slug variables, and more.

Are there storage limits for collection fields?
Yes. You can store up to 500KB of data in a single item's total collection fields. This limit does not apply to image, document, multi document, video, audio, or media gallery fields. Click here to vote for increasing the storage limits.
Can I create a dynamic link that visitors click to send emails?
Yes. You can create dynamic links that open the visitor's mail client so they can send an email to the relevant address.
To create dynamic links that open the visitor's mail client:
Create a URL field type in your collection for storing the email addresses.
Add the email addresses to the field with mailto: at the beginning of each address (e.g. mailto:support@email.com).

Link a button or image to a dataset that connects to this URL field. When visitors click the link, their email client opens with the relevant address in the 'To:' field.
How can I sort my items in a more logical way when using a mixture of letters and numbers in a 'Text' field type?
When you're using a 'Text' field type that contains both letters and numbers, the system applies an alphabetic sorting order. This means that 'Text' field values are sorted in an alphabetic sequence. For example:
P101
P120
P1200
P123
While this is an expected behavior for an alphabetic sorting logic, you might prefer to sort these values in a numerical sequence.
To achieve this, you can use a 'Number' field type without any letters. By using a 'Number' field type, the system will sort the same set of numbers as follows:
101
120
123
1200
This order aligns with a numerical sequence, offering a more intuitive understanding of your sorted data.
Learn how to:
Add sorts to a dataset to control the order of items on your live site.
Add sorts to your collection view to control the order of items in your collection.
What is a URL slug?
A URL slug is a part of a URL that identifies a specific page. It is the text in the URL that comes after the domain name and helps humans and search engines understand what the page is about. Learn how to work with URL slug structures to create unique dynamic page URLs.
What is a dataset?
Datasets are the vital link between the elements on your page and the content in your CMS collection. You can use datasets to create a two-way connection, allowing you to display collection content, capture user inputs, or both.
Datasets allow you to control which parts of your page elements connect to which fields in your collection. Each dataset connects to a collection and each element connected to the dataset connects to a field in the collection. This unlocks a new way of managing which content appears and where.
