Connecting CMS collection content to your site
CMS: Displaying Addresses from Your Collection Items on Google Maps
Display locations from your CMS (Content Management System) collection items in an interactive Google Maps element on your site. Add the locations of your items in an address field in your collection. Then connect a map on your site to a dataset that binds to your collection.
Before you begin:
Add the CMS (Content Management System) to your site.
Adding an address field to your CMS collection
Make sure the collection items you want to display on the map have a location entered in an address field. Once connected to your map, these locations show up as pins. You can connect the pins' titles, descriptions, links, link text, and pin URLs to collection fields as well.
To add an address field to your collection:
Go to CMS in your site's dashboard. Alternatively, you can click CMS
 in your Editor, then click Your Collections.
Click the relevant collection.
Click Manage Fields.
Click + Add Field.
Select Address and click Choose Field Type.
Enter a name in the Field name field.
(Optional for Velo only) Update the Field ID, which is used in the site's code. You cannot update this field later.
(Optional) Enter Help text if you want a tooltip to appear in your collection next to the field title.
(Optional) Enable the Personally Identifiable Information toggle to encrypt location data that could be considered Personally Identifiable Information.
Click Save.
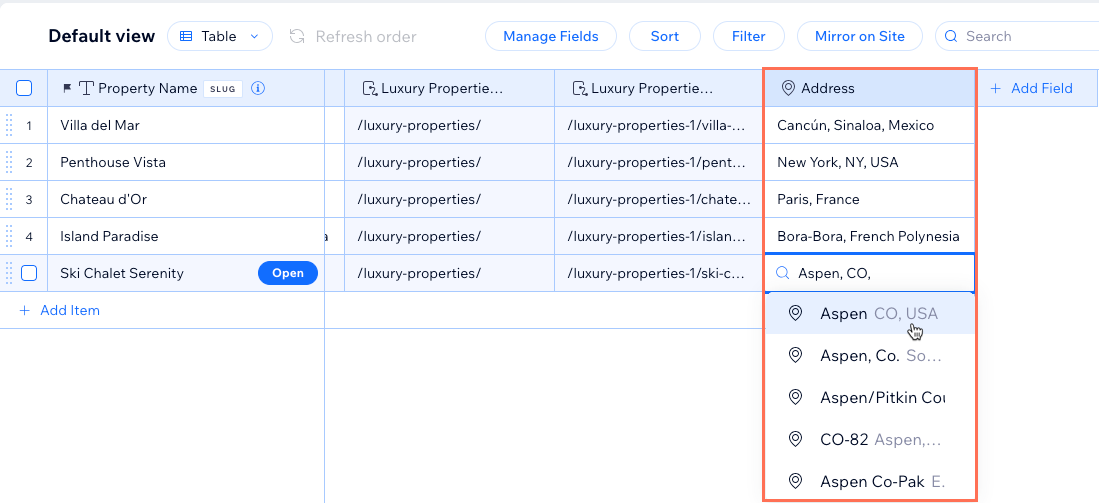
Enter a location for each item in their address field. Make sure to manually select the correct address from the list that appears as you type. If you do not select an address from the list, Google Maps may have trouble reading and properly displaying all your addresses.
Connecting your collection fields to your map
Connect your Google Maps element to a dataset that binds to your collection. Then connect the address field to the map location and choose which fields to use with the rest of the connections. Once connected, you can make sure all the locations are in view by adjusting the zoom setting. You can choose from several stylized map designs and adjust the size of the map on your page.
Wix Editor
Studio Editor
Go to the page or section in which you want to add a map.
Click Add Elements
 on the left side of the Editor.
Click Contact & Forms and select Maps.
Click and drag the relevant Google Maps element onto your page.
Click the Connect to CMS icon
 .
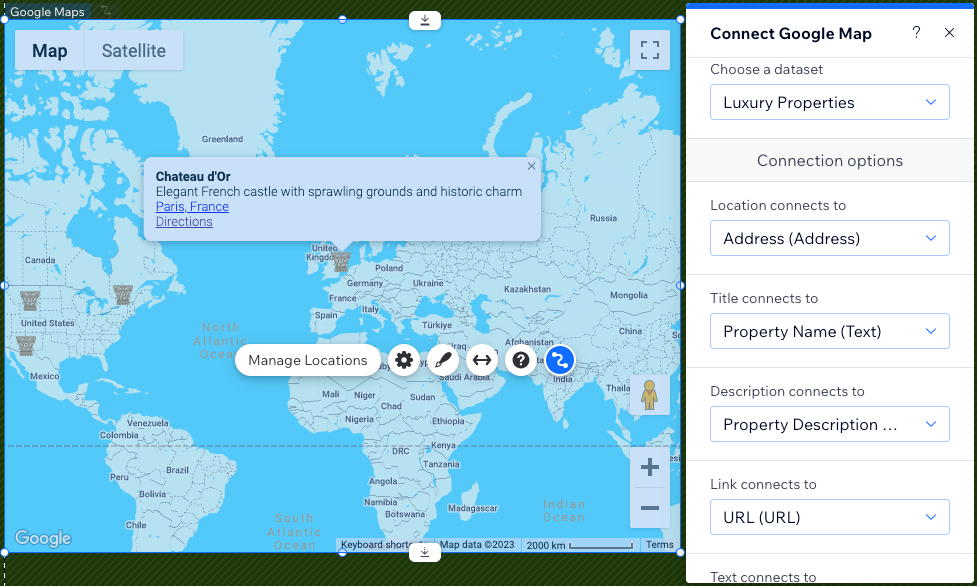
.Click the Choose a dataset drop-down and select an existing dataset that connects to your collection. Alternatively, click Add a Dataset, then choose the collection you want to connect, give the dataset a name and click Create.
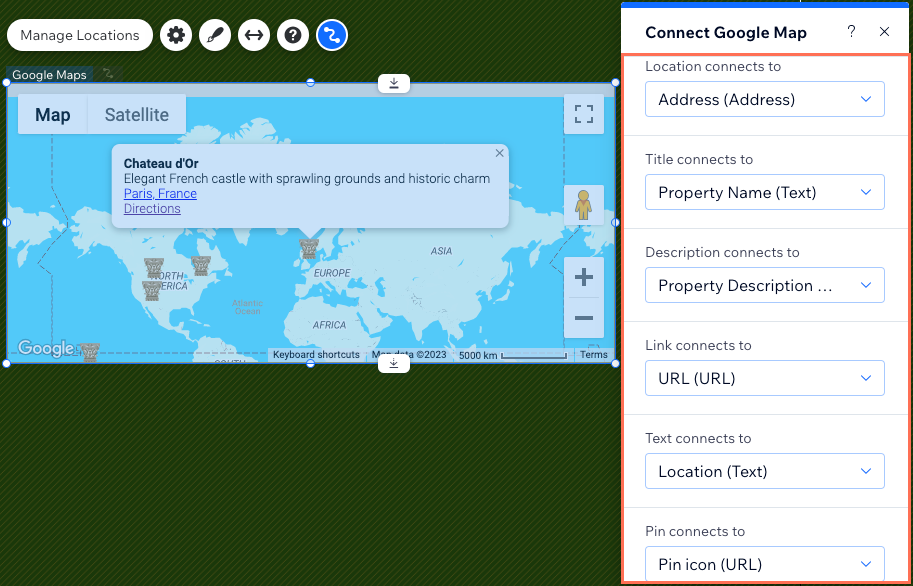
Under Connection options, use the drop-downs to connect each part of your map:
Tip: Click the relevant drop-down and select + Add if you need to create and connect a new collection field.Location connects to: Select the address field you want to use for your item(s).
Title connects to: Select the field to use as the title, which displays in bold text on the map.
Description connects to: Select the field to use as the description, which displays under the title.
Link connects to: Select a URL field if you want to add a link below the title and description. Make sure to connect the Text connects to drop-down that determines the text that will be linked, or the link will not display.
Text connects to: Select a field to use as the text that will be hyperlinked to the Link connects to drop-down. Make sure to select from both drop-downs so the link displays.
Pin connects to: If you want to use your own icon instead of the map's default Pin marker , select a URL field that includes the URL of your icon. We recommend using images that are less than 30 pixels in width and height.
Resize your map by clicking and dragging the edges. You can also click the Stretch icon
 to expand it to the full width of your site.
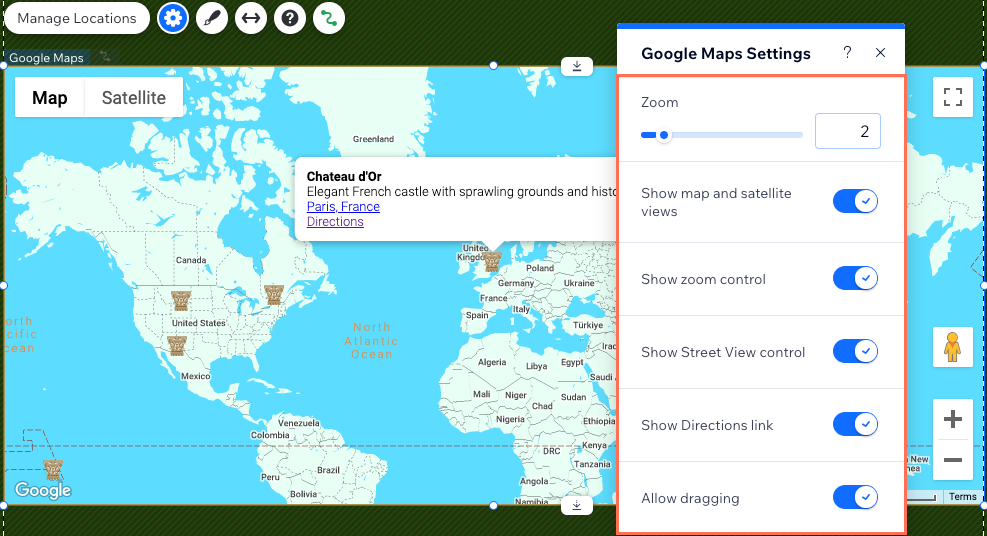
Click the Settings icon
 on the Google Maps element and choose from the following options:Zoom: Drag the slider to change the default zoom position of your map.
Show map and satellite views: Let visitors switch between the map and satellite views.
Show zoom control: Let visitors zoom in and out of your map.
Show Street View control: Let visitors select the Google Street View to see the location from the ground level.
Show Directions link: Let visitors click a link to view directions in Google Maps.
Allow dragging: Let visitors click and drag to move around in the map.
Click the Design icon
 to choose another preset map design.
Note: The Pin Design tab does not affect your map's pin once you connect the map to a dataset. Use the Pin connects to drop-down in step 8 if you want to use a custom pin in your map.
Important:
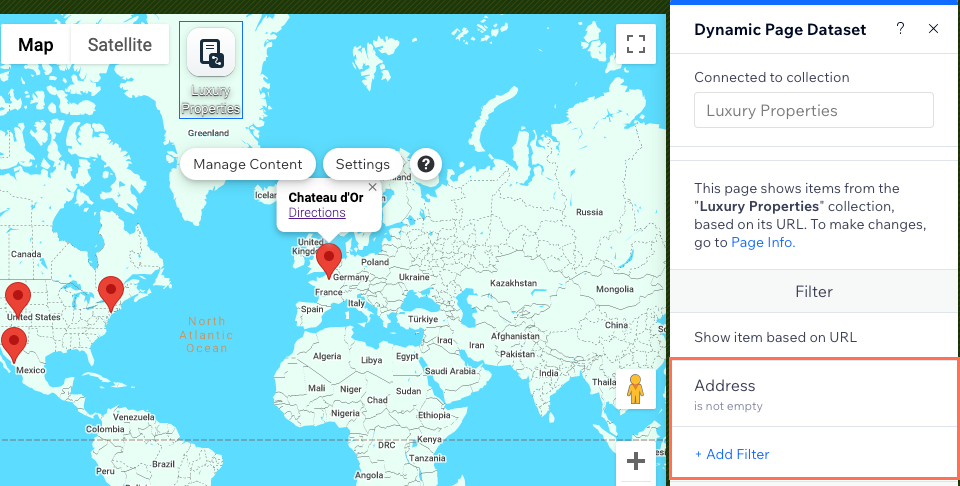
If you have items in your collection that do not have locations in the address field you connected, the map will not display any collection items. You can resolve this issue by adding a filter to the dataset. Set the filter to the address field and the condition to Is not empty. As a result, the dataset only reads items that have a location and displays them in the map.
FAQs
Click below for answers to common questions about connecting Google Maps to your CMS.
Can I show addresses that visitors submit on my map?
Absolutely. You can add an address input element that visitors use to submit addresses to a collection. Then connect your map to a dataset that binds to the same collection. Make sure the dataset mode is set to Read & Write and that the collection permissions allow it to be viewed by the relevant people. Learn how to set the dataset mode and collection permissions.
Can I display multiple addresses for the same collection item?
It is not possible to connect multiple addresses from the same collection item to your map. You can connect only one address field to your map to display one location per collection item. If this is a feature you would like to see in the future, click here and vote.
You can still display multiple addresses on your map, they just need to be for different collection items.
If you've connected your map, but don't see all of your collection items' locations in it, check the following:
Page type: Dynamic item pages only display one item at a time since the dataset filters to only include the page's dedicated item. Since you can connect only one field to the map's location, only one item can display in the map on dynamic item pages. Connect your map on a dynamic list page or another page type to show locations for multiple items.
Zoom setting: You map could be zoomed in too close to see all the addresses you connected. Go to the map's settings and use the Zoom slider to adjust the default zoom level.
Empty address fields: If items in your collection are missing locations in the connected address field, none of your items appear on the map. You can either add locations in the address field of each item, or add a filter to the dataset. Set the filter to the address field and the condition to Is not empty. As a result, the dataset only reads items that have a location and displays them in the map.
What do the Manage Locations settings do?
Once you connect the Google Maps element to a dataset, the Manage Locations settings do not affect the map. This setting is used to add locations manually if you do not connect the map to your CMS.
The number of locations displayed depends on how many collection items the dataset can read. However, if you have items that do not have an address in the connected address field, the map will not display any of your item locations. Make sure to add locations in the address field for each item in the collection, or add a dataset filter. Set the filter to the address field and the condition to Is not empty. As a result, the dataset only reads items that have a location and displays them in the map.
