Working with dynamic pages and the CMS
CMS: Creating Dynamic Pages that List Items by Category
Organize your CMS (Content Management System) collection items by category on your website with dynamic pages. You can create a dynamic 'category' page with a different version for each category. In each version, visitors view a list of the items within the category and can click to view the specific items.
For example, let's say you're a book blogger with reviews for many different genres like mystery, romance, and fantasy. By setting up dynamic pages for each genre, your book-loving visitors can easily navigate to the reviews they are interested in, improving their experience.
This guide will show you how to establish dynamic pages for each category, adjust URL structures, personalize your pages, and, if desired, create an overarching dynamic page that displays all your categories.
Before you begin:
Make sure you have a CMS collection with items that you want to categorize.
Make sure you've created a dynamic item page for your collection. You will add a dynamic link to this page from your dynamic 'category' page so visitors can click to view details about a particular item.
Step 1 | Add a field for categorizing your collection items
To display different categories of items on your site, your collection needs a field that defines which category each item belongs to. Add or choose a 'category' field in your collection, then enter values in the field to categorize each item.
To add a 'category' field to your collection:
Go to CMS in your site's dashboard. Alternatively, you can click CMS
 in your editor, then click Your Collections.
Click the relevant collection.
Click Manage Fields.
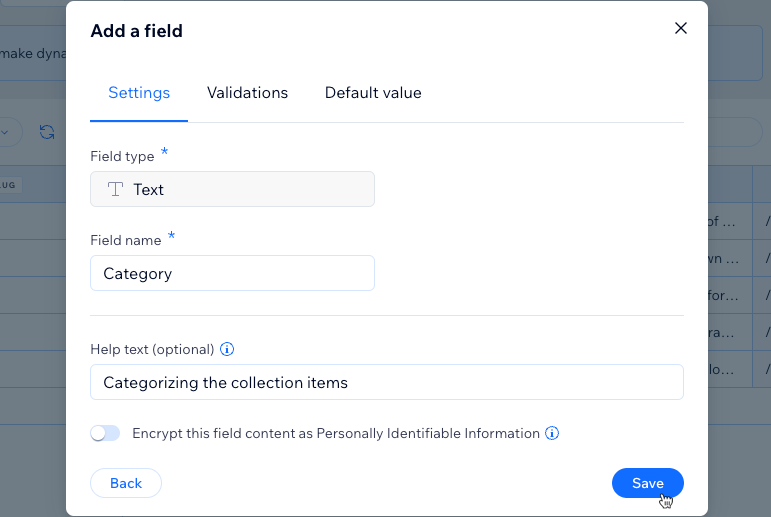
Click + Add Field, choose the Text or Number field type and click Choose Field Type.
Enter the Field name (e.g. Category).
(Optional for Velo only) Update the Field ID, which is used in the site's code. You cannot update this ID later.
(Optional) Enter Help text that will appear in your collection view as a tooltip next to the field name.
(Optional) Click the Validations tab to make this a required field, limit the character count, or accept specific values only. Learn more about adding field validations.
(Optional) Click the Default value tab to add text that gets added to the field automatically for each new item in the collection. Learn more about adding default values to fields.
Click Save.
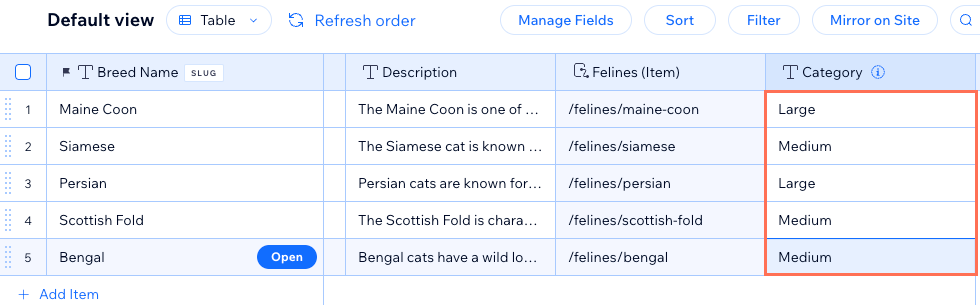
Enter the name of the category that each item belongs to in your new 'category' field. Make sure to spell, capitalize, and use the same number of spaces for each unique category.
Step 2 | Add a dynamic page that lists items per category
Create a new dynamic list page for your collection. Later, this dynamic page will serve as a template with different versions for each category. Each version will only show items that belong to its category.
Wix Editor
Studio Editor
Click CMS
 on the left side of the editor.
Click Your Collections.
Hover over the relevant collection and click the More Actions icon
 .
.Click Add dynamic page.
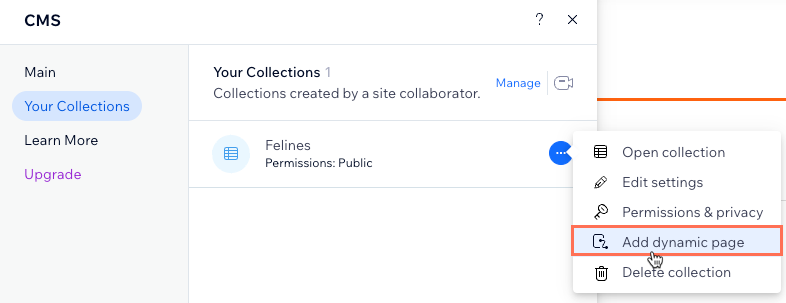
Select List page and click Add to Site.
Step 3 | Modify the URL slug structures
You need to convert your new dynamic list page to a type of dynamic item page that lists items per category. To do so, edit the page's URL slug structure. Make sure to add your 'category' field as a variable and to keep the slug structure unique to your site.
Important:
If you change the URL slug structure of your dynamic pages, all the existing links to these pages will no longer work. This affects links within your site, any links you've shared externally, and SEO links in search engines. We're releasing a feature that will let you add an automatic redirect, taking visitors and search engines from the old URL to the new one.
Unique URL slug structure
The URL slug structure cannot already be used by other existing pages on your site. To be unique, the URL slug structure cannot have the same prefix (e.g. {Collection name}) and the same number of variables as another page on your site, even if the variables are different.
The CMS will not allow you to save changes to the URL slug structure if it conflicts with an existing one. This is why you may want to alter the URL slug structures of your collection's other dynamic pages.
Show me an example of conflicting URL slug structures that cannot be used

What converts the dynamic list page to a dynamic item page?
When you create any dynamic page, a Page Link field is added to your collection. The Page Link field generates the actual URL slug values for each item in your collection based on the URL slug structure of the dynamic page.
Editing the dynamic page's URL slug structure causes the Page Link field values to adjust accordingly. If multiple items in your collection have the same Page Link value (URL slug), the CMS determines that these items should share the same page. So, the dynamic page is turned into a dynamic item page with a different version for each unique Page Link value (URL slug).
Show me an example of duplicate Page Link field values in a collection

Creating dynamic 'category' pages from combined field variables:
You can create dynamic 'category' pages with versions for each unique combination of field values. If you add multiple field variables to the URL slug structure of a dynamic page, the values are combined in the Page Link field. If this field is the same for multiple items, the dynamic page is converted to a dynamic item page with versions for each unique Page Link value (URL slug).
Example URL slug structures you can create
You can use any text or number fields as variable in your dynamic pages' URL slug structures. For example, you could create the following URL slug structures for your dynamic pages:
Dynamic item page: https://www.{your-domain.com}/{collection-name}/{category}/{primary-field}
Dynamic category page: https://www.{your-domain.com}/{collection-name}/{category}
Dynamic list page: https://www.{your-domain.com}/{collection-name}
To edit the URL slug structures of your dynamic pages:
Wix Editor
Studio Editor
Click Pages & Menu
 on the left side of the editor.
Click Dynamic Pages.
Edit the URL slug structures of the dynamic pages that connect to your collection. Click the relevant dynamic page type below for directions:
Dynamic item page (used to display individual items)
If necessary, you can edit the URL slug structure of your collection's dynamic item page, used to show details about individual items. Keep in mind that changing the URL slug structure of your existing dynamic pages will cause the existing links to these pages to no longer work. This affects links within your site, any links you've shared externally, and SEO links in search engines.
To edit the URL slug structure of your dynamic item page used to display individual items:
Hover over the dynamic item page, click the More Actions icon
 and select SEO.
Edit the URL slug structure field and press Enter on your keyboard. For example, you could use the following slug structure for your dynamic item page: {collection-name}/{category}/{primary-field}
Tip: Click Add Variable to add a collection field to the URL that will dynamically adjust based on the item displayed on the page.

Dynamic page (that will display items per category)
Convert your dynamic list page into a dynamic page with different versions for each category. To do so, edit the URL slug structure so it remains unique to your site and includes your 'category' field as a variable.
To edit the URL slug structure of your dynamic 'category' page:
Hover over the dynamic list page, click the More Actions icon
and select SEO.Edit the URL slug structure so it includes your 'category' field and does not conflict with existing URL slug structures. For example, you could use the following slug structure for this dynamic 'category' page: {collection-name}/{category}
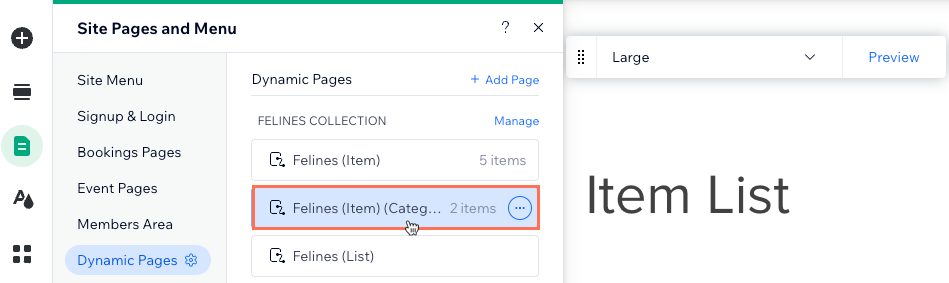
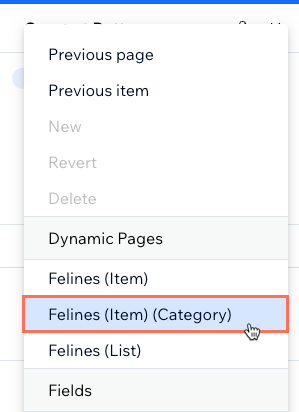
Tip: Click Add Variable to add your 'category' field to the URL slug structure.Press Enter on your keyboard. The page name changes from {Collection Name} (List) to {Collection Name} (Item).

(Optional) Rename your dynamic category page so you can easily recognize it in your editor:Hover over the dynamic 'category' page under Site Pages and Menu, click the More Actions icon
and select Rename.
Edit the name of the page and press Enter on your keyboard. For example, you could name the page: "{Collection name} (Item) (Category)"
Dynamic list page (used to show all collection items)
If needed, you can edit the URL slug structure of a dynamic list page that shows all the collection items. Make sure you do not add variables that would make the Page Link field values repeat in your collection, as this would turn the page into a dynamic item 'category' page.
To edit the URL slug structure of a dynamic list page:
Hover over the dynamic list page, click the More Actions icon
and select SEO.Edit the URL slug structure field and press Enter on your keyboard. For example, you could use the following slug structure for your dynamic list page: {collection-name}

Step 4 | Customize your dynamic category page
Your dynamic 'category' page should now act as a dynamic item page with different versions for each of your categories. In each version, a repeater has various elements already connected to your CMS collection fields to show details about each item within the category.
You can add or remove elements in the repeater, modify their CMS connections, and resize the repeater to fit everything. Use the Preview toolbar to view how each version of your page looks. We recommend connecting text at the top of the page to your CMS 'category' field so that each version shows the name of the category at the top.
Want to use a gallery or table instead of a repeater?
If you'd rather display the items in a gallery or table, you can. Delete the default repeater and add a Pro Gallery or table. Then connect each part of your gallery or table to the CMS collection through the dataset.
To customize your dynamic category page:
Wix Editor
Studio Editor
Go to your dynamic category page:Click Pages & Menu
on the left side of the editor.
Click Dynamic Pages.
Click the dynamic category page you created in the previous section's steps.
(Optional) Add elements to your repeater (e.g. buttons, text, images) or remove elements you do not need. You can adjust the size of the repeater so it can contain all the elements.
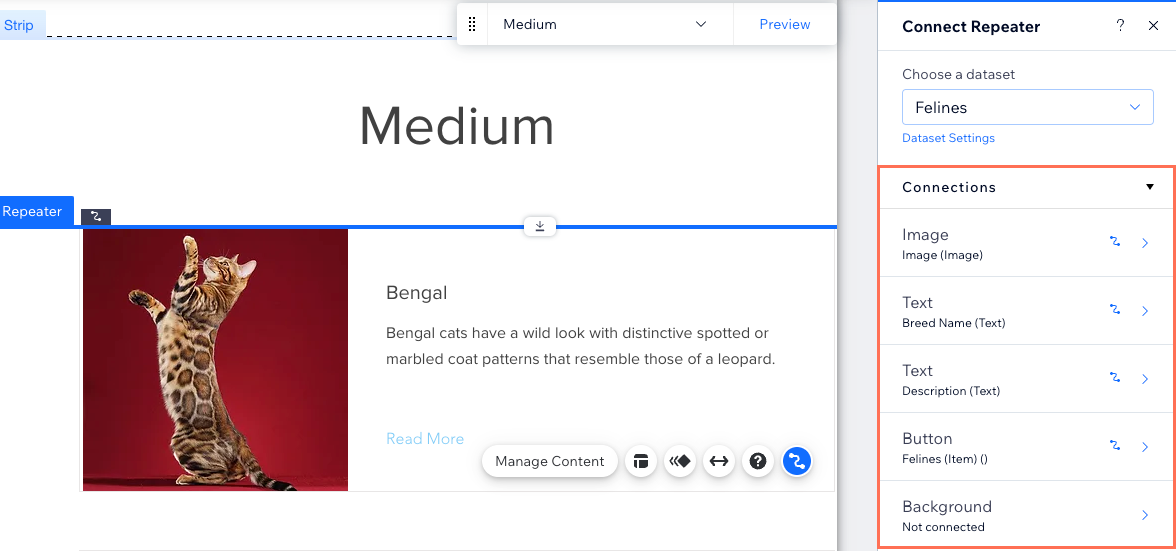
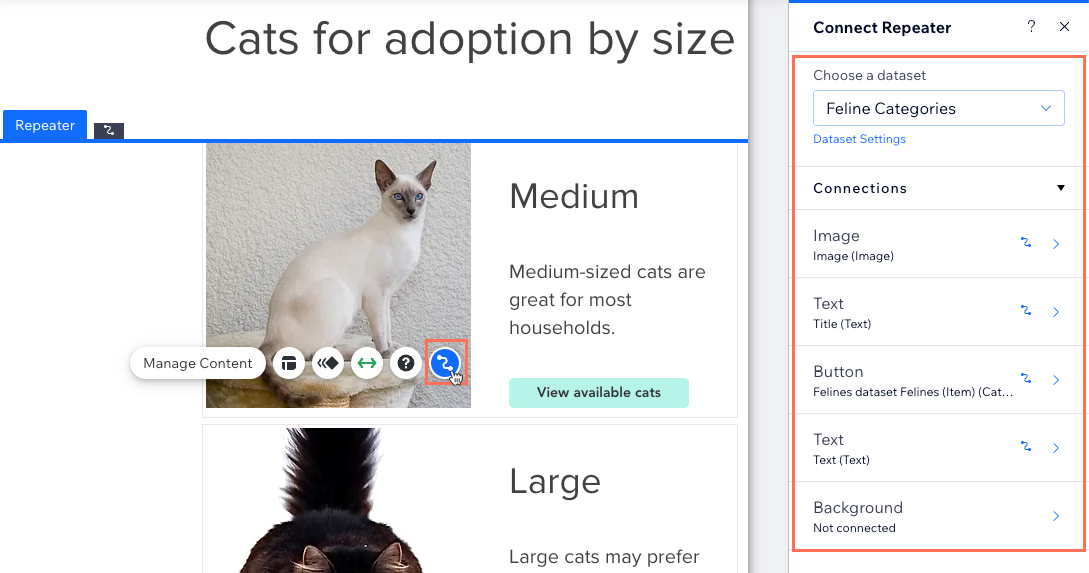
Click the repeater element and select the Connect to CMS icon
 .
.In the Connect Repeater panel on the right, click the element you want to connect.
Under Connections, click the relevant drop-downs to connect the element to the relevant collection field or dataset action. The options vary depending on the element type.
Tips:
Connect text at the top of the page to your 'category' field so it dynamically adjusts, depending on which category is displayed.
Connect the image or button in your repeater to your dynamic item page used to display one item at a time.
Click Repeater connections at the top of the panel.
Repeat steps 3-7 above to connect the elements to collection fields or dataset actions.
Click to adjust your repeater elements as needed.
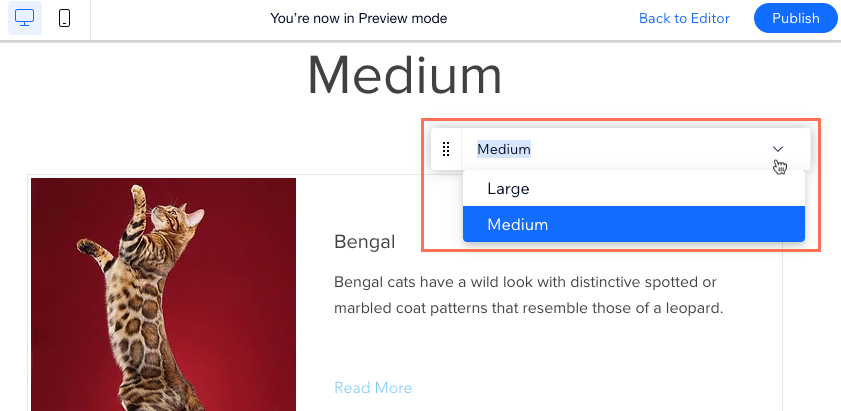
Tip: You can add or remove elements from your repeater at any time. Disconnect elements if you want to use static content that doesn't change.Click Preview and use the toolbar to test each version of your dynamic category page.
Tip: If you get a 404 error message when you enter preview mode, save and reload your editor, then try again.
Click Publish if you are ready to make the changes go live.
Step 5 | (Optional) Create a dynamic page that lists your categories
Now that you have a dynamic page with different versions for each of your categories, you may want to create a page that lists all of these categories. That way, visitors can view an index of all your categories, then click to go to the relevant version of the dynamic 'category' page you created earlier.
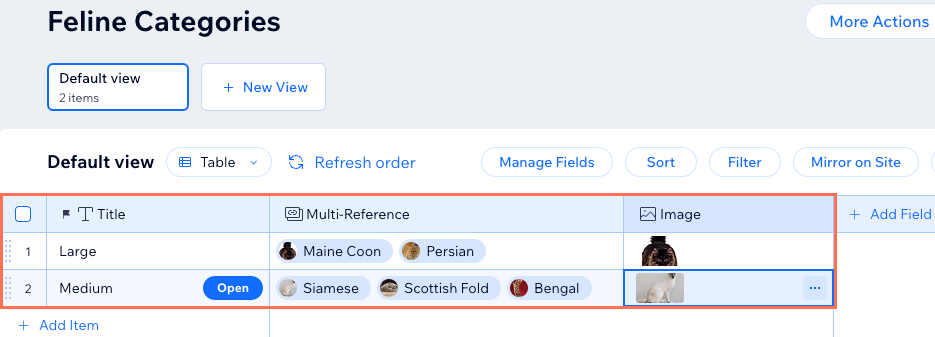
To do this, you need a separate collection with an item for each of your categories. Your 'categories' collection will also need a Multi-Reference field referencing items from your main collection. You can also add an image field for each category's image and a text field to provide a brief description of each category.
Then, add a dynamic list page for your 'categories' collection. You need to add a dataset that connects to your main collection and has a filter that includes the Title ('categories') field from your 'categories' collection. Customize the page and modify its URL slug structure if needed.
a | Create a collection for listing your categories
Go to CMS in your site's dashboard.
Click + Create Collection at the top right.
Click Start from scratch, then click Next.
Enter a name for your collection.
(Coding only) Enter a collection ID to use in your code.
Leave Multiple item collection (Default) selected and click Create.
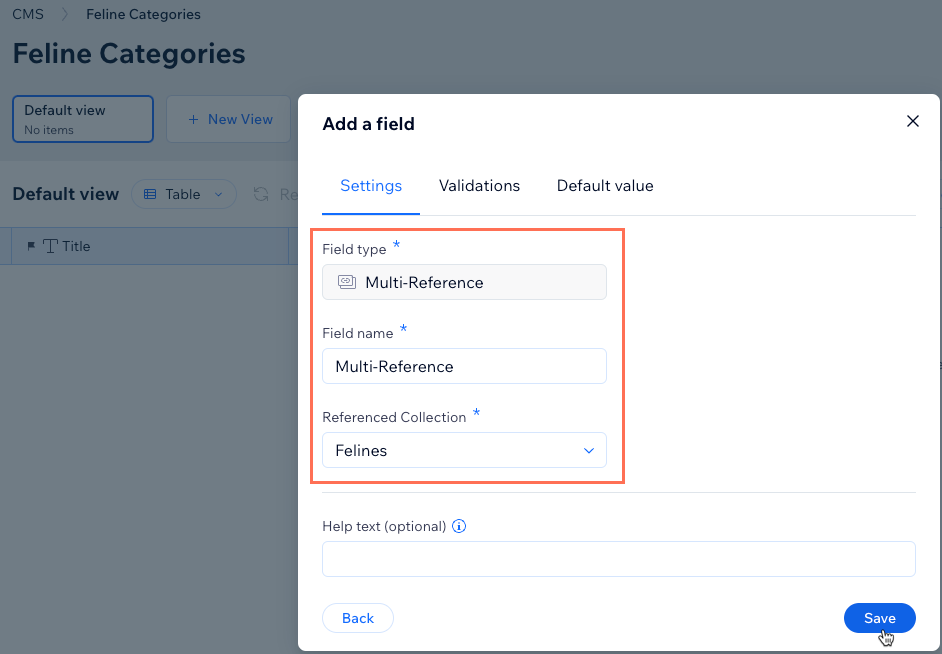
Add a multi-reference field that references your main collection:Click Add Field, select Multi-reference, then click Choose Field Type.
Enter the Field name.
Click the Referenced Collection drop-down, select the main collection that includes your 'category' field, then click Save.
(Optional) Add more fields to display on your list of categories page (e.g. image, text). For example, you could add an image field for displaying an image representing each category.
Add a new item for each category:Click + Add Item.
Enter the name of one of your categories in your primary Title field.
Click the Multi-Reference cell and select the items that have a category field matching this item's primary Title field.
Fill out any additional fields you added for this item/category.
Repeat these steps to add items representing each category.
b | Add a dynamic page for displaying your list of categories
Wix Editor
Studio Editor
Click CMS
on the left side of the editor.Click Your Collections.
Hover over the collection you just created for listing your categories and click the More Actions icon
.Click Add dynamic page.
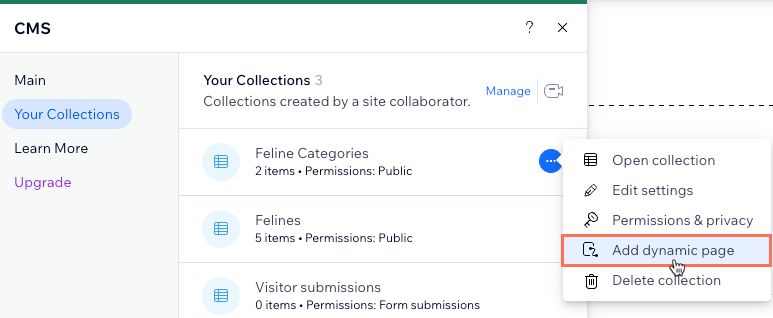
Select List page and click Add to Site.
Add a dataset that connects to your main collection and has a filter that includes the Title ('categories') field from your 'categories' collection:Click CMS
on the left side of the editor.
Click Add Content Elements then select Dataset.
Click the drop-down, select the main collection and click Create.
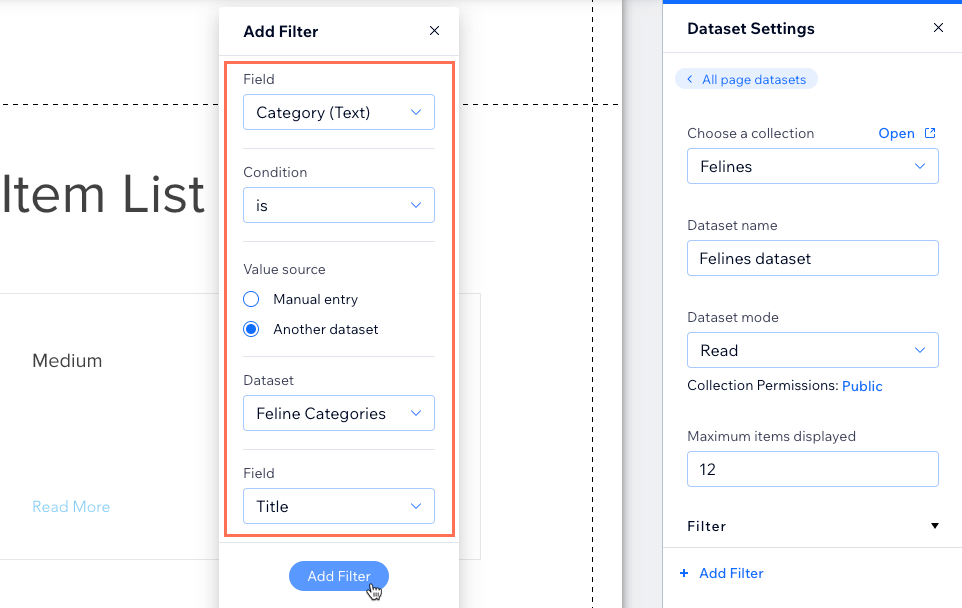
Click + Add Filter in the Dataset Settings panel on the right.
Click the Field drop-down and select your 'category' field.
Select Another dataset under Value source.
Click the Dataset drop-down and select your collection that lists the categories.
Leave Title selected in the Field drop-down and click Add Filter.
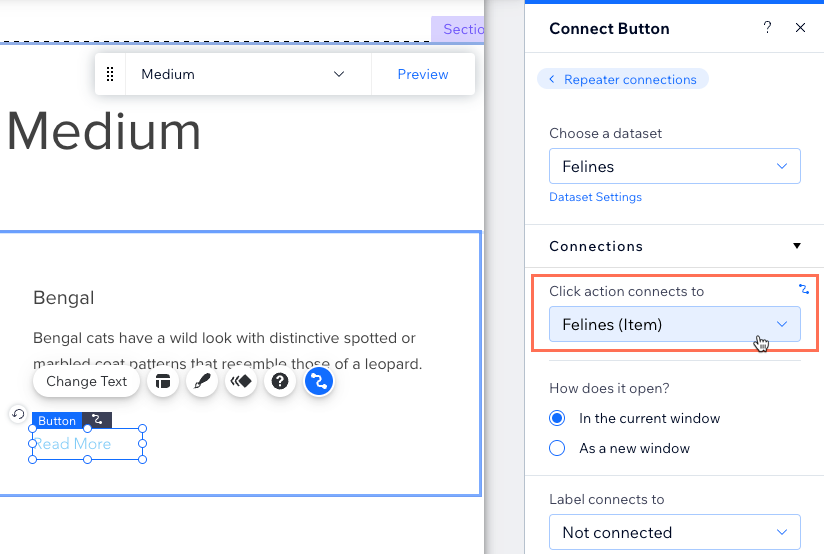
Connect the 'Read More' buttons in your repeater to your dynamic category page:Click the button in your repeater and select the Connect to CMS icon
.
Click the Choose a dataset drop-down and select the dataset you just added that connects to your main collection.
Click the Click action connects to drop-down and select the dynamic 'category' page.
(Optional) Add elements to your repeater (e.g. buttons, text, images) or remove elements you do not need. You can adjust the size of the repeater so it can contain all the elements.
Click the repeater and select the Connect to CMS icon
to adjust the connections between the elements and your collection.
(Optional) Modify the URL slug structure of this dynamic page.
Click Preview to test your connections.
Click Publish if you are ready to make the changes go live.
Next:
Learn how to add links to your new dynamic pages in your site's menu.
Learn how to add a 'Load More' button to your dynamic list page.
Learn how to add input elements that allow visitors to filter collection content.
FAQs
Click below for answers to common questions about creating dynamic category pages.
Why do I get a 404 error message when I preview my new dynamic category page?
If you get a Page Not Found (404) error message when previewing newly created dynamic pages, try saving and reloading your editor. If the issue persists, contact us so we can look into resolving the issue.

Can I add links to my dynamic category pages in my site menu?
Yes. When adding a link to your site menu, you can choose which dynamic pages you'd like to link. For dynamic item pages like your dynamic 'category' page, you can choose which specific item (category) the menu link leads to.
You can also link other elements such as text, buttons, or images to your dynamic pages.
Learn how to add links to your dynamic pages.
Can I add 'Load More' or navigational buttons to my dynamic pages?
If you have more items than you'd like to show when the page initially loads, consider adding a 'Load More' button to improve the page's loading performance. This allows you to hide items from displaying until visitors click the button. To help visitors navigate through various collection items, add navigational buttons or pagination bars (Wix Editor only).
