Important:
This article is about the Wix POS Register for brick & mortar businesses. If you are using POS on a mobile device, learn more about selling physical gift cards with Mobile POS.
If you are using POS Register with Moneris as a payment provider, learn about selling Moneris physical gift cards instead.
You can sell physical gift cards and let customers use them to pay for purchases at your store. Physical gift cards help encourage customers to come back and are also a great way to attract new buyers.

Step 1 | Order physical gift cards
Get started by designing and ordering your cards. There are a number of ways to order physical gift cards. Choose from the options below.
Tip:
The Wix gift cards do not have a set dollar value. You assign the value when you sell the physical gift card to your customer (see below).
Order gift cards in the Wix dashboard (US merchants)
Go to gift card templates in your site's dashboard.
Hover over a template and click Customize to select it.
Customize your gift card:
Click Customize.
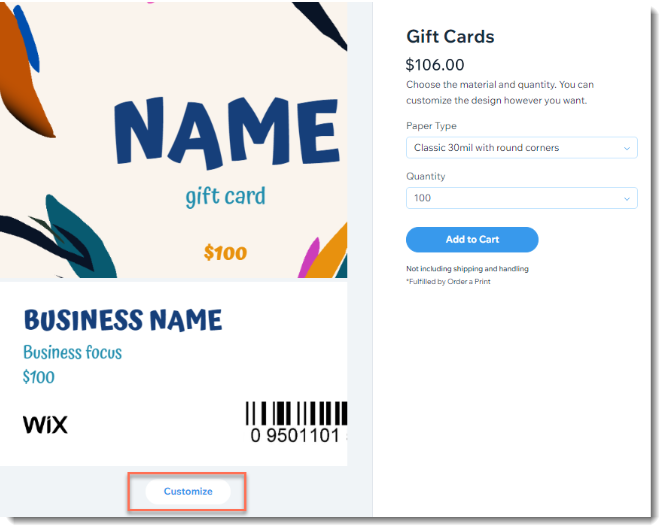
Add, edit, or delete any of the available elements.
Tip: To switch to a solid color background, select the background image and set the opacity to 0%, then click Change Background to select a background color.
Click Switch to Back at the bottom to design the back of the card.
Click Done.
Click the Paper Type drop-down and select an option.
Click the Quantity drop-down and select the number of cards you want to purchase.
Click Add to Cart.
Click Continue to Checkout.
Add your shipping details.
Click Save & Continue.
Add your payment details.
Click Submit Purchase.
Order gift cards in the Wix dashboard (UK merchants)
Go to gift card templates in your site's dashboard.
Hover over a template and click Customize to select it.
Customize your gift card:
Click Customize.
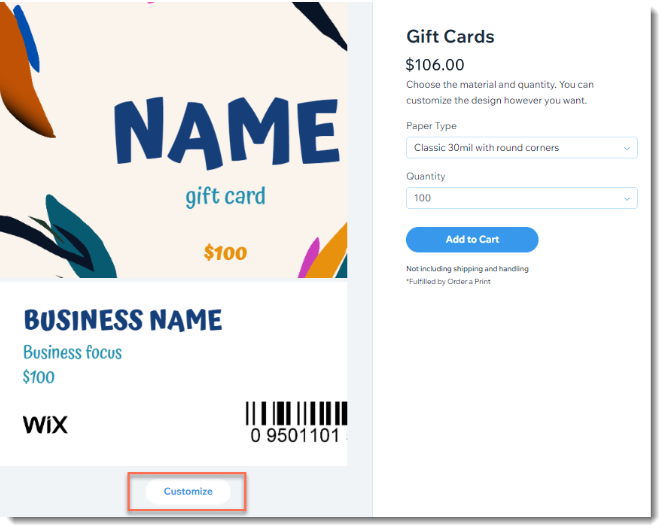
Add, edit, or delete any of the available elements.
Tip: To switch to a solid color background, select the background image and set the opacity to 0%, then click Change Background to select a background color.
Click Switch to Back at the bottom to design the back of the card.
Click Done.
Click the Paper Type drop-down and select an option.
Click the Quantity drop-down and select the number of cards you want to purchase.
Note: The quantity will be 1. You can select the actual quantity in step 12.
Click Add to Cart.
Click Continue to Checkout.
Note: You'll be directed to purchase the gift cards for £0.
Enter the required details.
Click Submit Purchase.
Go to the email you received and download your gift card design.
In the email, click Order Printed Gift Card.
Upload the gift card design and enter the required details and complete your purchase.
Order cards through eCard Systems
When ordering physical gift cards through the eCard website, you can choose between quick cards, ready-to-go designs with personalized text, or Custom Cards.
All gift cards are manufactured using a 30 mil litho-quality PVC core with full-color printing on both sides and finished in your choice of gloss or satin matte laminate. They include a durable hi-co magnetic stripe, encoding, and numbering to work seamlessly with your POS.
Notes:
Before the cards are printed, eCard Systems will contact you so you can approve the gift card design.
Click Use Our Design Service to order custom cards designed by a pro.
To order gift cards through eCard Systems:
Click Get Started under Quick Cards.
Select an option:
Order gift cards with ready-made designs:
Design the front of the card by double-clicking textboxes and entering your text.
Under Choose your background use the arrows to navigate the available options.
Select a background.
Click Next at the top right.
Design the back of the card by double-clicking textboxes and entering your text.
Click Next.
Upload your own design to create your gift cards:
Click Upload My Own Artwork.
Click Upload Artwork to upload an image to use as the front of your gift cards.
Click Next at the top right.
Design the back of the card by double-clicking textboxes and entering your text.
Click Next.
Choose a Satin or Gloss finish.
Create your own custom cards using a design tool
Personalize the front of your card with the available tools:
Upload your own artwork: Click Upload Artwork. You can resize and drag your images across the canvas.
Add text: Click Add Text to add a textbox to your design. You can add multiple textboxes and format your text.
Change background: Click the Background color drop-down under your design to select a pre-set background color.
Organize layers: Change the order of your design layers by scrolling down to the Layers section. Drag and drop to change the order of the layers, delete them, or lock them so they stay in place as you work.
Click Next at the top right.
Design the back of the card by double-clicking textboxes and entering your text.
Click Next.
Choose between a Satin or Gloss finish.
Select the number of cards you want to print under Choose your quantity.
Click Add to Cart and complete the order.
Order your own external gift cards
You also have the option of ordering other gift cards and selling them. Note that the gift cards must have codes that are between 8 and 16 characters long (numbers or letters) for you to be able to use them at your point of sale.
Tip:
Check the FAQ section below for info on file types and sizes that you can upload to eCard.
Step 2 | Enable gift cards in your dashboard
Before you can start selling gift cards at your point of sale, you need to go to your Wix dashboard and enable gift cards for your site.
To enable gift cards:
Go to Gift Cards in your site's dashboard.
Click Add Gift Card to Site.
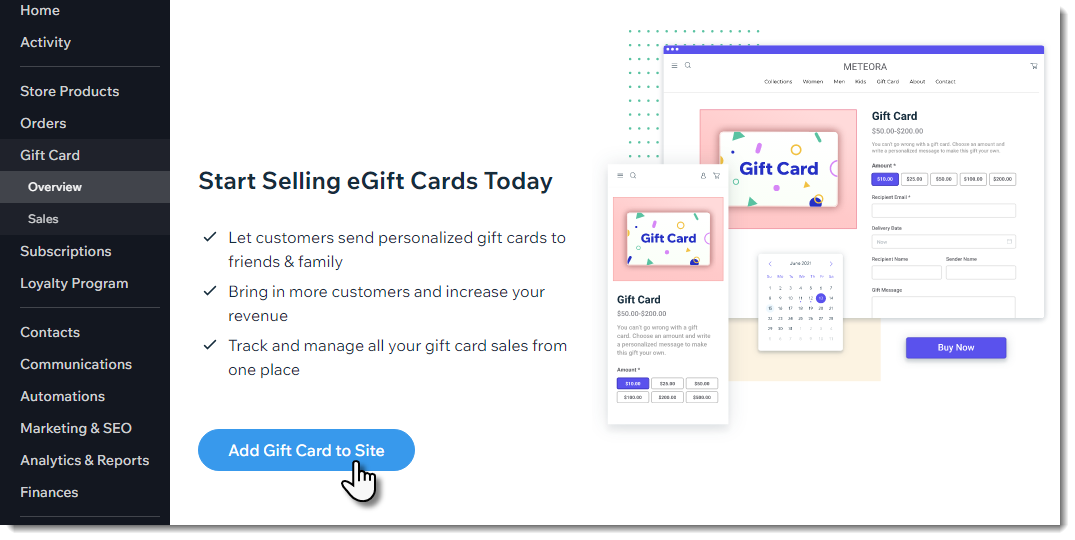
Tip:
After clicking Add Gift Card to Site, you do not need to do anything else in the dashboard page or your editor in order to continue physical gift card setup.
Step 3 | Sell physical gift cards
Once you receive the gift cards you ordered and enable gift cards in the dashboard, you can start selling physical gift cards in person to customers.
To sell physical gift cards:
(On your POS tablet) Tap Checkout from the menu bar at the bottom.
Tap Gift Cards.
Tap Sell Physical Gift Card.
Take a physical gift card from your supply (one of the plastic cards you purchased).
Choose how to enter the card code:
Scan the card's code.
Manually enter the card's code.
Tip: Gift card codes are not case sensitive.
Enter the value of the gift card (up to $1000).
Tap Add to Cart.
Complete checkout as you would for any other product.
Give the physical gift card to your customer.
Step 4 | Accept payment with physical gift cards
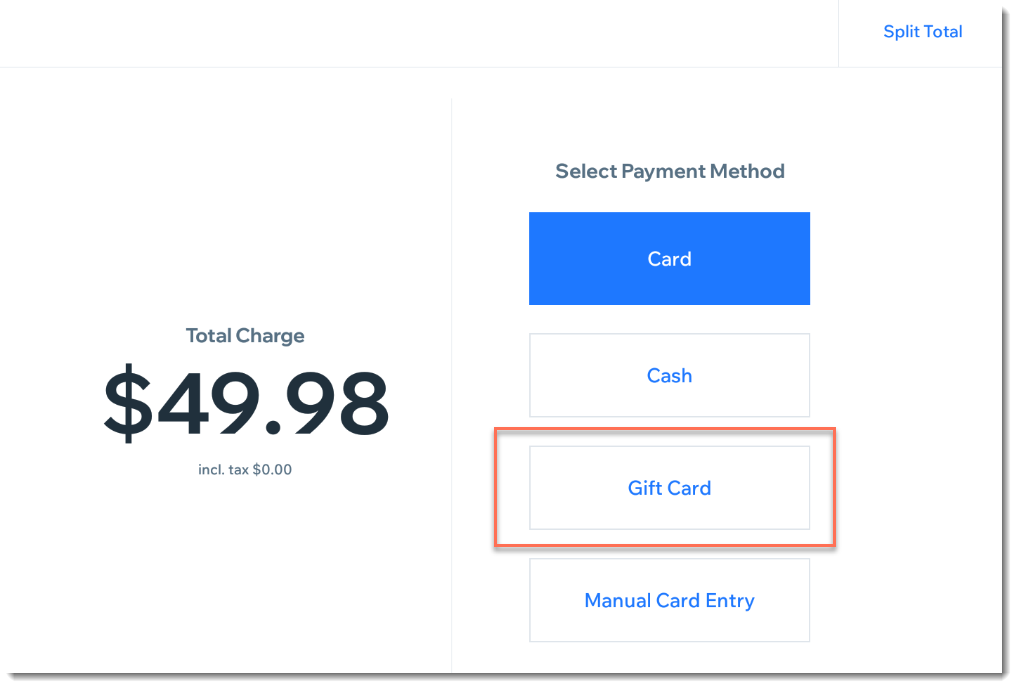
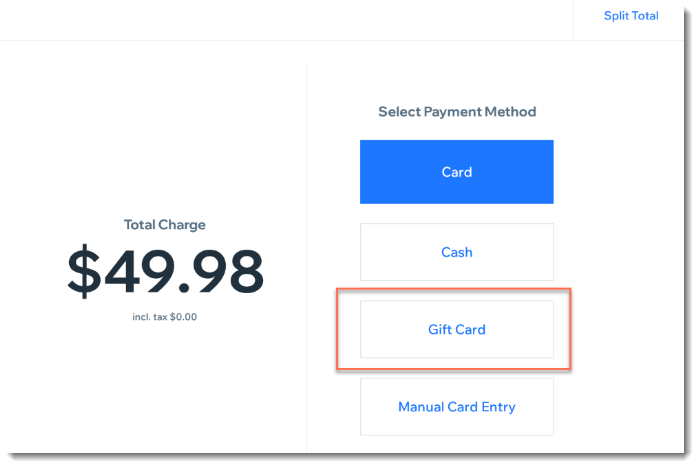
When customers want to pay for their order using their gift card, you need to select Gift Card as the payment method.
To accept gift card payment:
(On your POS tablet) Tap Checkout on the bottom bar.
Process the sale and proceed to checkout.
Select Gift Card under Select Payment Method.
Enter or scan the gift card code and tap Apply.
(If the gift card didn't cover the entire purchase) Click Add Payment and process the balance using another payment method, like cash or card.
FAQs
Click below for answers to common questions about selling physical gift cards.
What are the image size and file type requirements when creating my gift cards?
You can upload images of the following types:
.png (Wix gift cards only)
.gpg (Wix gift cards only)
.jpeg
.tiff
.eps (eCard Systems only)
Adobe PhotoShop file types
Adobe Illustrator file types
Adobe InDesign file types
Other print-quality PDF file formats
The minimum image resolution is 300 dpi and the maximum file size is 50 MB.
How do I make sure my gift card design appears correctly before printing?
Wix gift cards: Our team reviews every order before it's sent to production. We'll reach out if we find any issues.
eCard Systems: An eCard Systems representative will contact you so you can approve the gift card design before they create them.
How long does it take for my gift cards to arrive?
Once your card design is approved, production takes about 15 days. Shipping takes an additional 3 to 7 days. This may vary somewhat depending on your location and the kind of gift cards you order.
I ordered Wix gift cards. Can I cancel the order or request a refund?
Wix gift card orders are fulfilled by Order a Print.
Cancel an order: You can cancel an order by writing to support@orderaprint.com within the first 24 hours of placing your order.
Request a refund: If the cards you received were damaged or defective, send an email to support@orderaprint.com to report the problem within seven days of delivery. Order a Print will investigate and send a replacement at their discretion.
Who can I contact about my gift card shipment?
Wix gift cards: For orders placed through Wix, contact our print partner, Order a Print.
ecard Systems: For help with your order, contact Ecard Systems customer service.
I don't see the option to pay by gift card. How can I add it?
If Gift Card does not appear as a payment option, make sure this function is enabled.
To enable payment by gift card:
(On your POS tablet) Tap the Menu icon

at the bottom left.
Tap Settings.
Tap Payment.
Tap the Accept Gift Cards toggle to enable it.
Can customers who buy physical gift cards use them for purchases on my site?
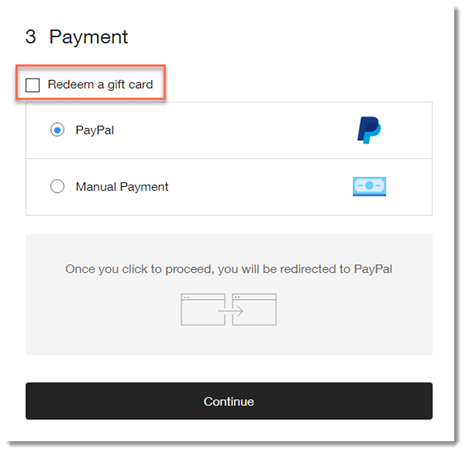
Yes, customers who receive a physical gift card can use it for online purchases on your site. Each card includes a unique code that the customer enters at checkout. When they reach the payment step, they simply select the Redeem a gift card checkbox and enter the code to apply the balance.
Can I add to the balance of a gift card that's already purchased?
No, it's not possible to add money to an existing gift card. If your customer wants more funds available, they need to purchase a new gift card.
Can I offer refunds or exchanges for orders paid for with a gift card?
It's not currently possible to provide a refund for products purchased with a gift card. You can, however, allow your customer to exchange products.
My customer wants to return the card they bought. Can I refund the card purchase?
No, gift card orders are not refundable.
This article is credited to the Wix team - https://support.wix.com/ and we thank them for that!