Important:
This article is about the Wix POS Register for brick & mortar businesses.
For info on using POS on a mobile device, learn more about Mobile POS.
Automatic discounts are price reductions you create in your site's desktop. With automatic discounts you can:
Set a sale start and end time: For example you can schedule a sale that starts at the first of them month and automatically end at the end of the month.
Create conditional discounts: You can create discounts that take effect only when a customer buys a set quantity (buy 3, get 30% off) or a set amount (buy $50 worth of hats and get $10 off).
Follow the steps below to enable automatic discounts.
Note:
Automatic discounts can only be applied to Wix Stores products, not Wix Bookings services.
Step 1 | Create automatic discounts
To get started, go to Automatic Discounts on desktop and create your first discount. Learn how to create automatic discounts.
Step 2 | Enable automatic discounts in the POS tablet
Now that you have one or more automatic discounts set up, you can enable them so that customers visiting your brick and mortar store get discounts.
To enable automatic discounts on POS:
Open the POS tablet.
Tap the Menu icon

at the bottom left.
Tap Settings.
Tap Automatic Discounts on the left menu.
Tap the Apply automatic discounts to POS sales toggle to enable it.
Step 3 | (Optional) Creating discounts that apply to specific customers
You can create automatic discounts that apply to specific groups of customers. For example, you can give all your employees 20% off all products.
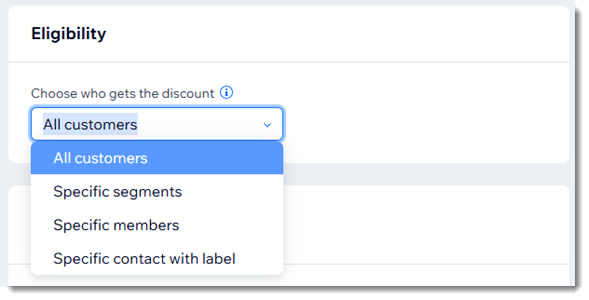
To set this up, go to Contacts in your site's dashboard. From there, you can use labels to create a group of customers. Then, when creating your discount, scroll down to the Eligibility section, choose Specific contact with label from the drop-down, and select the relevant label.
Tips:
On Wix POS Register, you can apply automatic discounts to specific customers only using labels, not by selecting Specific segments or Specific members.
To apply an automatic discount to a single customer, create a label and assign it only to that contact.
Learn more about creating and applying contact labels
Step 4 | (Optional) Removing a discount from a specific sale
In the previous step, you enabled automatic discount and they now apply to every relevant sale. If, for some reason, you don't want to apply the discount to a particular sale, you can remove it during checkout.
To remove the discount from a specific sale:
Open the POS tablet.
Tap Checkout on the bottom bar.
Start processing a sale.
Tap Actions at the top right.
Select Remove Automatic Discounts.
Complete the sale.
FAQs
Click a question below to learn more about using automatic discounts at a point of sale.
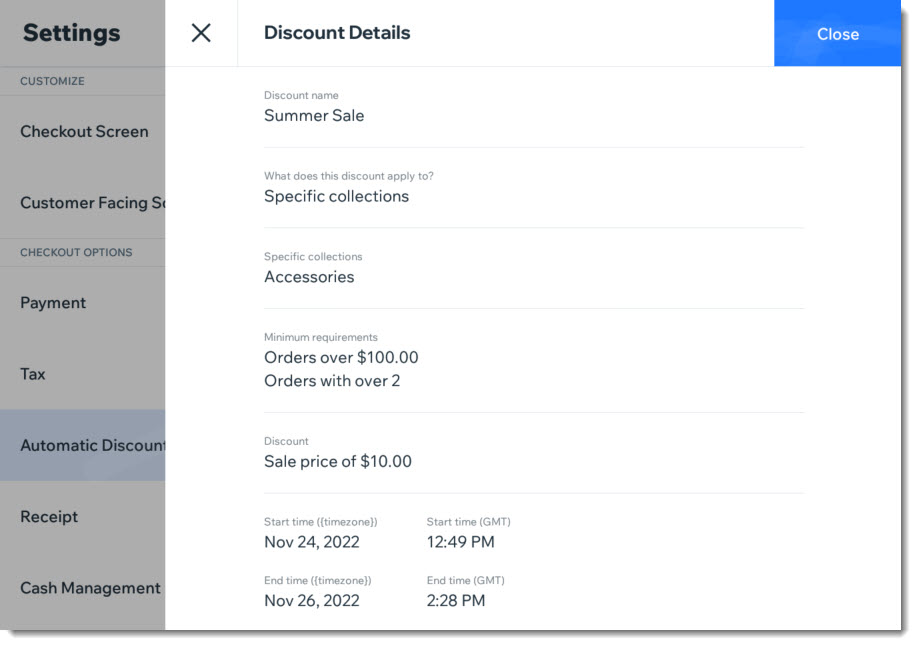
How can I view the details of a specific automatic discount on the tablet?
To view more information about a specific discount:
Open the POS tablet.
Tap the Menu icon

at the bottom left.
Tap the Settings tab.
Tap the Automatic Discounts tab.
Tap the discount you want to view.
What statuses can automatic discounts have?
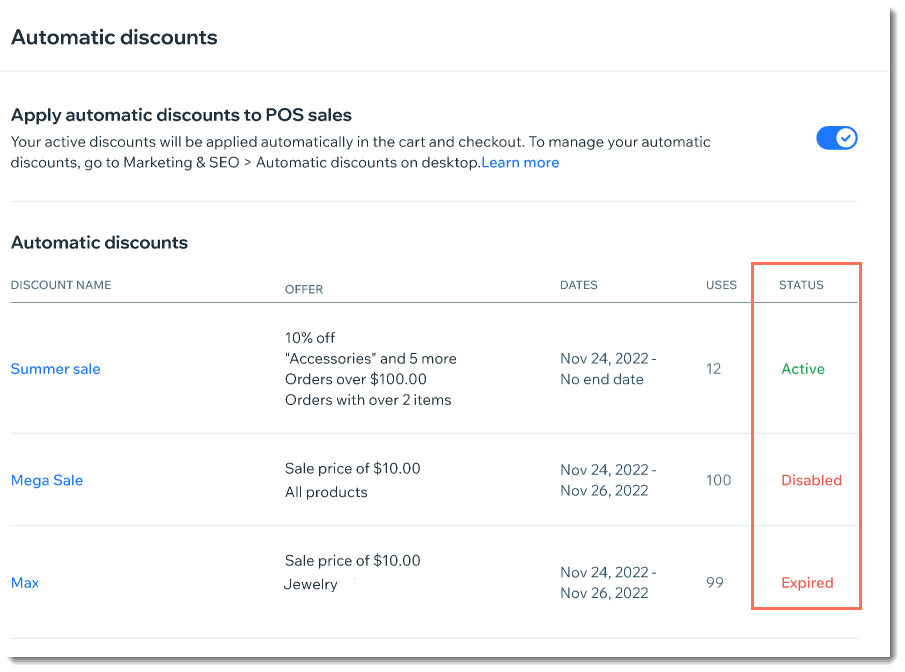
Automatic discounts can have 3 statuses.
Active: Can be applied to sales
Disabled: Was manually turned off
Expired: Has passed the final date.
Only discounts with an "Active" status will be applied to sales.
How can I see that an automatic discount was applied to a sale?
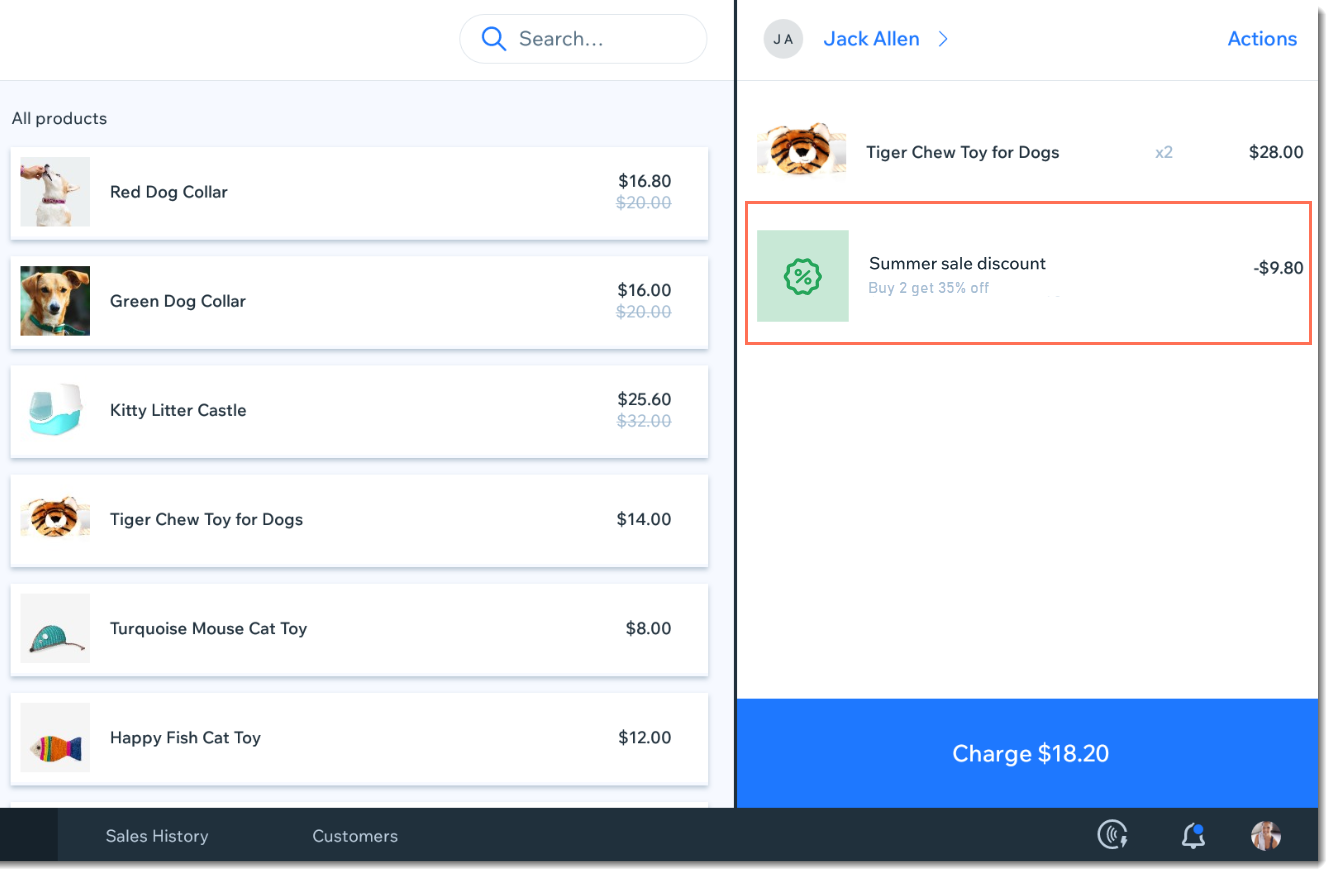
The discount is automatically added to any sale that meets the sale requirements.
For example, if you created a 35% off sale for customers who buy 2 dog toys, it'll automatically appear when a customer fulfills those requirements.
Can I enable a specific discount only online or only in the POS tablet?
No, you can only decide whether you want to enable or disable all automatic discounts on POS.
How can I create a new automatic discount or edit an existing one?
To create or edit automatic discounts, go to Automatic Discounts on desktop. Learn more about automatic discounts.
This article is credited to the Wix team - https://support.wix.com/ and we thank them for that!