Important:
This article is about the Wix POS Register for brick & mortar businesses.
If you are using POS on a mobile device, learn more about Mobile POS.
Keep your customers satisfied by allowing them to exchange purchased store items. If the new item they choose isn't the same price, you can refund the difference or charge them for the additional cost.
Accepting exchanges from customers
Important:
If you purchased your POS system after October 25, 2023 and before April 2024, you may need to upgrade to enable exchanges. Learn more about the POS Register Plan.
It's not possible to process exchanges for products in orders that have been partially paid on your POS tablet. Learn more about processing exchanges for partially paid orders on desktop.
To start processing the exchange, first locate the original purchase in your sales history. From there you can select what the customer is returning and add what they're taking instead.
To let customers exchange purchased items:
(In your POS tablet) Tap Sales History at the bottom of the screen.
Select the relevant sale.
Tip: You can search for a sale by order number, customer name, or customer email.
Tap Actions at the top right.
Tap Exchange.
Use the Plus icon

to select how many of each product the customer wants to exchange.
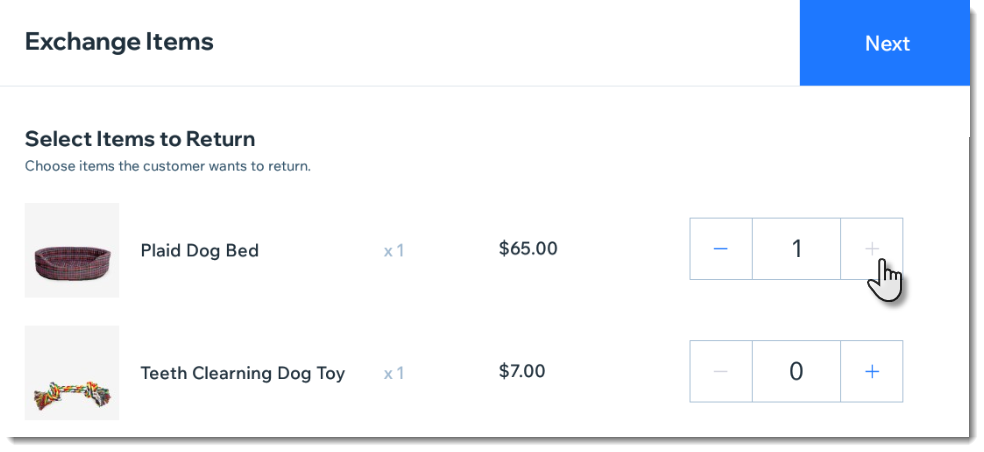
Tap Next.
Select the new product the customer wants.
Tip: You can scan the new item with your barcode scanner or select it from the product list.
Select the type of sale:
The order total is the same as the original order
When your customers selects products that cost exactly the same as the products they return, you can exchange the items without a payment transaction.
Tap Exchange.
Select a receipt option:
Email Receipt: If prompted, enter the customer's email address.
Print Receipt: Receipt prints on your POS printer.
No Receipt: No receipt is printed or emailed.
The order total is less - I need to refund my customer
When your customers select products that cost less than the products they return, you can refund the difference. For example, if your customer returns a $100 item and wants a $60 item instead, you refund them $40.
Tap Exchange.
Refund the customer:
Note: You must refund the customer using the payment method they used to pay for the order.
Cash: Give the customer the refund amount that appears on the screen.
Credit Card: The refund amount is automatically sent to the credit card the customer used to pay for the original order.
Select a receipt option:
Email Receipt: If prompted, enter the customer's email address.
Print Receipt: Receipt prints on your POS printer.
No Receipt: No receipt is printed or emailed.
The order total is more - I need to charge my customer
When your customers select products that cost more than the products they return, you can charge them the difference. For example, if your customer returns a $100 item and wants a $160 item instead, you charge them the additional $60.
Tap Charge in the top right corner.
Note: The amount you need to charge your customer appears on the button.
Accept payment as you would for a regular sale.
Select a receipt option:
Email Receipt: If prompted, enter the customer's email address.
Print Receipt: Receipt prints on your POS printer.
No Receipt: No receipt is printed or emailed.
Notes:
You can only accept exchanges for store products purchased at a POS, not online.
You cannot accept exchanges when the order was paid for with a split payment.
You can exchange orders paid for with a gift card only when the price of the exchanged products is the same (i.e. the customer isn't refunded or charged).
Viewing exchanges in your sales history
After you process the exchange, the original order is updated to show the changes.
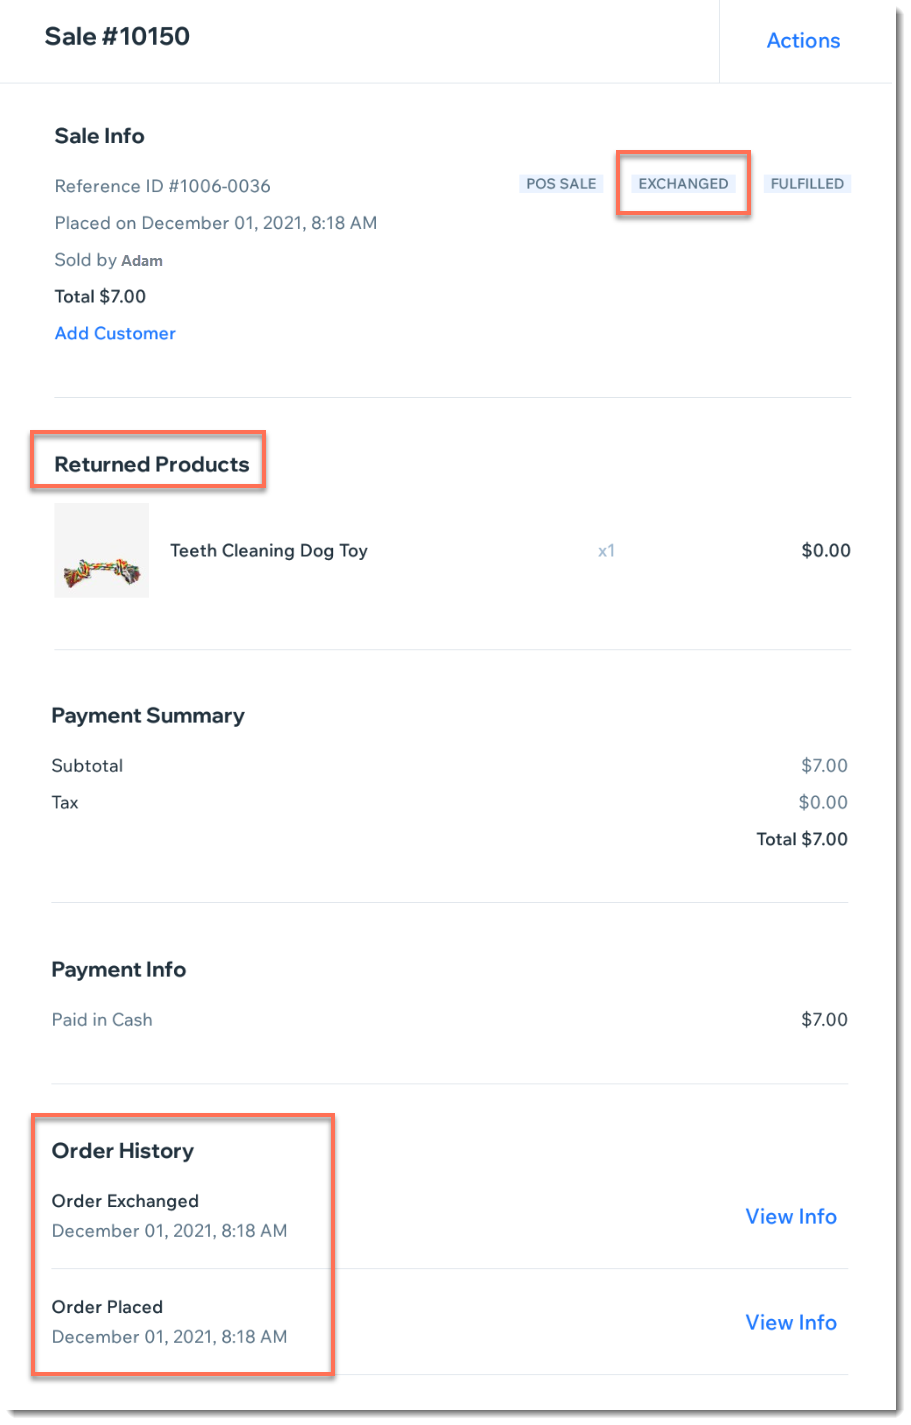
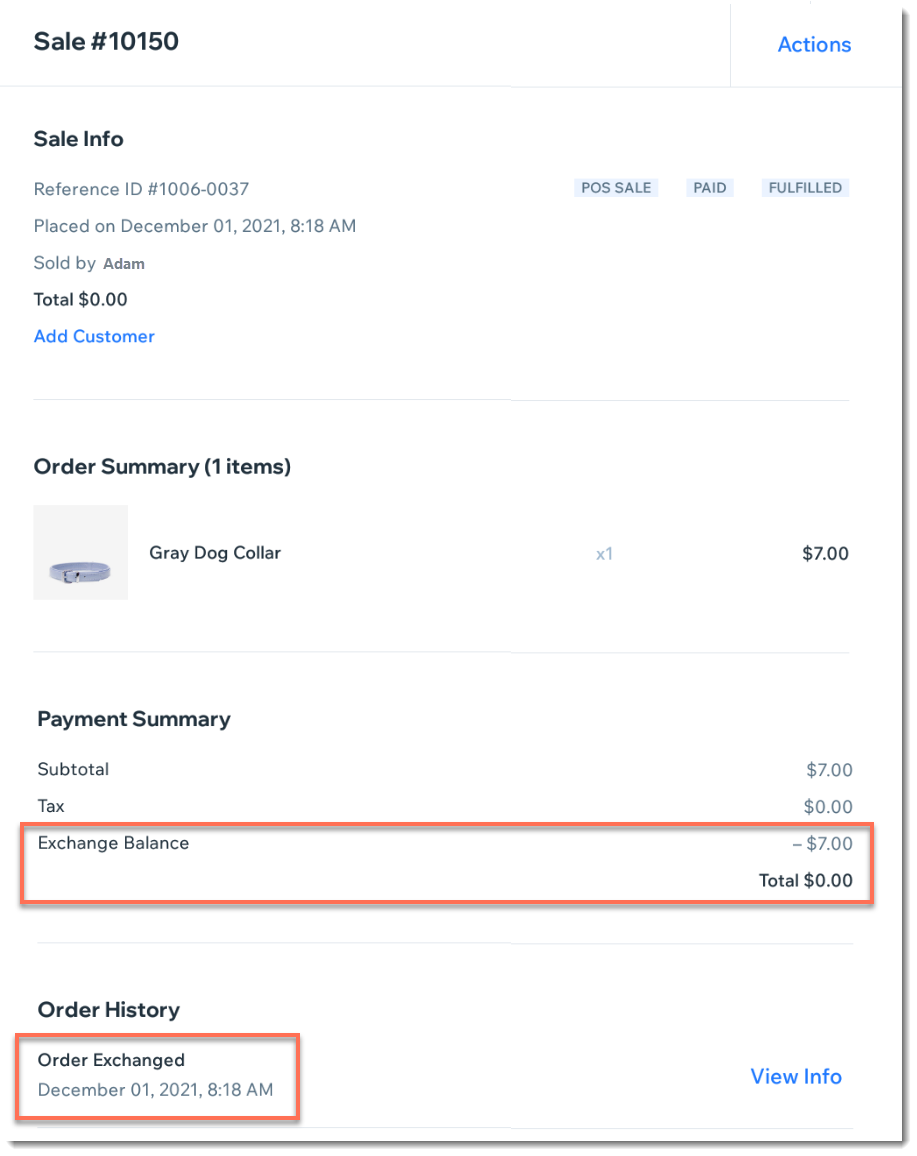
In addition, a new order is created to show the "sale" of the new item (even if there was no payment transaction).
This article is credited to the Wix team - https://support.wix.com/ and we thank them for that!