Important
This article is about setting up a printer when using the Wix POS Go as a standalone solution.
The Wix POS Go card reader is currently available only in the US, Canada, and UK.
Provide your customer with a physical receipt of their purchase when making sales with your POS Go. Purchase a compatible printer and pair it with your device to start providing clear, branded receipts on the spot.
Step 1 | Purchase a printer
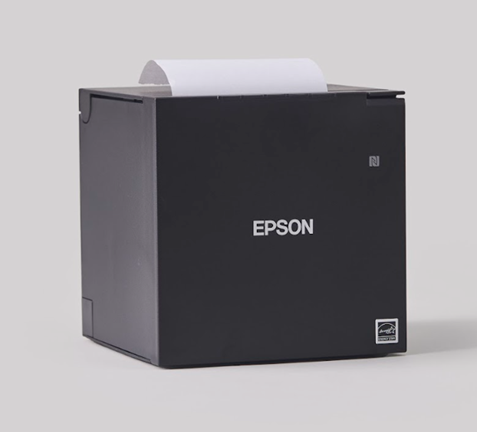
To get started, purchase your Epson M30-III thermal receipt printer from our shop.
Step 2 | Pair the printer with your POS Go
Once your printer is unboxed and plugged in, you need to pair it with your Wix POS Go via WiFi.
Tap More

at the bottom right of your Wix POS Go.
Tap Settings.
Tap Hardware management.
Tap Connect next to Receipt printer.
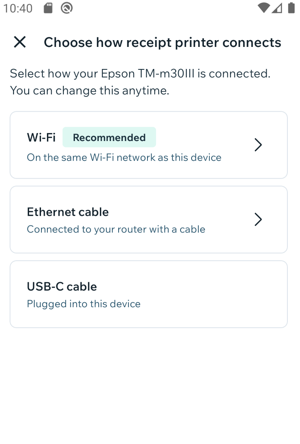
Select how your printer connects:
Wi-Fi
Tap Wi-Fi.
If your printer is already connected to your Wi-Fi network, tap It's Already On Wi-Fi. If not, tap Help Me Connect It and follow the on-screen instructions.
Wait while the app searches for your printer, then tap it in the list when it appears.
Tap Done.
Ethernet cable
Tap Ethernet cable.
Tap It's Powered On.
Follow the on-screen instructions to connect your printer.
USB-C cable
Tap USB-C cable.
Follow the on-screen instructions to connect your printer.
(Optional) Tap Print Test Receipt to test the connection to the printer.
Tap Done.
Note:
Make sure to connect your Epson printer to the same WiFi network as your Wix POS Go device.
Step 3 | Print a receipt
After your printer is connected, you can print receipts when making a sale, or print a receipt for a previous order.
Print when making a sale
Process a sale with your Wix POS Go and complete the payment.
Tip: Learn more about making a sale with your Wix POS Go.
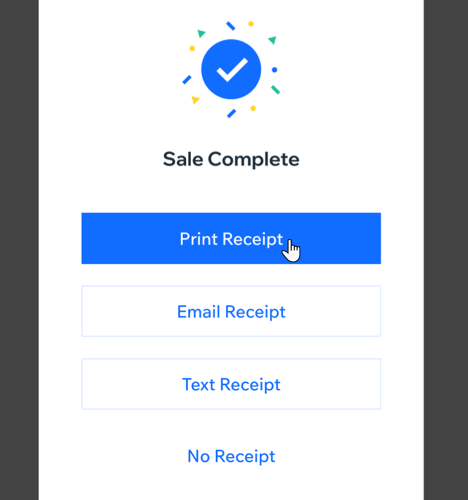
Tap Print Receipt under Sale Complete.
Print for a previous order
Tap Sales History at the bottom of your Wix POS Go screen.
Tap the relevant order to open the details.
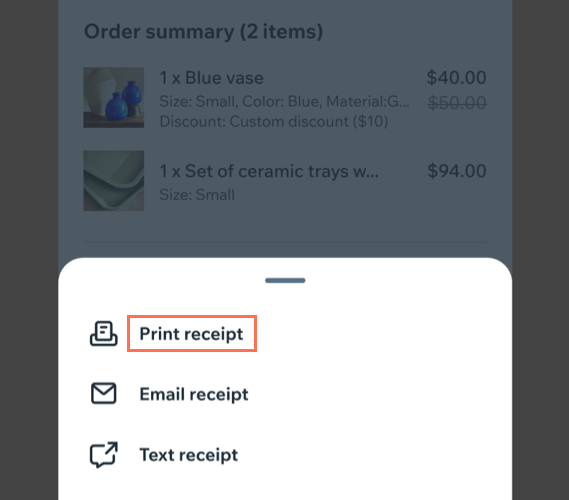
Tap Actions at the top right.
Select Print receipt.
FAQs
Click a question below to learn more about connecting a receipt printer to your POS Go.
How do I test if my printer is working properly?
You can run a test print at any time without creating a new sale.
Tap More
at the bottom right of your Wix POS Go.
Tap Settings.
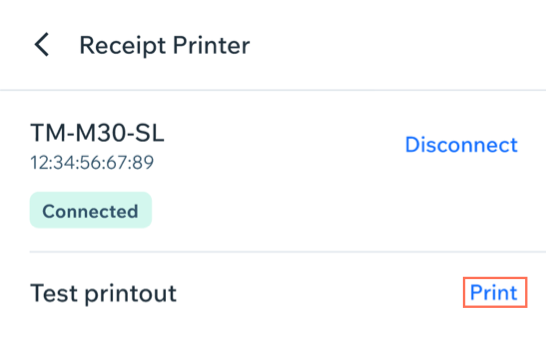
Tap Receipt Printer.
Tap Print next to Test printout.
How do I disconnect a receipt printer from my POS Go?
To disconnect your printer:
Tap More
at the bottom right of your Wix POS Go.
Tap Settings.
Tap Receipt Printer.
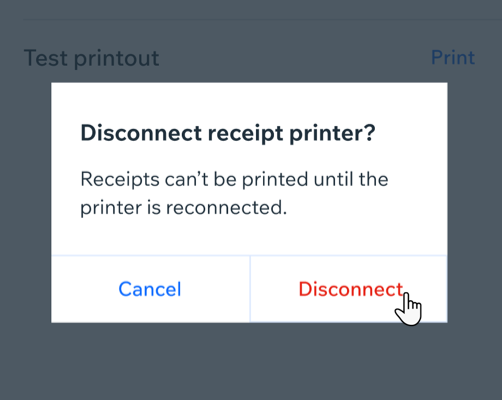
Tap Disconnect next to the printer name.
(In the pop-up) Confirm by tapping Disconnect.
This article is credited to the Wix team - https://support.wix.com/ and we thank them for that!