Customize the appearance of your invoices. Ensure they represent your brand well and share important info with your customers. Any changes you make will be reflected in all issued and future invoices.
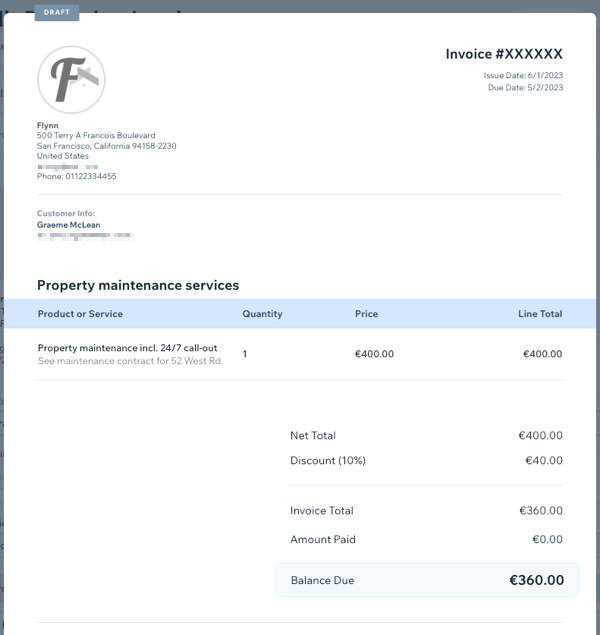
To customize your invoices:
Go to Invoices in your site's dashboard.
Click More Actions at the top right.
Select Update invoice settings.
Choose what you want to customize:
Header details
Customize the appearance of your invoice header:
Document name and number: Set the name that appears in the top right of your invoice and the numbering that appears beside this name.
Note: Once you set the invoice number, it cannot be changed to a lower number.
Logo: Your business logo is taken from your site's Business Info. Any edits you make to your logo will be automatically reflected in your invoices.
Header fields: Choose the details to include in your header, such as reference number or sales representative. You can also create custom fields.
Note: You will add information to these fields when you're creating a new invoice.
Business info
The details you see in this section are taken from your site's Business Info. You can edit this business info and also add custom fields (e.g. Tax ID, IBAN) that you want to appear in your invoices.
Tax display
Click to select the relevant checkboxes to control how you display taxes on your invoices.
Note: If you select none of the options below, your invoices just show total taxes.
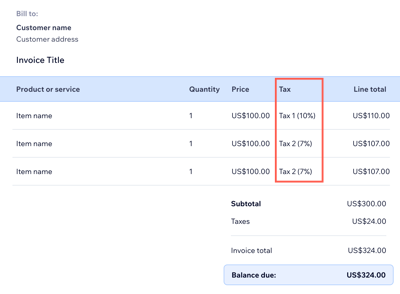
Additional tax column: Display tax next to each invoice item.
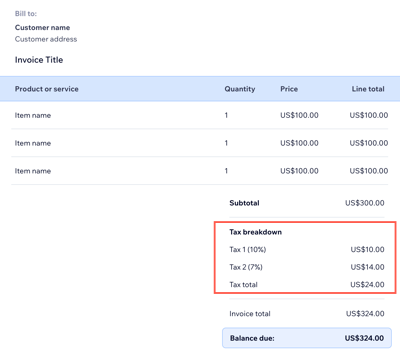
Tax breakdown in the Total section: Display all taxes in their own section at the end of the invoice.
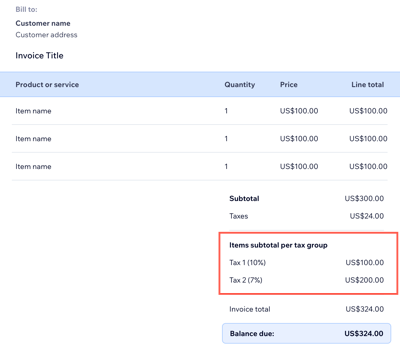
Display Items subtotal per tax group: Display taxes according to their tax group at the end of the invoice.
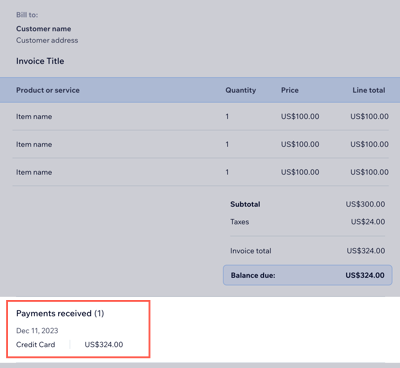
Payments received
Click to enable the Show transaction details checkbox to include breakdowns of payments made. These breakdowns include payment date, method and amount.
Footer notes
Add notes or terms for your customers. These will appear at the bottom of your invoices.
Tips:
To update your invoice language, update your account language in your site's dashboard. This affects all invoices.
If you have an online store, you can add store products to an invoice. A store order is automatically created when this invoice is issued.
Manage and edit additional business info (e.g., contact info and business location) in Business Info in your site's dashboard.
This article is credited to the Wix team - https://support.wix.com/ and we thank them for that!