When guests purchase event tickets, they fill out a checkout form. You can customize this form to gather the exact information you need from each attendee.
Customizing the checkout form of a ticketed event
Update the fields in the checkout form to get the details you need from your guests (e.g. phone numbers).
Note:
First name, last name, and email are required fields on the checkout form. It is not possible to remove them.
To customize the checkout form:
Go to Events in your site's dashboard.
Click Manage next to the relevant event.
Click the Settings tab.
Click Edit next to Checkout form.
Choose how to collect guest info:
1 form per order: Guests fill out the form once, even for multiple tickets.
1 form per ticket: Guests fill out a separate form for each ticket.
Tip: Learn more about collecting guest info for individual tickets.
Click Edit Form next to Form preview.
Click the Add icon

at the top left.
Select the field you want to add (e.g. phone, address).
Click the relevant form field to open its Field Settings panel.
Make the available edits (e.g. edit a field title, enable a toggle).
Click Save at the top right.
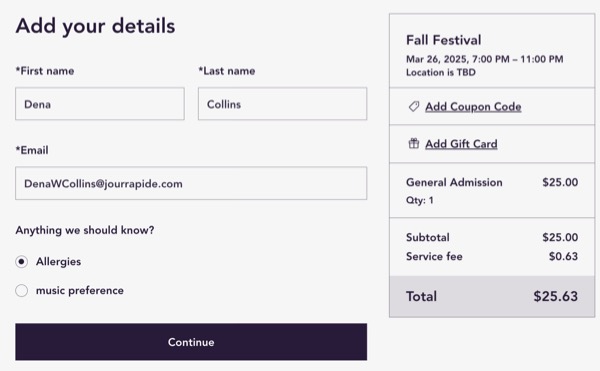
Note:
Some field types (e.g. Short answer) also have an Advanced tab in Field Settings with additional options such as Limit characters, Use RegEx validation, and Make read-only.
FAQs
Click a question below to learn more about customizing the checkout form.
How can I read responses to checkout form questions?
When managing the event from your site's dashboard, the Guests tab is the place to view responses that individuals guests entered in the checkout form.
To view a table with all your guests responses, you can export the guest list.
Learn more about viewing guest responses and exporting your guest list.
How can I customize the "Tickets Unavailable" and "Registration Closed" messages?
Go to Events in your site's dashboard.
Click Manage next to the relevant event.
Click the Settings tab.
Click Edit next to the message you want to customize.
Learn more about editing the "Thank You" and "Registration Closed" messages.
How can I customize the design of the checkout form?
You can update the colors, font, and more to get a look that suits your site. Learn how to customize the registration form design.
This article is credited to the Wix team - https://support.wix.com/ and we thank them for that!