With booking policies, you can control when clients can book, cancel, or reschedule their sessions. You can set rules for how far in advance bookings must be made and how close to the session clients can make changes.
For some services, you can allow group bookings and late bookings. You can also ask clients to add payment details and charge fees for cancellations and no-shows.
Important:
Daylight saving time impacts your booking policies. For example, this may mean that when the time changes, clients will have a shorter or longer window to book, cancel or reschedule a session.
Video tutorial
Check out this video tutorial or scroll down to read the full article.
Adding new policies
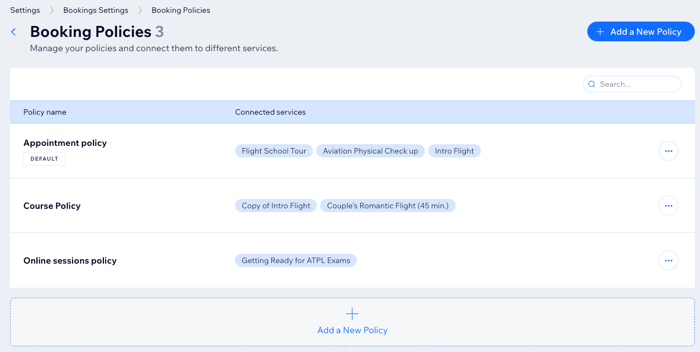
You can add new policies at any time and customize them to suit your needs. Offer different booking policies for each of your services or connect several services to the same policy. This is a great way to ensure you stay as fully booked as possible and that your staff have enough time to prepare everything.
Notes:
Certain policy rules and options only apply to specific service types, such as classes or courses.
When you add a new policy, the policy's rules take effect for all connected services for both current and future bookings.
You can also add checkout policies to your site, in addition to your booking policies.
Show me examples of new booking policies
Below are a few examples of different types of policies you could create depending on the preparation needed, the service type or other requirements:
Offer services that need a lot of preparation beforehand?
Allow bookings up to 4 weeks in advance.
Don't accept bookings within 48 hours of the service start time.
Don't allow cancellation or rescheduling less than 48 hours before the start time.
Have certain classes that are in high demand?
Set a stricter cancellation policy where clients can only cancel up to 24 hours before the start time.
State that there are no refunds for last-minute cancellations (less than 24 hours before start time) in your policy description.
Enable a waitlist for the class to ensure it is always fully booked even when there are cancellations.
Have clients who book for other people?
Allow clients to book on behalf of someone else, so a parent can enroll a child in a class.
Collect each participant's contact details for group bookings, so everyone gets their own confirmation.
Set the maximum number of participants allowed per booking.
Offer online and in-person services?
Create an in-person service policy that allows bookings no later than 24 hours before the start time, and cancellations up to 2 hours before the start time.
Create a more flexible online service policy that allows bookings up to 2 hours before start time and cancellations up to 15 minutes beforehand.
Need different policies for different service types?
Create one policy for your courses which allows clients to cancel up to 1 week in advance.
Create a second policy for your classes which allows clients to cancel up to 4 hours in advance.
Create another policy for your appointments which allows clients to cancel up to 30 minutes in advance.
To add a new policy:
Go to Booking Settings in your site's dashboard.
Scroll down and click Booking policies.
Click + Add a New Policy.
Customize your policy:
Policy details
Add your policy details:
Policy name: Enter a name for the policy. This is only visible to you.
Policy description: Briefly describe your cancellation and rescheduling policies or any other information clients need to know. Clients see this when they book a service.
Note: A policy description is optional unless you have enabled cancellation and no-show fees, then it is required.
Client booking rules
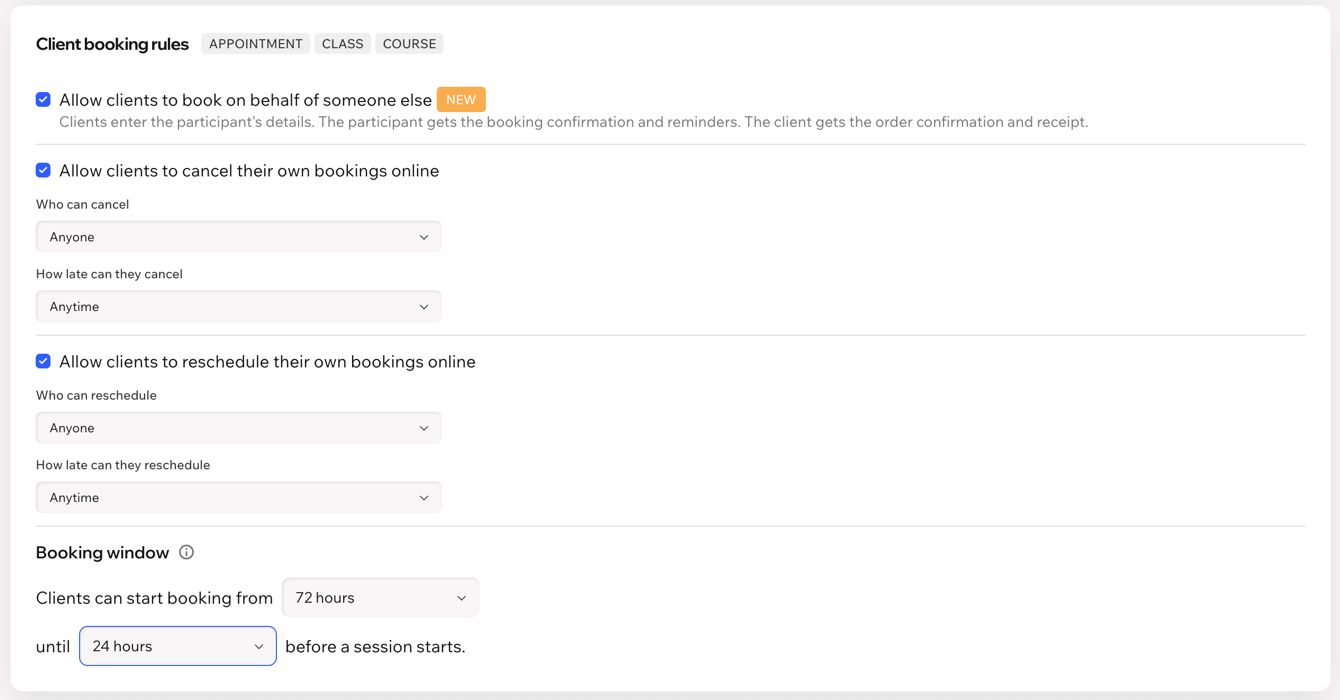
Select the checkboxes and choose the timeframe next to the relevant Client booking rules:
Allow clients to book on behalf of someone else: Clients enter the participant's details. The participant gets the booking confirmation and reminders. The client gets the order confirmation and receipt.
Allow clients to cancel their own bookings online: Select the checkbox to allow clients (site members / all site visitors) to cancel their booked sessions. Define how much time before a session clients can cancel their booking by choosing one of the existing options from the drop-down or create your own custom timeframe.
Allow clients to reschedule their own bookings online: Select the checkbox to allow clients (site members / all site visitors) to reschedule their booked sessions. Define how much time before a session clients can reschedule their booking by choosing one of the existing options from the drop-down or create your own custom rescheduling timeframe.
Booking window: The booking window determines when clients can book your service. Choose how far in advance bookings open and when they close.
Click the Clients can start booking from dropdown and select when clients can begin booking.
Click the until dropdown and select how long before a session starts bookings close.
Automatic staff assignment
Set how staff are chosen for appointments when clients don’t select a specific staff member.
Assign staff randomly: Assign any available staff without a specific order.
Assign staff by priority: Assign staff based on the priority you set for each staff member to get booked.
Payment and fees
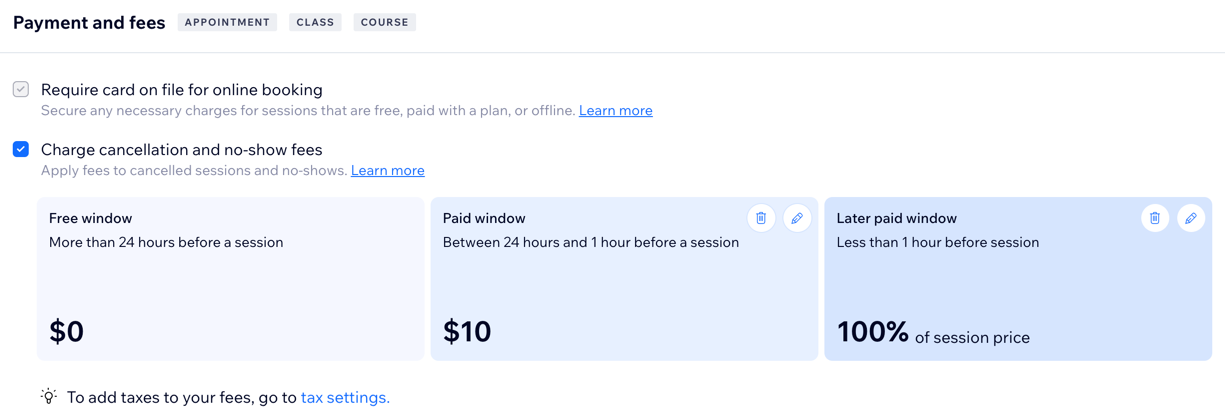
Secure your bookings by collecting payment details for each reservation, even if no payment is needed upfront. You can also charge fees when clients cancel late or don’t show up to their session.
Require payment details or enable cancellation fees:
Select the Require card on file for online booking checkbox to request payment information for each booking, even if there's nothing to pay online.
Select the Charge cancellation and no-show fees checkbox to enable cancellation and no-show fees.
Note: When you enable cancellation fees, you automatically ask clients to provide their payment details at checkout. Read more about saving and charging clients' credit cards.
Waitlist
Let clients join a waitlist for fully booked classes. When a spot opens up, people on the waitlist get the chance to join. Waitlists only apply to classes. Learn more about appointment waitlists.
Note: Clients will be able to join the waitlist only through a Wix members app. If booking from your website, they'll be prompted to download the app.
To set up a waitlist:
Select the Allow clients to join a waitlist for fully booked classes checkbox.
Set up your waitlist options:
Maximum waitlist capacity: Enter how many clients can join the list.
An open spot will be held for: Choose how long an open spot is held from the drop-down.
Group bookings
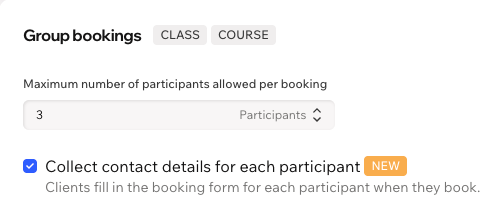
Choose the rules for group bookings in your classes and courses:
Set the Maximum number of participants allowed per booking to choose how many people can join with a single reservation.
Select the Collect contact details for each participant checkbox so clients fill in the booking form for each person they book for.
Book a course after start date
Select the Book a course after start date checkbox to allow clients to join a course after it has started. Clients who join a course after it has started still pay the full amount for the course.
Tip: If you want to allow clients to book after the course has started, make sure you don't limit late bookings (see 'Client booking rules' above).
5. Click Save.
Tip:
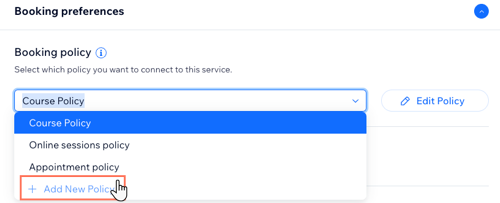
You can also add new policies while creating new services. In the service creation form, scroll down to Booking preferences, then click the drop-down under Booking policy. Click + Add New policy, then follow the steps above to finish creating the new policy.
Managing connected services
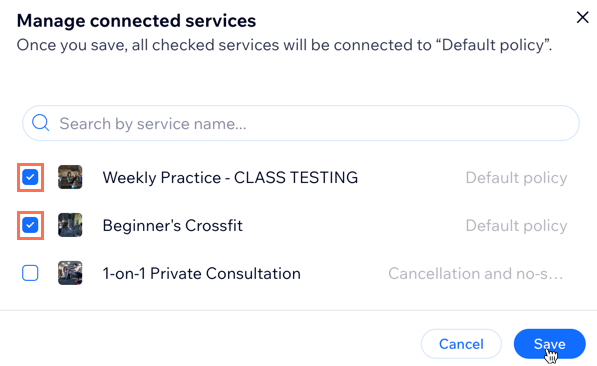
You can move or connect services to different policies at any time. This is great for when you notice a spike in demand for particular services and need a more restrictive policy to manage the number of bookings.
To manage connected services:
Go to Booking Settings in your site's dashboard.
Click Booking Policies.
Click the More Actions icon

next to the relevant policy.
Click Manage connected services.
Select the checkbox next to each service you want to connect to the policy.
Click Save.
Setting your default policy
Choose which of your policies you want to automatically apply to all your services. This is useful when you are adding new services as your business grows. You can then link services to more customized policies whenever you need.
Important:
You can't delete your default policy. However, you can make another policy the default, then delete the original default policy.
When you change which of your policies is the default, and delete the original policy, all services automatically link with the new default policy.
To set your default policy:
Go to Booking Settings in your site's dashboard.
Click Booking Policies.
Click the More Actions icon
next to the relevant policy.
Click Set as default.

Deleting policies
As your business grows, and your needs change, you may want to delete some of your old booking policies.
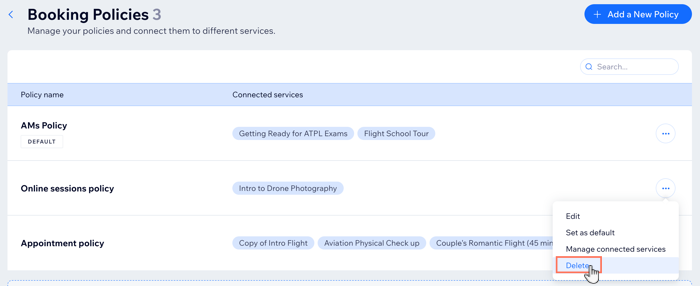
You can delete policies at any time, but make sure you choose your default policy before deleting any irrelevant policies. When you delete a policy, all connected services move to your default policy. You must have at least one booking policy at all times.
To delete a booking policy:
Go to Booking Settings in your site's dashboard.
Click Booking Policies.
Click the More Actions icon
next to the relevant policy.
Click Delete.
Click Delete to confirm.
FAQs
Click a question below to learn more.
Can I create new policies while I'm adding a new service to my site?
Yes, you can create a new policy in the Booking preferences section of the service creation form.
To create a new policy while adding a new service:
Go to Booking Services in your site's dashboard.
Click + Add a New Service in the top right.
Choose the service type and fill out all the relevant details, including price, staff member, location, and more.
Scroll down to Booking preferences.
Click the drop-down under Booking policy.
Click + Add New policy. Then follow these steps to finish creating the new policy.
Can I edit an existing policy?
Yes, you can update your booking policies at any time. Click the More Actions icon
next to the relevant policy and then click edit.
Can I see an example of a booking policy with multiple rules and how it works?
You can combine Booking rules in many different ways to ensure your clients and staff have the best experience possible.
Let's look at an example:
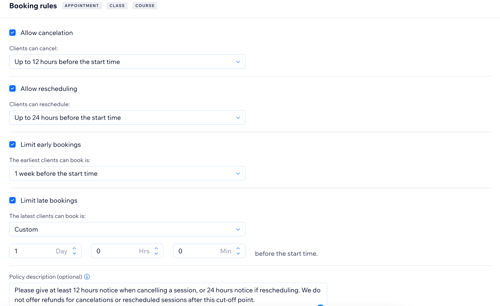
You limit the booking window to 1 week in advance but not less than 24 hours before the session. This allows your staff enough time to prepare and allocate time and resources where needed.
You allow clients to cancel up to 12 hours before the start time. This leaves enough time for your staff to stop preparing for the session, saving time and resources.
You allow rescheduling up to 24 hours before the start time. This gives your clients more flexibility with their scheduling. It also gives your staff enough notice before a session time changes.
You add a note to your policy description so your clients know exactly what to expect when they go to cancel or reschedule.
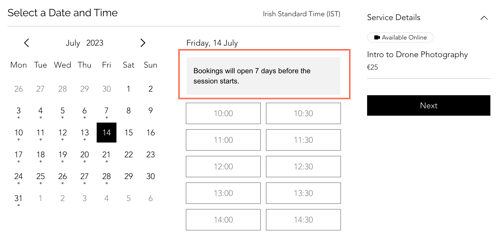
If a client tries to book 6 weeks in advance, they see a message explaining when they can book the session.
Can I add checkout-specific policies to a Wix Bookings site?
Yes, you can also add checkout policies to your Wix Bookings site.
This article is credited to the Wix team - https://support.wix.com/ and we thank them for that!