Make your blog posts more engaging by adding images, GIFs, videos, galleries, or files. You can add media to your posts from your site's dashboard, or from the Wix app.
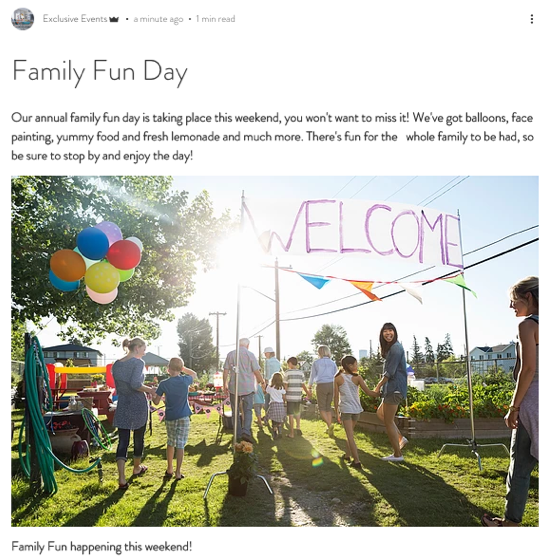
Adding media to a post from your dashboard and the Wix app
You can add media to your blog posts in the Blog section of your site's dashboard or from the Wix app.
Dashboard
Go to Blog in your site's dashboard.
Click + Create New Post or click an existing post.
Click the Add icon

in the panel on the left.
Choose from the following options:
Image
Click Image.
Choose how you want to add your image:
Select from site files: Pick an image that’s already in your site’s files.
Upload a new image: Click +Upload Media to add an image from your computer.
Stock images: Browse free options, such as Media from Wix, to find images for your post.
Click Add to Page.
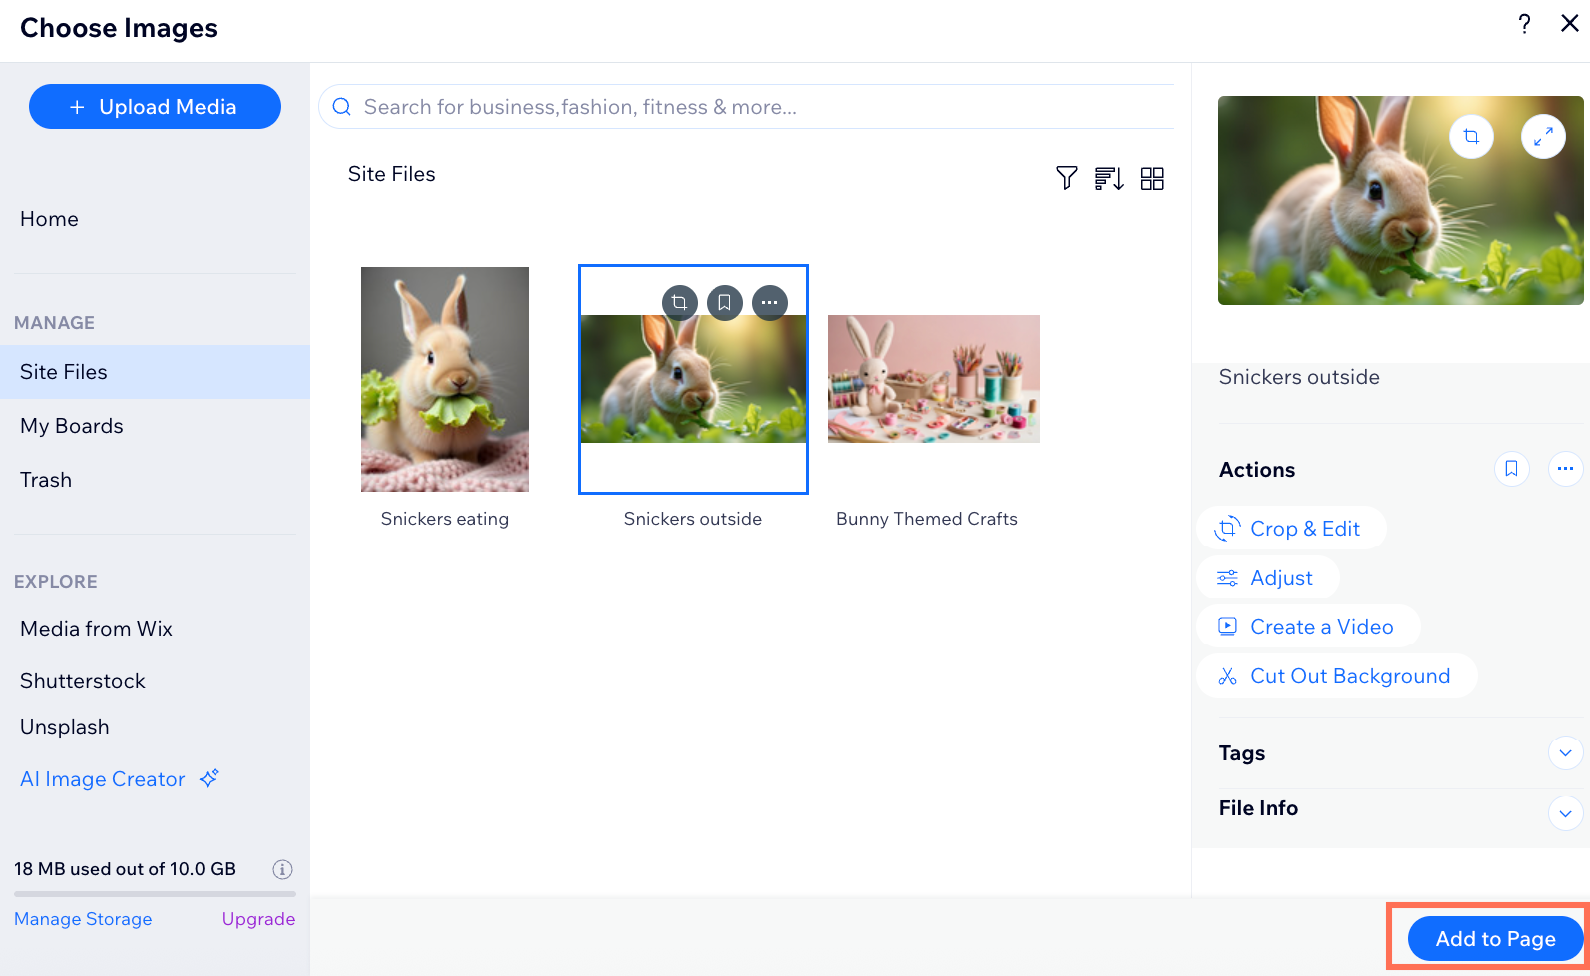
Tip: Click the image in your post and use the toolbar to edit the image settings, size and alignment. You can also add a link to the image, edit the image further in the Photo Studio, or delete it.

Gallery
Click Gallery.
Choose how you want to add images to your gallery:
Select from site files: Select one or more images from your site’s files.
Tip: Hold the Ctrl (Windows) or Command (Mac) key to select multiple images at once.
Upload new images: Click +Upload Media to add new images from your computer.
Stock images: Browse free options, like Media from Wix, and select as many images as you need for your gallery.
Click Add to Page.
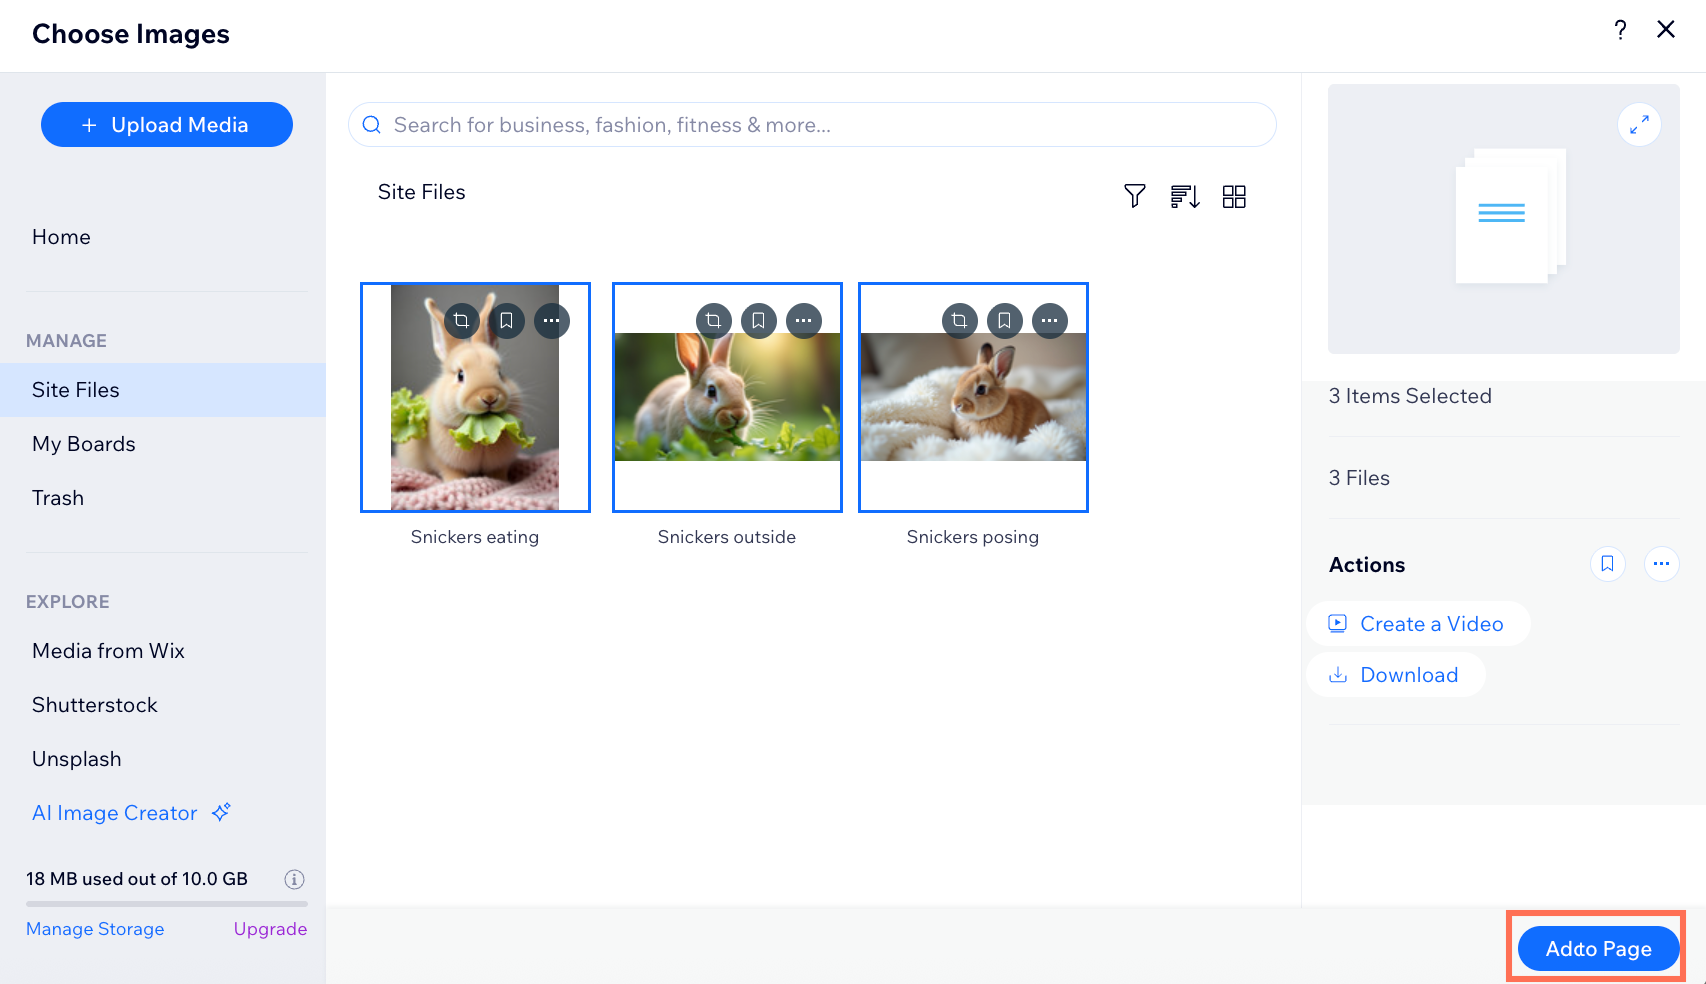
Tip: Click the gallery in your post and use the toolbar to manage your gallery media, layout and settings. You can also change the size and alignment of your gallery, or delete it.

Video
Click Video.
Choose how you want to add your video:
Embed: Embed a video from an external source, e.g. YouTube, Vimeo, or Facebook:
Copy the URL from the video you want to embed.
Paste the URL in the field provided.
Click Embed Video.
Upload: Upload your own video file from your computer.
Click Upload.
Click Upload Video.
Choose how you want to upload your video:
Select from site files: Select a video that’s already in your site’s files.
Upload a new video: Click +Upload Media to add a video from your computer.
Stock videos: Browse free options, such as Media from Wix, to find short videos for your post.
Click Add to page.
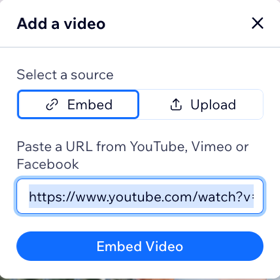
Tip: Click the video in your post and use the toolbar to change the size or alignment of the video. You can also replace the video, adjust the settings, or delete it.

GIF
Click GIF.
Click GIF or Sticker.
Use the search box to search for a GIF or sticker.
Select the one you like from the options available.

Tip: Click the GIF in your post and use the toolbar to change the size or alignment of the GIF. You can also replace the GIF or delete it.

File
Click File.
Choose how you want to add your file:
Select from site files: Select a file that’s already in your site’s files.
Upload a new file: Click +Upload Media to add a file from your computer.
Click Add to Page.
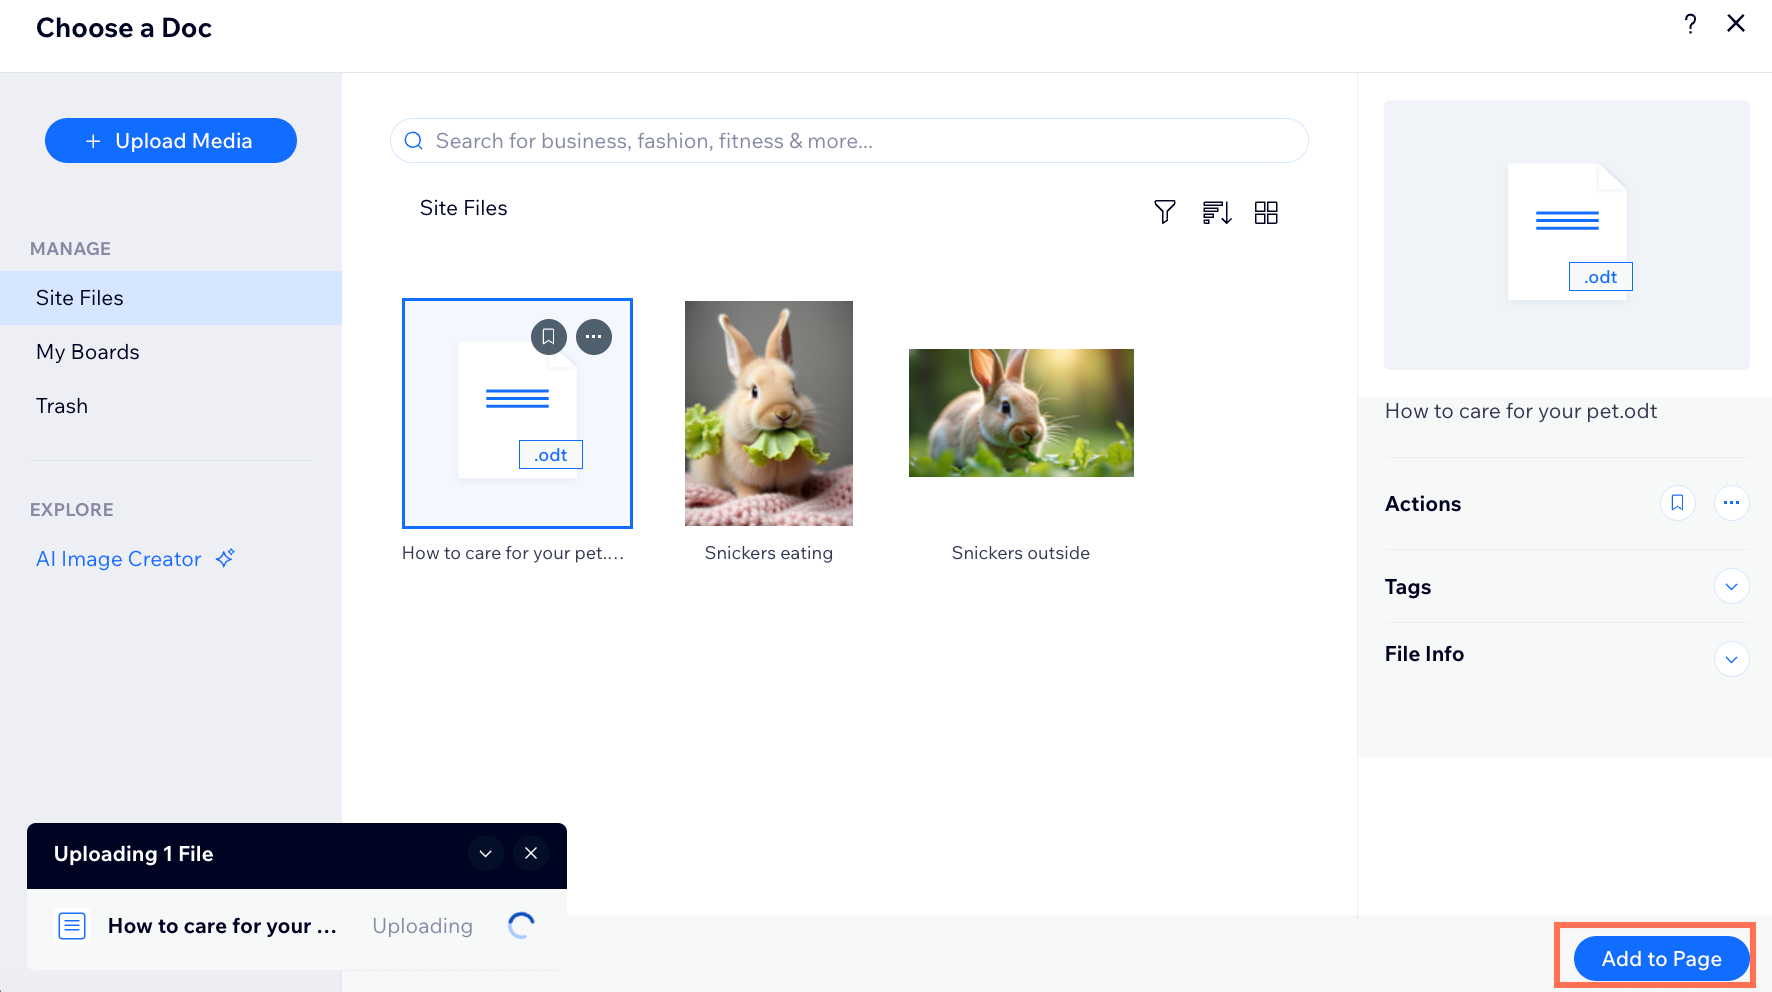
Tip: Click the file in your post and use the toolbar to change the size or alignment of the file. You can also replace the file or delete it.

Wix app
Go to your site in the Wix app.
Tap Manage

at the bottom.
Tap Blog.
Tap Posts.
Tap +Create New Post or tap a post to edit it.
Tap the main body of the post and tap the Add icon

.
Choose from the following options:
Image
Tap Image.
Choose how you want to add your image:
Camera: Use your camera to capture the image.
AI Image: Create an image using the AI Image tool.
All media: Select an image from your site, mobile device, boards, Google Photos, social media, or browse the Free by Wix stock images.
Tap Next.
(Optional) Tap Edit to edit the image before you add it to your post. Learn more about editing images.
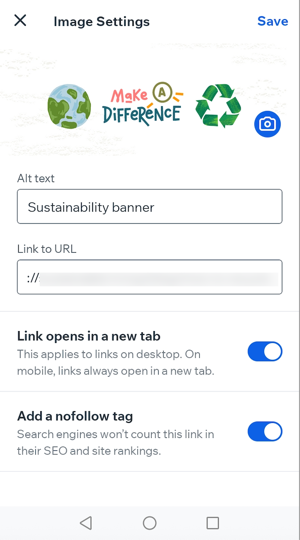
Tap the Settings icon

.
Customize the image settings:
Alt text: Enter a description of your image for accessibility and SEO.
Link to URL: Add a clickable URL to your image.
Link opens in a new tab: Choose if you want the link to open in a new tab.
Add no follow tag: Choose if you want to add a no follow tag to your image.
Tap Save.
Gallery
Tap Gallery.
Select images for your gallery from your site, mobile device, boards, Google Photos, social media, or browse the Free by Wix stock images.
Tap Next.
(Optional) Tap Edit to edit the images before you add them to your post.
Note: You can only edit one image at a time. Learn more about editing images.
Tap Next.
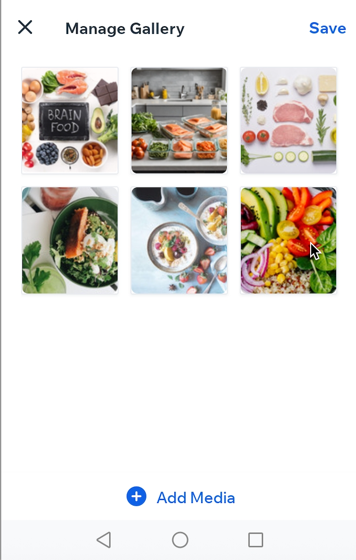
Tap Manage.
Select an image to manage.
Tap Image settings.
Customize the image settings:
Alt text: Enter a description of your image for accessibility and SEO.
Link to URL: Add a clickable URL to your image.
Link opens in a new tab: Choose if you want the link to open in a new tab.
Add no follow tag: Choose if you want to add a no follow tag to your image.
Tap Save.
Customize the image settings for the remaining images in your gallery.
Divider
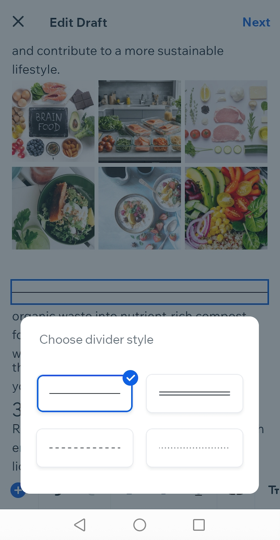
Tap Divider.
Tap the Choose divider style drop-down and select a style for your divider.
Tap the Choose divider widthdrop-down and select the width of your divider.
Choose an alignment for your divider: Left, Center or Right.
Video
Tap Video.
Choose how you want to add your video:
Camera: Use your camera to capture the video.
All media: Select a video from your site, mobile device, boards, Google Photos, social media, or browse the Free by Wix stock videos.
Create video: Create your own video using the Wix Video Maker.
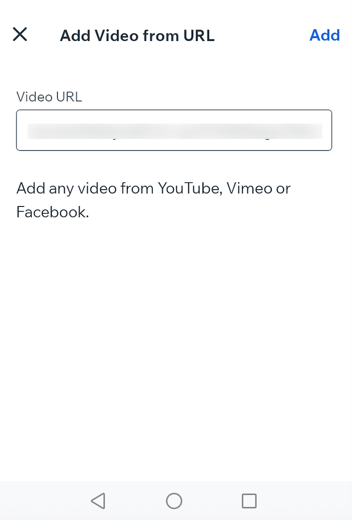
URL: Add a URL to any video from YouTube, Vimeo or Facebook.
Tap Add.
GIF
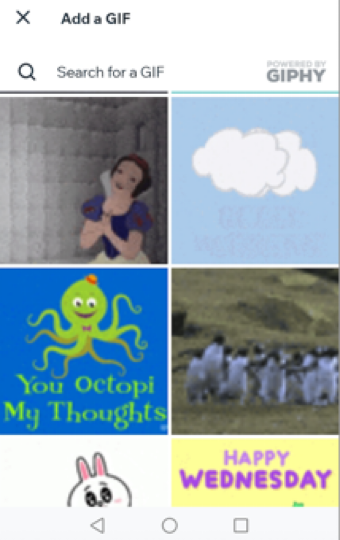
Tap GIF.
Use the search bar to search for a GIF or scroll through the default GIFs.
Button
Tap Button.
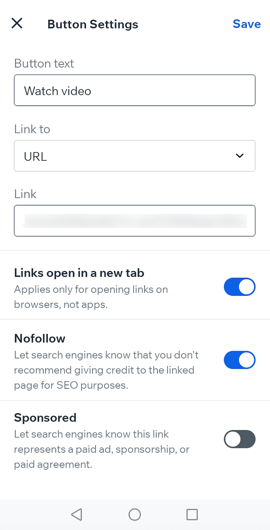
Tap Settings.
Customize the button settings:
Button text: Enter the text that displays on your button.
Link to: Tap the drop-down and select what you want the button to link to:
URL: Enter the link in the field provided and choose how the link behaves by enabling/disabling the toggles.
Section: Select the section of the blog post you want to link to.
Tap Save.
Choose an alignment for your button: Left, Center or Right.
8. Tap Next.
9. Choose what you want to do by tapping the relevant option:
Preview post:
Tap Preview post.
Review your post before you publish it.
Save as draft:
Tap Save as draft.
Schedule post: This option is only available for new posts.
Tap Schedule post.
Save and publish:
Tap Save and publish.
FAQs
Click a question below to learn more about adding media to blog posts.
What types of media files can I add to my blog post?
Wix supports a variety of media file types and sizes, including images, videos, audio, and more. For best results on your blog, use high-quality images to ensure they display clearly across all devices. Learn more about the recommended image sizes for your blog.
Why is my media not displaying correctly in my published post?
There are several reasons why your media might not display as expected:
Unsupported file type or size: Ensure you're using a supported file format, such as, JPG, PNG, GIF, MP4, PDF, or ZIP and that the file doesn’t exceed Wix’s upload limits. Large files may fail to load or appear slowly.
Image resolution: Low-resolution images can appear blurry or pixelated. For best results, we recommend using high-quality images.
Browser or internet issues: Try refreshing the page, clearing your browser’s cache and cookies, or viewing the post in a different browser or device to rule out local loading issues.
Blog post not published: Don't forget to publish or preview your site to view your changes. Edits saved in your editor won't appear live until the post is published.
Mobile vs. desktop limitations: Some media formatting or interactive elements may not display the same on mobile devices or in the Wix app. Always preview your post on multiple devices before publishing.
This article is credited to the Wix team - https://support.wix.com/ and we thank them for that!