Create an automation to grow or manage your business. Choose to create one from scratch or start with a suggested automation.
All automations consist of a trigger and at least one action. An automation's trigger is the event that causes the sequence of steps to be performed. The action is the response to the trigger. An action can take place immediately after the trigger, after a predefined number of hours or days, or if certain criteria are met.
Example:
Joan has a monthly newsletter. She creates a newsletter subscription form to grow her mailing list. She wants to thank each subscriber as they sign up, but manually sending these emails would be impossible. Instead, she sets up an automation that automatically sends a 'thank you' message every time a new person subscribes.
Step 1 | Create a new automation
Any automations you create appear under Automations in your site's dashboard. Make sure to choose a name that's memorable and can be understood by all of your site collaborators.
Create with AI:
Use the automation agent to describe the automation you want, then review and edit the draft it creates.
To create a new automation:
Go to Automations in your site's dashboard.
Click + Create Automation at the top right.
Choose how you want to start creating your automation:
From Scratch: Click Start from Scratch to begin from a blank automation template.
Suggested automation: Use the categories or search bar to find the suggested automation you want to edit. Then click Set Up next to the automation.
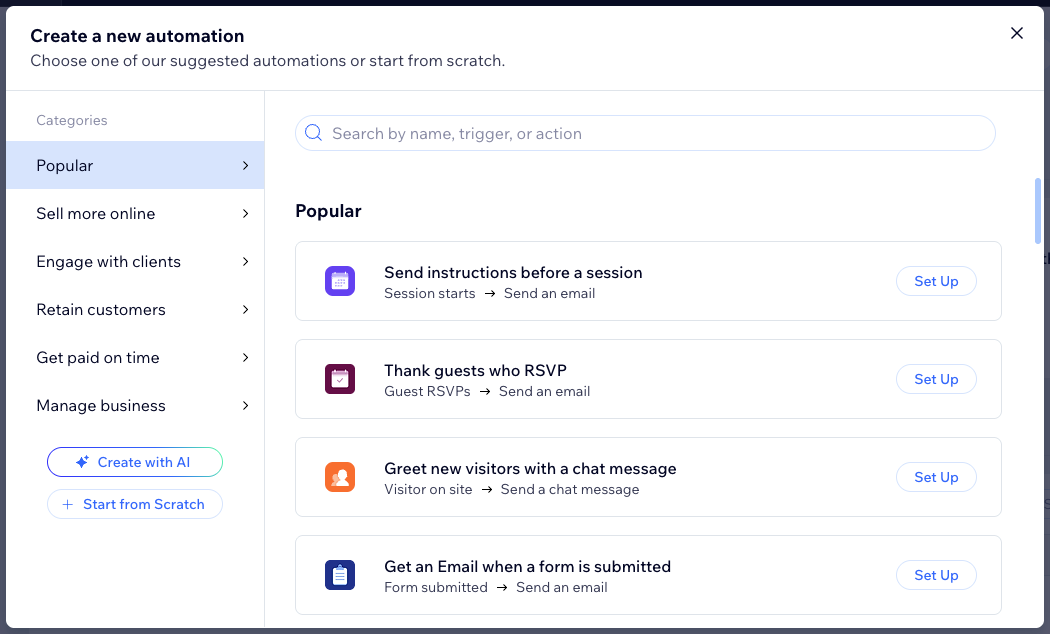
Click the title to give your automation a name.
Step 2 | Choose a trigger
To get started, select the trigger you wish to initiate the automation. This may be something that a visitor does on your site (for example, purchasing a product), or something you or your collaborators do (e.g. creating an invoice).
Note:
The triggers you'll see listed differ depending on which apps are installed on your site (e.g. Wix Forms, Wix Stores).
To choose a trigger:
Choose a trigger in the trigger selection panelfrom the available options under the relevant app.
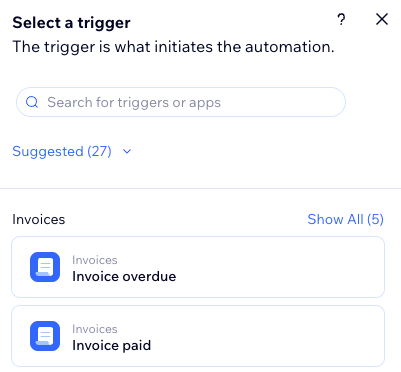
Set up the trigger.
Note: Based on the trigger you choose, you will see different settings to finish configuring the trigger.
(Optional) Enable the Trigger once per person toggle to limit trigger frequency:
Select the person from the trigger data: Decide how often the automation can be triggered for the same person (e.g. Contact ID, Post Author Contact ID, Visitor ID).
Tip: This is useful for triggers that might occur repeatedly.
Trigger once per person every: Select this checkbox if you want to set a specific amount of time that should pass before the automation can be triggered again for the same person.
Step 3 | Add steps to your automation
After selecting a trigger, continue setting up your automation using any of the available steps: Delay, Condition, Split, Local variable, Global storage item. These steps can be added anywhere in your automation sequence depending on the logic you are trying to implement.
Customize your automation by adding these steps:
Delay: Pause your automation between steps by adding a delay. This lets you wait a specific amount of time before continuing to the next step.
Tip: If you don't add a delay, the action is performed immediately.
Condition: Conditions let you create complex automation flows by defining criteria for continuing the flow. In the ‘THEN’ path, the automation flow continues only if the condition is met. You can set an 'ELSE' path to define what happens if it isn’t.
Split: Add multiple paths to your automation so that multiple actions can occur at the same time.
Local variable: Create a placeholder for information you use repeatedly in your automation. This gives you the flexibility to manipulate your data and reuse it in conditions or actions.
Global storage item: Create a dynamic global value that can be read, and updated across all your automations. This gives your automations the ability to remember and update shared information as they run.
Tips:
You can add notes to your automation to leave short explanations, reminders, or tasks on the canvas for you and your team. Click the Add notes icon

and drag it to the relevant place.
You can move these steps around your automation by holding the Reorder icon

and dragging it to the relevant place.
Once you’ve added a step, select it to rename, duplicate, skip, delete, or view its data.
You can use the Undo

or Redo

arrows to reverse or reapply your recent changes.
Step 4 | Choose an action
Actions are what the automation performs. For example, if your trigger is 'Form submitted', you might want to send that visitor an automatic thank you email. In the Select an action panel, you can find the action offering relevant to the selected trigger, which can be customized to suit your needs.
Did you know?
You can add multiple actions if needed, at any point throughout your flow.
You can rename an action to fit your needs.
To choose an action:
Click the Add Step icon

.
Click Action.
Choose an action from the panel.
Note: The actions available will differ based on your trigger choice.
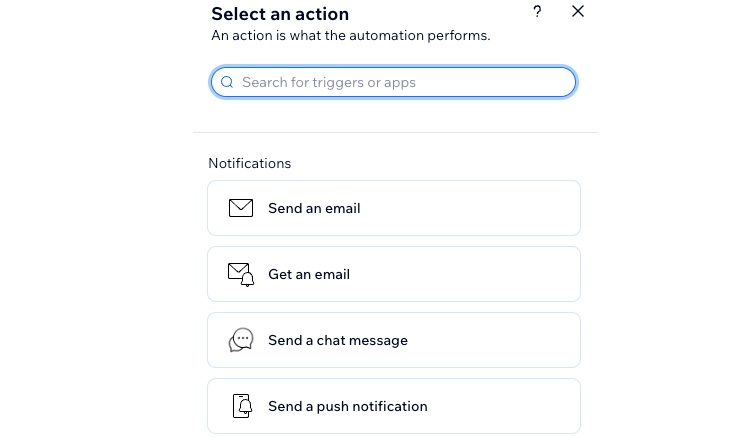
Set up the action using the available settings. Click the relevant action below to learn how:
Send an email
Click Edit in the Sender details section to edit your sender details:
From name: This is the name that appears in the recipient's inbox.
Reply-to email: This is the address that replies are sent to.
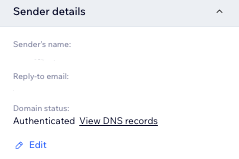
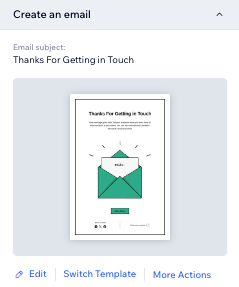
Click the Email template section and choose what you want to do:
Click Edit to update the default template generated by this automation. If relevant select Email Builder or Email Builder Plus. Learn more about editing your email template.
Click Change template to use an email template from a different automation or email marketing campaign.
Click More Actions to preview and test the email or reset to default template.
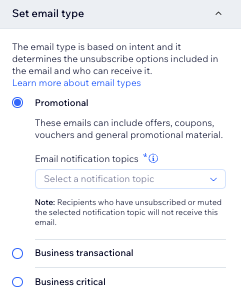
Under the Set email type section, select a type for your email to determine how or when your recipients can mute or unsubscribe from your emails:
Promotional: Non-essential business information or marketing content.
Business transactional: Essential information to your customers, directly related to their activity on your site.
Business critical: Only meant for critical cases.
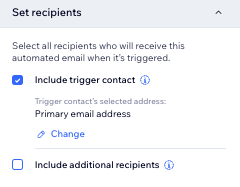
Under the Set recipients section, select who will receive this automated email when it's triggered:
Include trigger contact: Recipient who triggered this automation.
Include additional recipients: Additional recipients who didn't trigger this automation
Tips:
If you want to send emails to yourself and your team, deselect the Include trigger contact checkbox and select all contacts or roles who you want to receive the email.
Make sure to create email automations that don't overlap with other emails. Many apps already send emails to your contacts for specific events (e.g. making purchases in Wix Stores).
If no recipients are selected, or a recipient shows a red 'missing property' warning, the automation has nowhere to send the email. Make sure to add a valid recipient, then save your changes.
Send a chat message
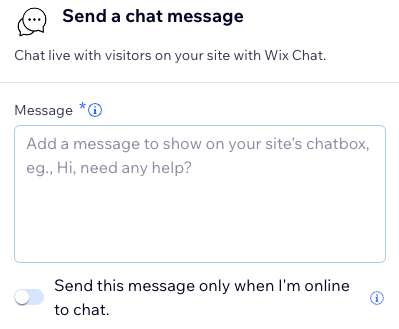
Enter the chat message you'd like to send in the Message field.
Click the Send this message only when I'm online to chat toggle to specify when these messages are sent:
Enabled: This chat message will only be sent when your chat status is online.
Disabled: This chat message will be sent whether your chat status is online or offline.
Note: You must have installed Wix Chat to set up this action.
Send a push notification
Send a push notification that appears on a customer's device screen ("pushed" by their mobile app). Enter the notification's title and message, and choose whether it takes customers to your app's home screen or a specific product or service.
Note: This action is only available with a Mobile App Premium plan and when your app is live in stores.
Send an SMS
If you are subscribed to a Wix Business Phone Number plan, you can send SMS messages to contacts who have provided cell phone numbers. Learn more about sending automated SMS messages.
Create a task
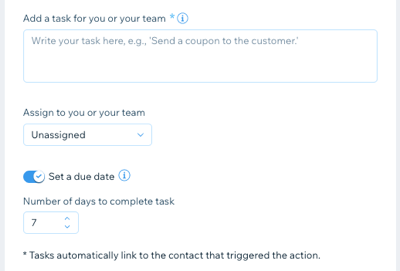
Add a task for yourself or your team members and set a due date for it.
Enter your task in the Add a task for you or your team field.
Click the Assign to you or your team drop-down to choose to have the task sent to you or a member of your team, or left unassigned.
Click the Set a due date toggle to choose whether to set a due date:
Enabled: Select a value in the Number of days to complete task field.
Disabled: Your task will not have a due date.
Learn more about tasks and reminders.
Assign a badge
Badges allow you to label your contacts so they can be easily differentiated (for example, a badge could mark a certain milestone being met). Learn more about badges.
Click X next to the badge(s) you don't want to assign, until you can only see the badge(s) you do want this automation to assign.

Note: Click + Add Badge to create your first badge if you don't see any listed.
Add a coupon
Select whether to send a unique coupon each time in the Set Coupon section.
Click the Select or create a coupon template drop-down to choose the coupon you want to use or create a new one.
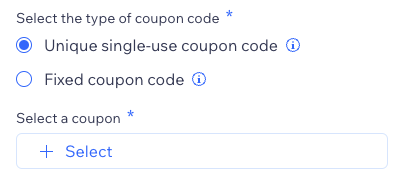
Adding a coupon does not automatically send that coupon. You need to attach the coupon to a relevant action and add it as a dynamic value to send. For example, you can use the coupon code in ‘Send an Email’, ‘Send an SMS’ and more.
Move card in a workflow
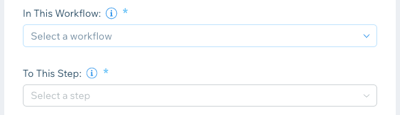
A workflow is a list that displays all of the steps of a project in columns so you can easily keep track of every phase. Create or move a card in a workflow automatically with Automations.
Click the In This Workflow drop-down to select the workflow you'd like to move a card in.
Click the To This Step drop-down to select the step you'd like to move the card to.
Give loyalty points
Reward your visitors for their loyalty by assigning loyalty points. Learn more about the Wix Loyalty Program.
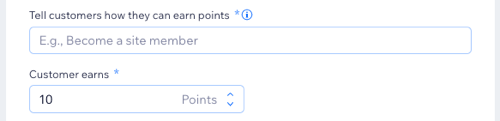
Enter a description of this way of earning points in the Tell customers how they can earn points field.
Note: This description should reflect the trigger you've chosen for this automation (for example, if your trigger is a visitor submitting a form, this will be the way they earn points).
Enter the number of points awarded in the Customer earns field.
Note: You can also add ways to earn loyalty points within the Loyalty Program area of your site's dashboard.
Add a label
Adding labels to your contacts helps you to filter your contact list and categorize your mailing lists. Learn more about labels.
Click + Add Label to select the label(s) you'd like to add.

Publish site
Publish the current version of this site. Learn more about configuring an automation to schedule your site to publish automatically.
Send HTTP request
Send data to a third-party app or your own server using a webhook. Learn more about automatically sending data using an HTTP request.
Update Google Sheets
Send site data, such as form submissions or store orders, directly to a Google spreadsheet. Learn more about using automations to send data to Google Sheets.
Invite to a group
Send an email to contacts to invite them to join your group.
Select an existing group you want to invite contacts to, or create a new group.
Wix CMS
Add, delete, update, or patch items in your CMS collections. You can also find or query items to use their data in subsequent automation steps.
Choose from the following CMS actions:
Add item: Add a new item to an existing collection.
Delete item: Delete an item from a collection.
Find item: Find an item by ID to use its data in subsequent automation steps.
Patch item: Edit or clear values in selected fields only. Fields you don't include stay the same.
Query items: Get all items that match your filters to use their data in subsequent automation steps.
Update item: Overwrite every field in an item.
Important: The Update item action overwrites all fields in the selected item. Any field you don't populate will have its existing content deleted.
Learn more about using CMS actions in automations.
Step 5 | (Optional) Test your automation
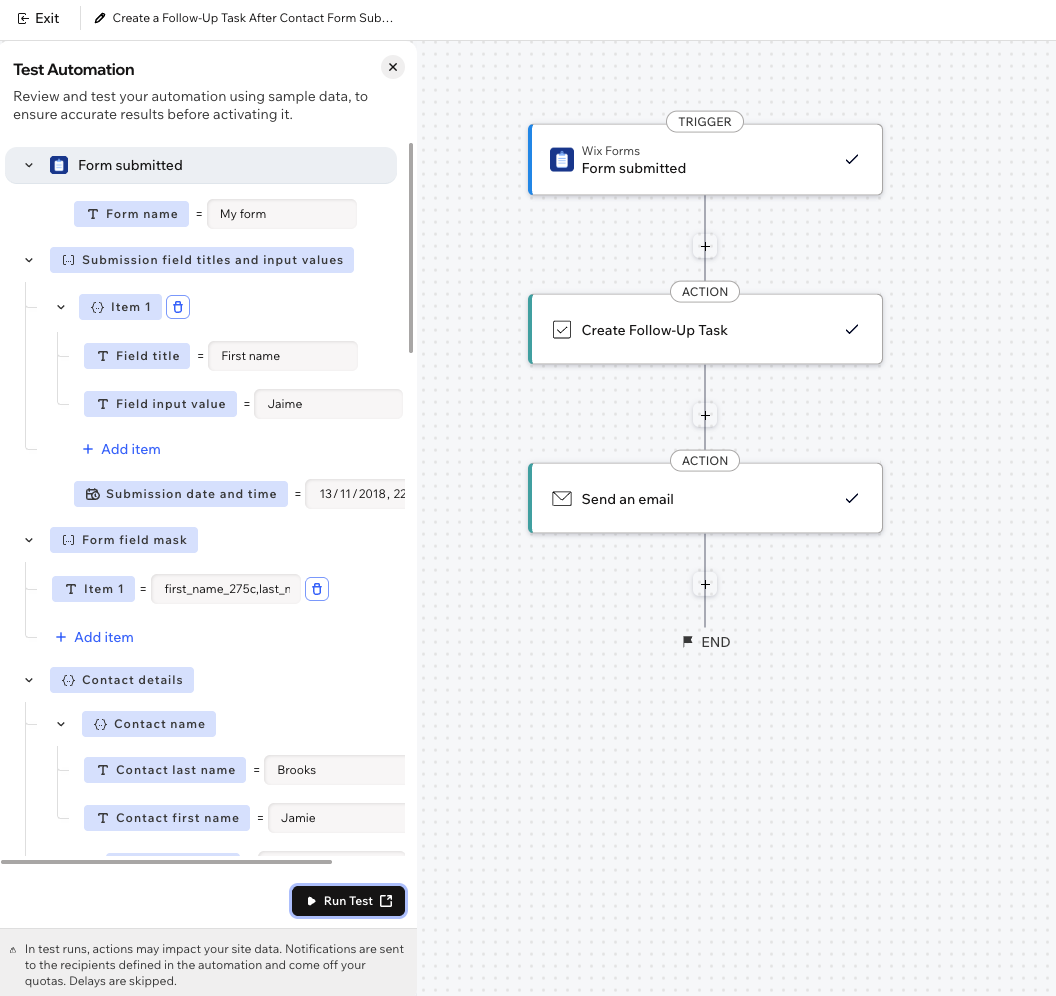
Before you activate your automation, you can run a test to check that your trigger, actions, and mapped values work as intended. The test skips delays so you can see results right away.
Important:
This feature is only available for automations with at least one action and no configuration errors.
Test runs send real emails and notifications to the recipients configured in your automation. To check an action with test recipients you must change the recipients in the action itself.
Test emails and notifications count against your site's quotas, run on your live site, and can create or update real data.
To test your automation:
Click Test at the top of your automation builder.
(Optional) Enter the sample trigger data in the Test Automation panel.
Note: Fields are generated from your trigger and may be pre-filled with example values.
Click Run Test at the bottom of the panel.
Read the confirmation and click Run Test.
View your results in the new tab that opens with your test automation flow.
Note: Test results don't appear in your automation's run log and are only available in the tab that opens after the test.
Step 6 | Activate the automation
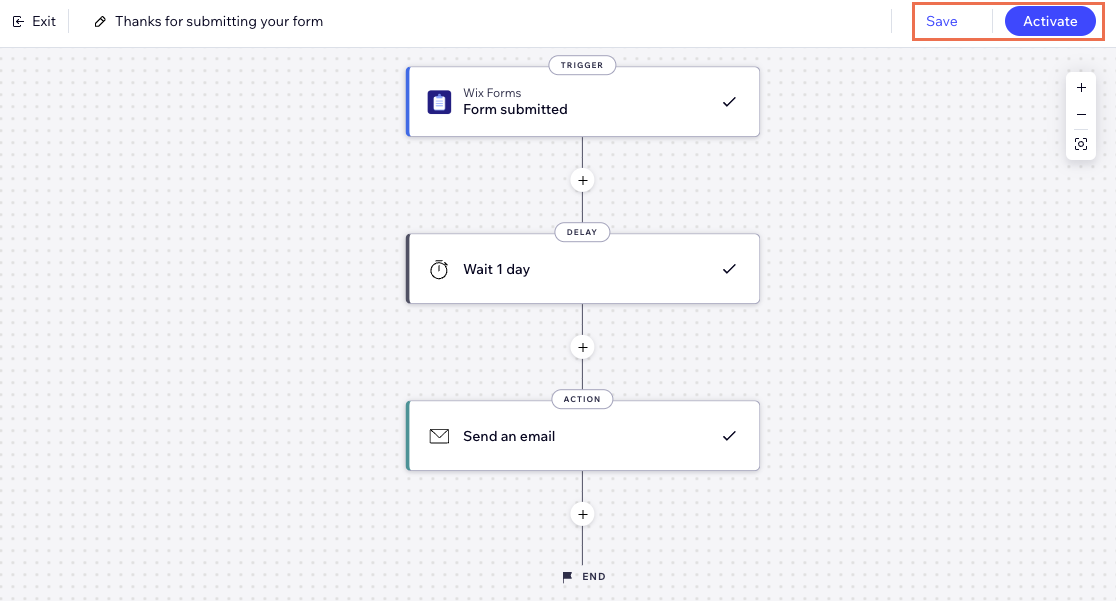
At the top right, click Save to save as a draft and come back later. Alternatively, click Activate to turn the automation on immediately. It now appears on your Automations page where you can monitor, edit, deactivate, or delete automations according to your needs.
This article is credited to the Wix team - https://support.wix.com/ and we thank them for that!