Add a time buffer between steps in your automation flow. For example, if your trigger is 'Customer abandons a cart' and your action is 'Send an email', you would want to delay the automation by sending this after a certain amount of time has passed.
Adding a delay
Click + to add a step.
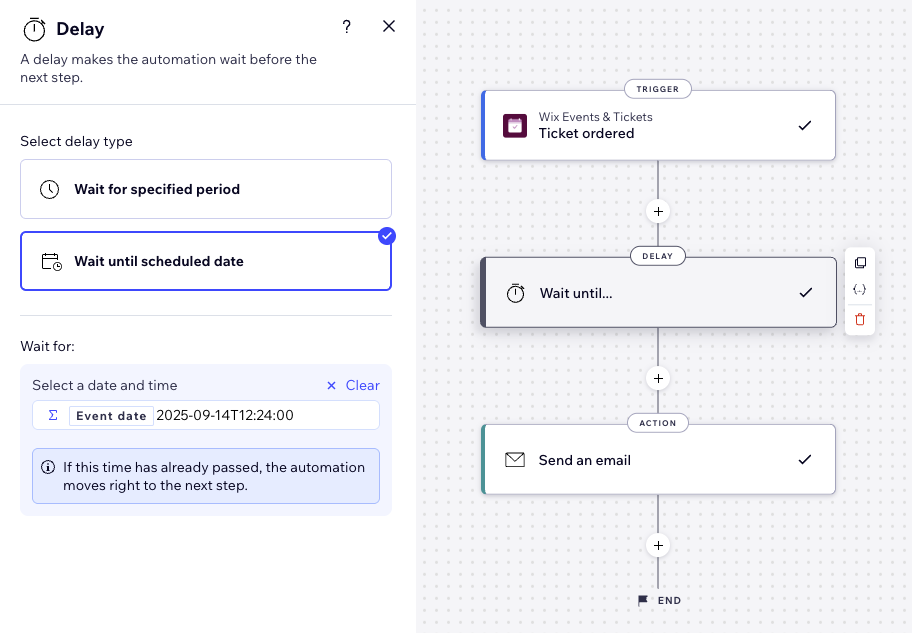
Click Delay.
Choose how to set up your delay under Select delay type:
Wait for specified period: Click the up and down arrows (or enter a number in the text box) and click the drop-down to choose between days, hours, and minutes.
Wait until scheduled date: Set specific date and time or click Customize to use formula field to build your expression.
FAQs
Click a question below to learn more.
Can I change the delay?
You can go back and edit an automation at any time to adjust or remove the delay.
Can I add more than one delay?
Yes, you can add multiple delays to an automation.
Where should I place delays?
Delays can be added anywhere along the automation flow. The delay affects all steps following it, so take that in mind when deciding where to place your delay.
This article is credited to the Wix team - https://support.wix.com/ and we thank them for that!