Use AI to simplify the process of creating personalized and effective marketing emails. This feature helps you save time and ensures your emails are engaging and relevant to your audience.
For example, imagine you want to announce a new product launch. With AI, you can quickly generate a professional email, allowing more time to focus on other aspects of your business.
Step 1 | Generate your AI content
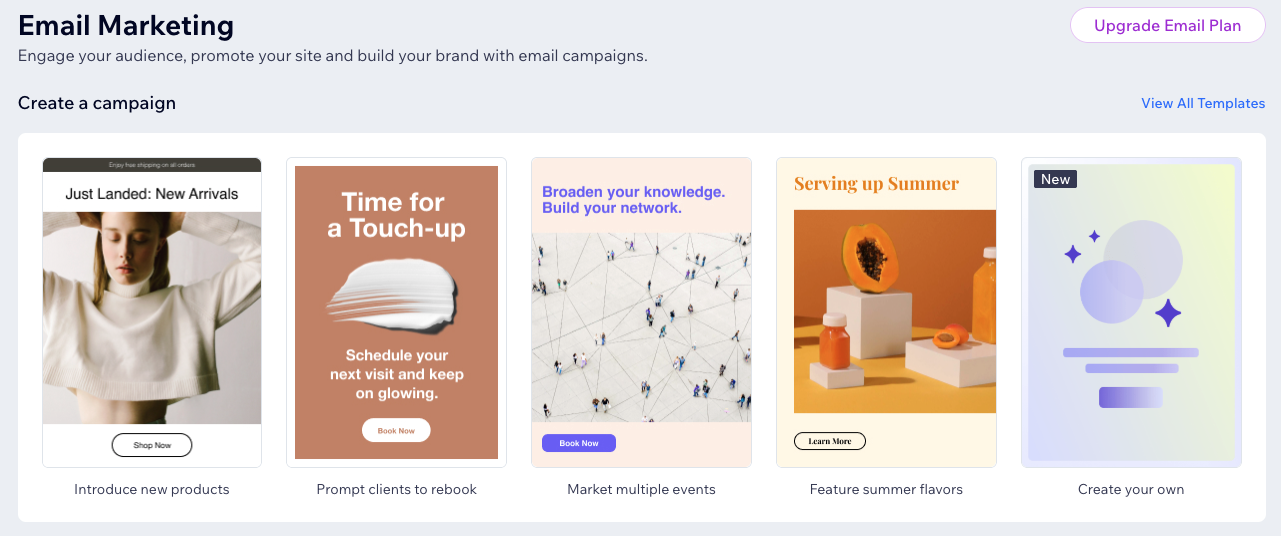
Get started by answering some detailed questions about your business and the needs of your campaign. The idea is that you can ask the AI to handle anything related to your entire email, from writing the content to suggesting layouts and designs.
To generate your content:
Go to Email Marketing in your site's dashboard.
Click View All Templates
Click + Create Email.
Click Create with AI.
Answer the AI's questions about your campaign's intent, highlighting options, and design theme.
Once you're happy with your email summary, campaign brief and intent click Generate Email.
Tip:
If you are unhappy with any part of the campaign, write back to the AI assistant and have it change the content. The clearer the information you give, the better your campaign will be.
Step 2 | Customize your email campaign
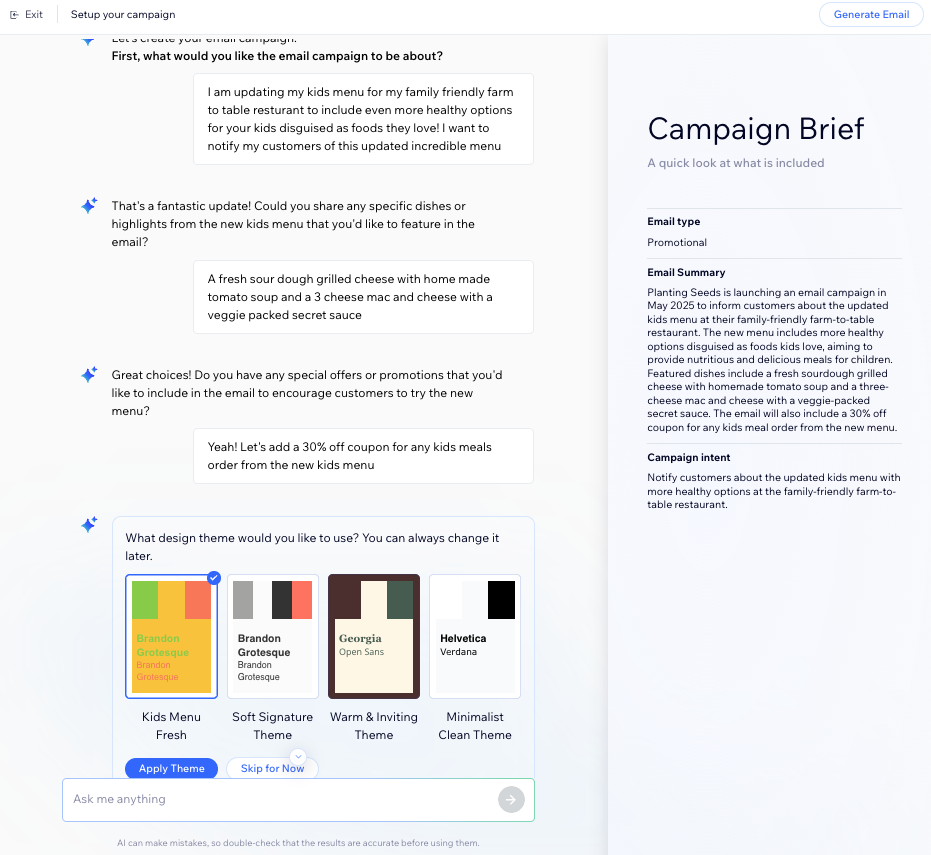
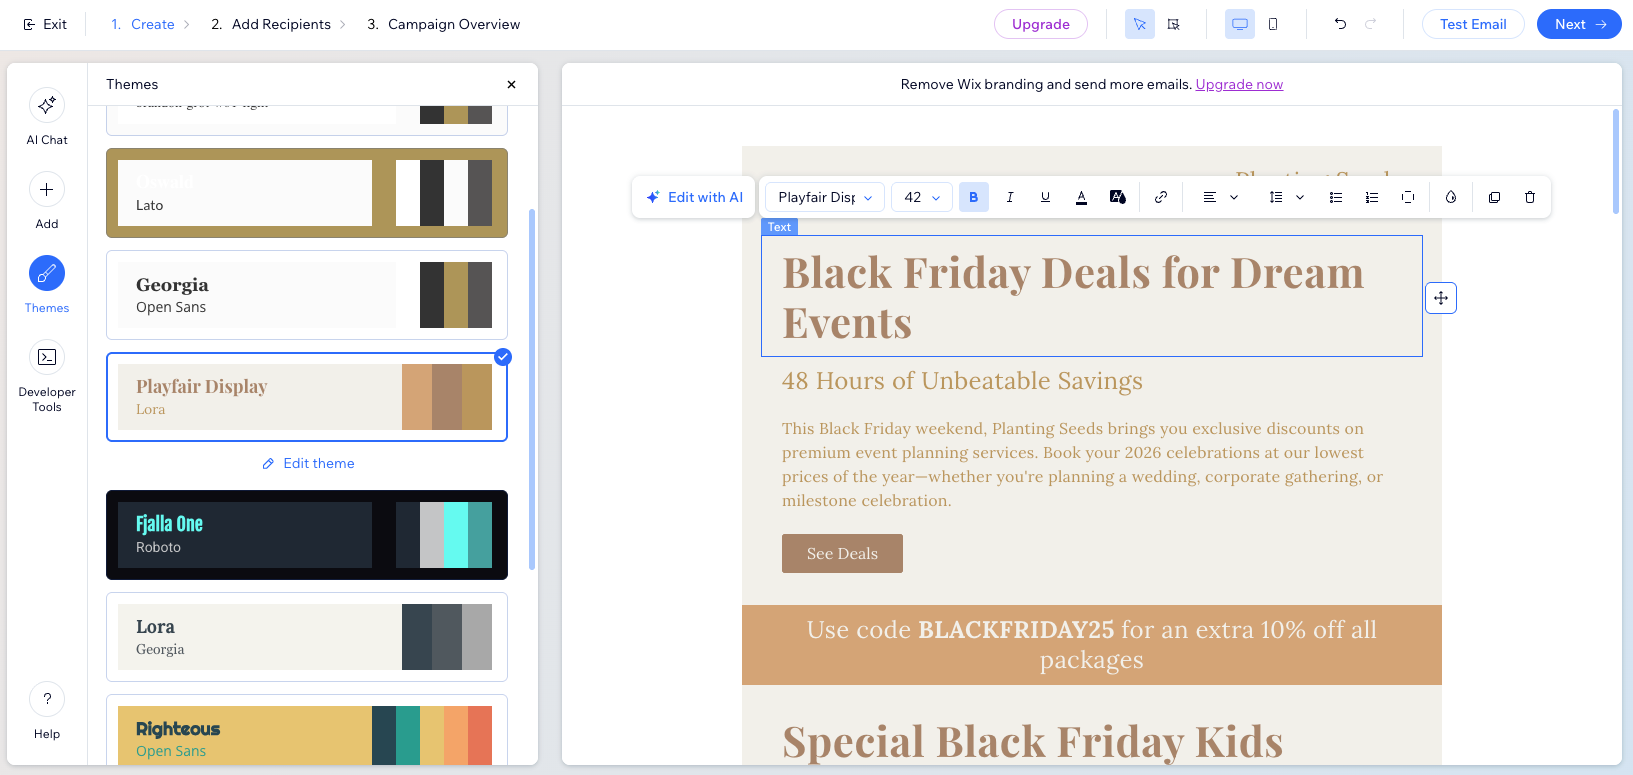
After generating the initial content,you're taken to edit the email and refine it further with AI. Ask it to rewrite entire sections, adjust the layout, or refine the tone to match your needs. If there’s a specific touch you’d prefer to customize yourself, you can always make manual adjustments.
Choose what you want to do:
Edit with the AI assistant
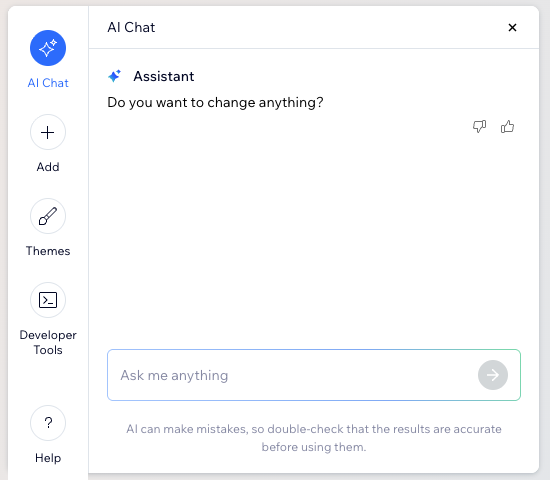
Click the AI Chat icon

on the left.
Chat with the AI assistant to adjust anything you'd like to regenerate in your campaign.
Tips:
Be as specific as possible when describing what you want. For example, ask the AI Assistant to create a two-column section highlighting the benefits of cycling.
If you want to regenerate a specific area of your campaign, highlight the area (e.g. text box, image, section, etc) of your email campaign and click Edit with AI to make changes with AI instead of making the changes manually.
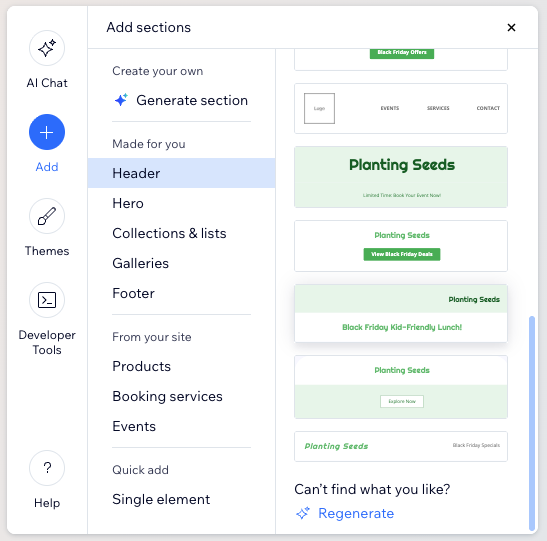
Add a section
Click the Add icon

on the left.
Select the section or element you want to add.
Customize the section or element to your liking.
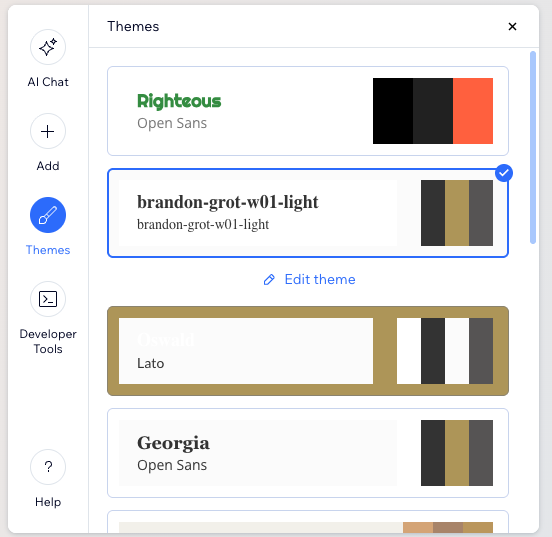
Change the theme
Click the Themes icon

on the left.
Choose what to do next:
Switch to a different theme: Click a new theme option to better fit your needs.
Edit the existing theme: Click Edit theme to change the outer and inner background colors, or add padding.
Edit existing elements in the email
You can click every element in the email to edit it individually, duplicate, or delete it.
Step 3 | Choose who to send your campaign to
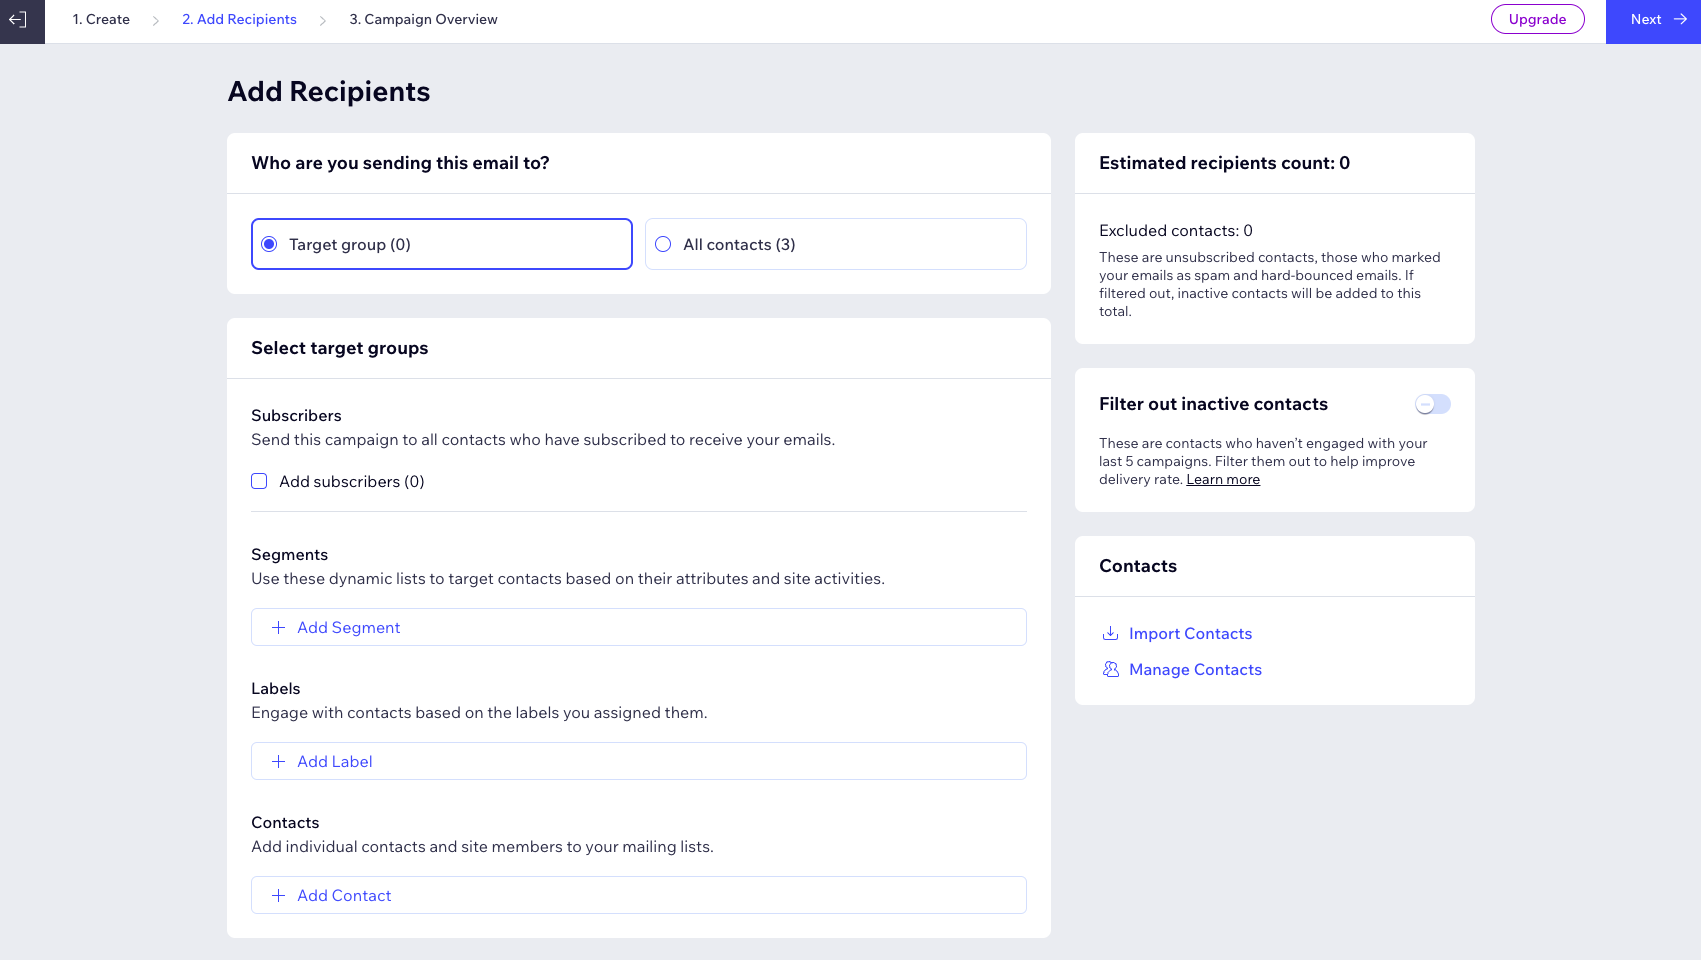
Next, add the recipients you want to send your emails to. You can select contacts individually or choose labels and segments that add groups of contacts at once. If you have a list of subscribers you need to add that are not yet in your contacts, you can import them from Google or a CSV file.
Important:
Make sure to follow the Wix Email Marketing best practices when choosing your recipients.
Each recipient only sees their own email address, your mailing list is kept private.
To add recipients:
From your AI email marketing builder, click Next at the top right.
(Optional) Import contacts from a CSV file or your Gmail account:
Click Import Contacts at the bottom right.
Click Import Contacts in the popup to confirm.
Choose between CSV file or Gmail account and follow the steps on-screen.
When ready, click Back to email marketing at the top.
Select who you want to send this email to:
Click Next at the top right.
Note:
You can click the Filter out inactive contacts toggle to enable it and remove inactive contacts from your list. We do not recommend sending campaigns to inactive contacts as this can increase your bounce rate, cause emails to be marked as spam, and decrease your email deliverability.
Step 4 | Publish and send your campaign
Create a subject line and enter the name your emails will show as sent from. Then decide whether to send your campaign as soon as possible or schedule it to be automatically sent at a future date.
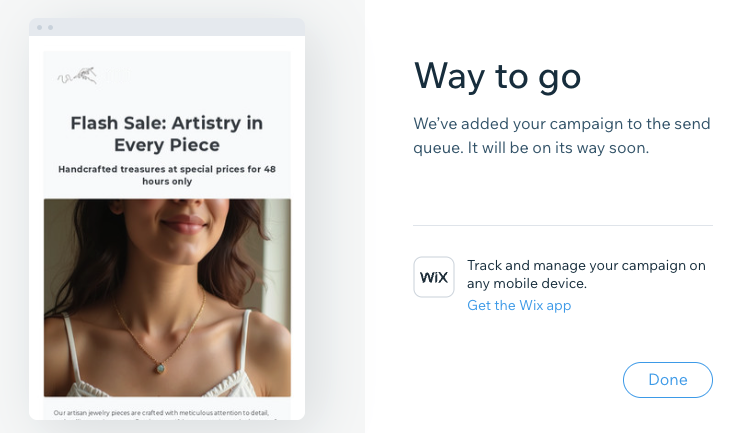
After scheduling or sending your campaign, it goes into a queue. Your campaign is then reviewed to ensure it complies with the Email Marketing terms of use. Then your emails get sent and you can share your campaign on social media or with a direct link to it.
To publish and send your campaign:
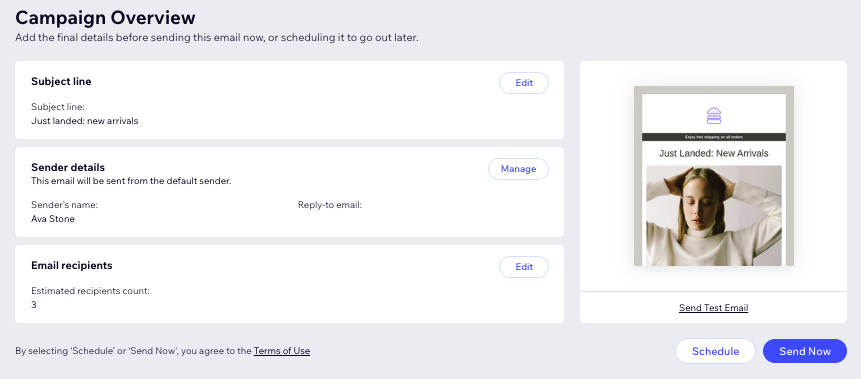
From the Campaign Overview page, edit the final sending details:
Subject line: Enter the subject line of the emails. You can add content that automatically adjusts to your contacts' details or your site's URL by clicking + Personalize and choosing an option.
Sender details: Enter the name the emails will show as sent from. This may be your business or personal name.
Email recipients: Enter the email address that recipients can reply to when they receive the emails. If you have not yet confirmed your email address, click Confirm Now.
Choose when you want to send your campaign:
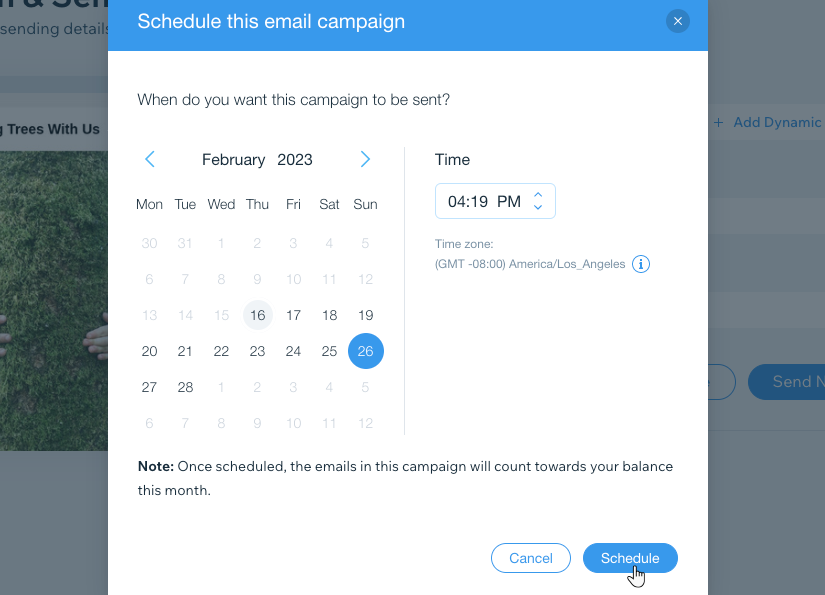
Schedule your campaign to be sent later
Click Schedule.
Select the date and time in which you want to the campaign to be sent.
Tip: Check the time zone to make sure your campaign is sent at the right time. If the time zone is incorrect, change it in your browser's settings.
Click Schedule.
Tip: You can edit or reschedule your campaign before it is sent.
Send your campaign as soon as possible
Click Send Now.
Tip: Your campaign gets added to the send queue, where it will be reviewed and sent soon.
Click Done.
FAQs
Click a question to learn more about using AI to generate an email campaign.
What if I don’t like the generated email?
You make manual adjustments for small fixes or completely redo the generated email to better fit your purpose and style. Just chat to the AI email assistant and let it know what you need.
What details should I include when describing my email campaign to the AI?
Provide specific details about what you want to include in the email to generate the best content for your campaign with the first try.
Can I select a template and edit it in the AI Builder?
Yes, you can choose any template from the email marketing dashboard and edit it with the AI builder.
Note: There are a few customizing options that are not available in the AI builder and therefore won't appear if they are in the template (e.g. a music element). Learn more about which options aren't available in the FAQ below.
Can I test my email campaign before I send it?
Yes, we highly recommend testing your campaign before sending it. Learn more about testing and previewing your campaigns.
Where can I see my campaign statistics?
You can analyze your campaign statistics straight from your dashboard. Learn more about understanding your campaign statistics.
Does the AI Email Builder have all of the same customizing options as the Email Builder?
No, there are a few features that are not supported in the AI Email Builder:
Email background image
Email inner background border
Music element (for sites using Wix Music)
Subscribe element
HTML element
This article is credited to the Wix team - https://support.wix.com/ and we thank them for that!