You can customize how your web pages look when they are shared on X (Twitter). Add your own images, titles, and descriptions for each page of your site to make your business look professional and increase traffic.
For example, you can customize the title of your site in X (Twitter) shares when want to advertise an upcoming sale or promotion.

About X (Twitter) settings
When you share your pages to X (Twitter), Wix provides the image and text you've included in your Social Share settings so that it displays in the correct format for an X (Twitter) card.
You can also customize your page's X (Twitter) settings to display a different x:title, x:description, and x:image for pages that you share on X (Twitter).
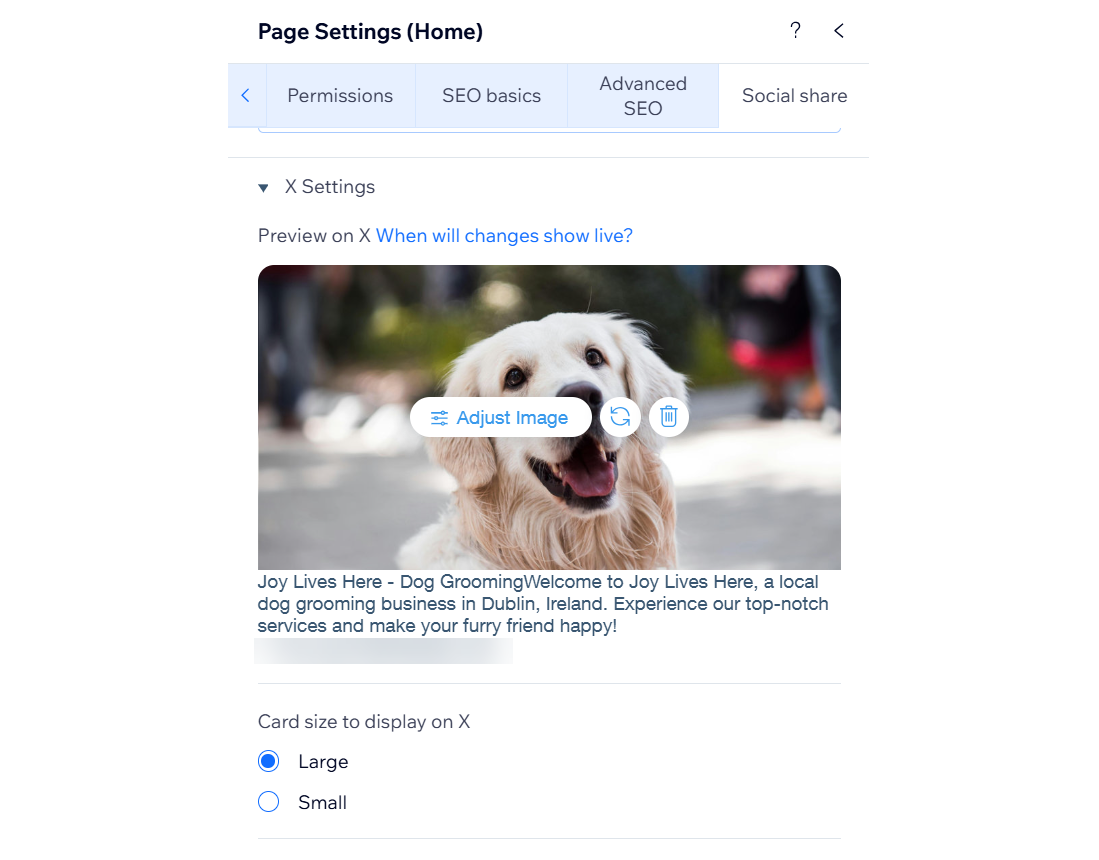
You can customize the following for X (Twitter) shares:
x:image: Choose an image that reflects the topic of the page. Use the preview to see how the image will look in your X (Twitter) share.
Card size: Choose to include a large or small card in your X (Twitter) share.
x:title: Add a title that summarizes the content of the page. We recommend keeping the length below 80 characters or some of the title may be truncated. Use the preview to see how the title will look in your social share.
x:description: Add a short description of the content of the page. We recommend keeping the length below 300 characters or some of the description may be truncated. Use the preview to see how the description will look in your social share.
Important:
X (Twitter) uses its own criteria to choose the best title, description, and image for the pages that get shared on it. While it's likely the information in your X (Twitter) Settings will be used, it's not guaranteed.
After you change your page information, it can take up to a week for the new information to appear in X (Twitter) shares. You can test what your X (Twitter) share will look like by following the steps in this X (Twitter) article.
Customizing Your Page's X (Twitter) Settings
Follow the steps below to customize your X (Twitter) Settings for:
Your site's pages in the Wix Editor
Click Pages & Menu

on the left side of the editor.
Click the page you want to edit.
Click the More Actions icon

and select Social Share.
Click X Settings to change your settings:
Click Upload Image to add an image.
Click the Change icon

to replace the image
Click Adjust Image to edit the image in Photo Studio.
Click the Delete icon

to remove the image.
Choose the card size under Card size to display on X.
Add a title under x:title (title on X).
Add a description under x:description (description on X).
Publish your site.
Your site's pages in the Studio Editor
Click Pages

on the left side of the editor.
Click the page you want to edit.
Click the More Actions icon
.
Click Social Share.
Click X Settings to change your settings:
Click Upload Image to add an image.
Click the Change icon
to replace the image.
Click Adjust Image to edit the image in Photo Studio.
Click the Delete icon
to remove the image.
Choose the card size under Card size to display on X.
Add a title under x:title (title on X).
Add a description under x:description (description on X).
Publish your site.
Wix Stores product pages
Go to Products in your site's dashboard.
Click the product you want to edit.
Click Edit SEO settings under Marketing & SEO.
Click Social share.
Click X Settings to change your settings:
Click Upload Image to add an image.
Click the Change icon
to replace the image.
Click Adjust Image to edit the image in Photo Studio.
Click the Delete icon
to remove the image.
Choose a card size under Select card size.
Add a title under x:title.
Add a description under x:description.
Wix Stores category pages
Go to Categories in your site's dashboard.
Click the category you want to edit.
Click Edit SEO settings under Marketing & SEO.
Click Social share.
Click X Settings to change your settings:
Click Upload Image to add an image.
Click the Change icon
to replace the image.
Click Adjust Image to edit the image in Photo Studio.
Click the Delete icon
to remove the image.
Choose a card size under Select card size.
Add a title under x:title.
Add a description under x:description.
Wix Bookings service pages
Go to Bookings Services in your site's dashboard.
Click the service you want to edit under Services List.
Click Edit SEO Settings under Marketing & SEO.
Click Social share
Click X Settings to change your settings.
Click Upload Image to add an image.
Click the Change icon
to replace the image.
Click Adjust Image to edit the image in Photo Studio.
Click the Delete icon
to remove the image.
Add a title under x:title.
Add a description under x:description.
Wix Blog posts
Go to Blog in your site's dashboard.
Click the blog post you want to edit.
Click SEO in the panel on the left.
Click Social Share
Click X Settings to change your settings.
Click Upload Image to add an image.
Click the Change icon
to replace the image.
Click Adjust Image to edit the image in Photo Studio.
Click the Delete icon
to remove the image.
Add a title under x:title.
Add a description under x:description.
Click Publish.
Online Programs pages
Go to Online Programs in your site's dashboard.
Click the More Actions icon

next to the program you want to edit.
Select Edit Settings.
Select SEO under Program Settings.
Click X Settings to change your settings.
Click Upload Image to add an image.
Click the Change icon
to replace the image.
Click Adjust Image to edit the image in Photo Studio.
Click the Delete icon
to remove the image.
Add a title under x:title.
Add a description under x:description.
Click Save.
Wix Events event pages
Go to Events in your site's dashboard.
Click the More Actions icon

next to the relevant event.

Select Edit SEO Settings.
Click the Social share tab.
Click Social share.
Click X Settings to change your settings.
Click Upload Image to add an image.
Click the Change icon
to replace the image.
Click Adjust Image to edit the image in Photo Studio.
Click the Delete icon
to remove the image.
Add a title under x:title.
Add a description under x:description.
Click Save.
Using Twitter settings in your site's SEO settings
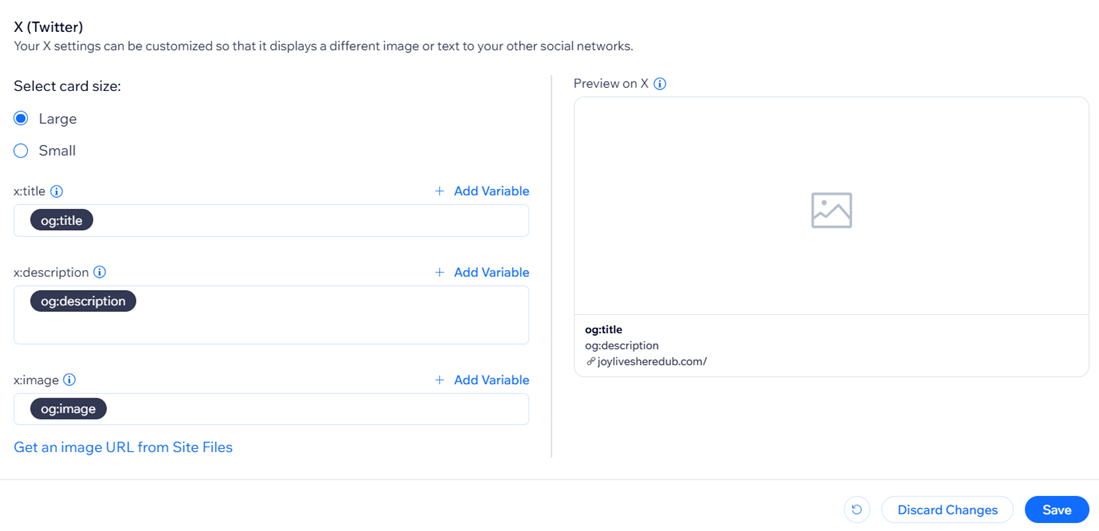
If you want to apply the same Twitter settings to more than one page, you can customize them in your site's SEO settings.
Any X (Twitter) settings you add in your SEO settings apply to every page that uses that SEO setting.
To customize in SEO settings:
Go to SEO & GEO in your site's dashboard.
Click SEO Settings under Tools and settings.
Select the page type that you want to edit.
Click the Customize defaults tab.
Click Edit next to Basics & social share.
Update your settings under X (Twitter). Learn more about customizing SEO settings
This article is credited to the Wix team - https://support.wix.com/ and we thank them for that!