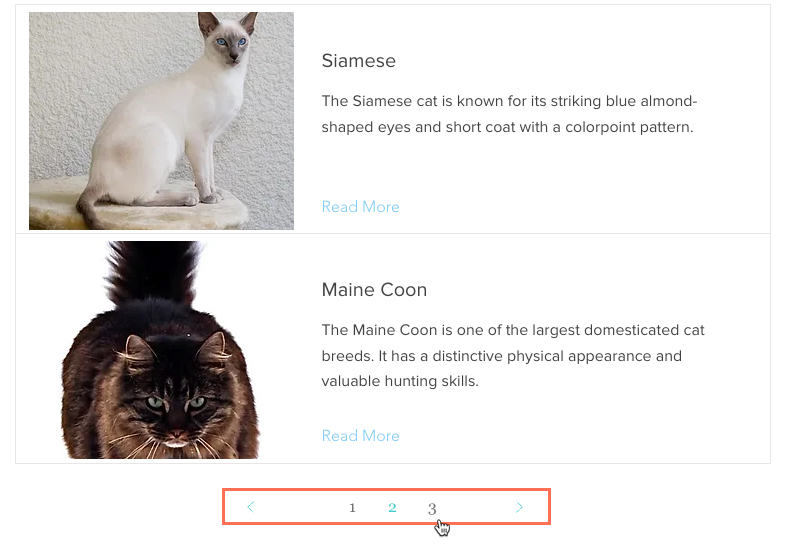
Use a pagination bar to provide visitors with a simple and intuitive way to browse through a large collection of items within a repeater or gallery. A pagination bar lets visitors navigate through 'pages', or sets of items displayed on a dynamic page. The dataset's ' Items per load' field determines the maximum number of items that appear in each 'page'.
The number of pages displayed by the pagination bar is calculated based on the total number of collection items retrieved by the dataset and the 'Items per load' field. For instance, if you have 50 visible items in your collection and you've set the 'Items per load' field to 10, your pagination bar will display 5 pages (50/10=5). Each page represents a set of items, and the pagination bar allows your visitors to navigate through these sets.
Before you begin:
Connect a repeater or gallery to the dynamic dataset in a dynamic list page or dynamic item page displaying items in categories.
Step 1 | Add and customize a pagination bar
Add a pagination bar to your site and customize it to match your design needs.
Wix Editor
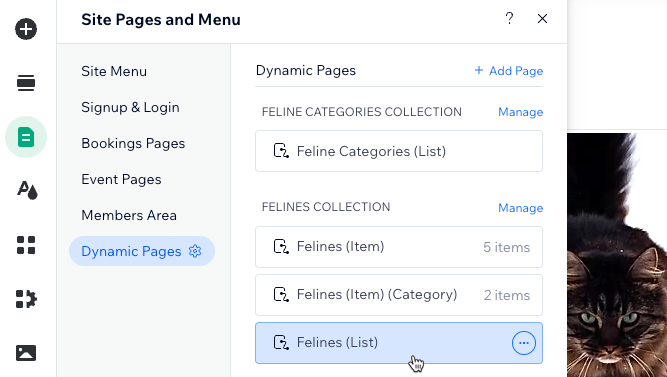
Go to the relevant dynamic page that can list multiple items:
Click Pages & Menu

on the left side of the editor.
Click Dynamic Pages.
Click the relevant dynamic page.
Note: Pagination bars are not relevant for dynamic item pages that can only display 1 item at a time.
Add a pagination bar:
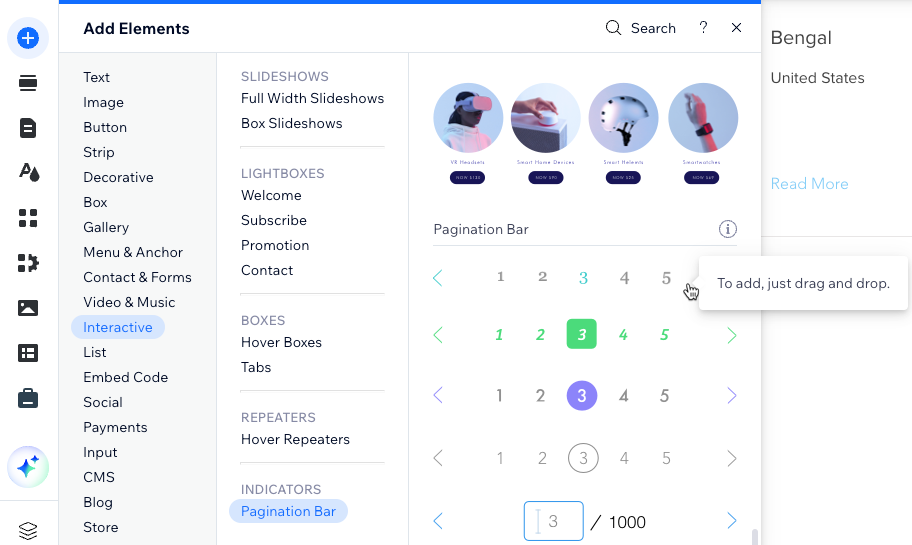
Click Add Elements

on the left side of the editor.
Click Interactive.
Click Pagination Bar.
Click and drag the pagination bar you want to use onto the page.
Customize the layout and design of the pagination bar:
Layout
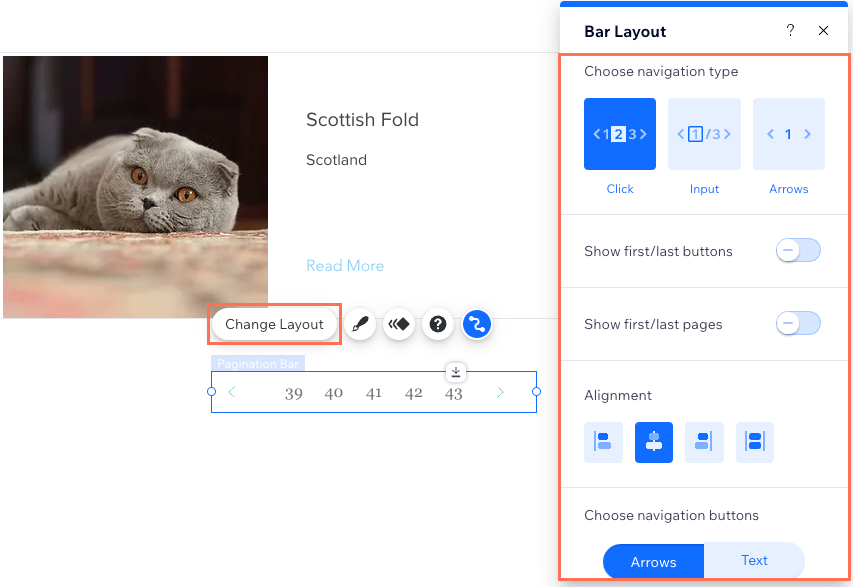
Click Change Layout to adjust the layout and choose from the following options:
Choose a navigation type:
Click: Multiple page numbers display and visitors click to go to the relevant page of items.
Input: Visitors enter the page number they want to view in a field next to the total number of pages.
Arrows: Visitors click navigation arrows or text to go to the next or previous page of items.
Show first/last buttons: Enable the toggle to show navigational arrows or text that takes visitors to the first or last page of items.
Show first/last pages: (Click type only) Enable the toggle to show the first and last page number if there's not enough space to show all the pages.
Show total pages: (Input type only) Enable the toggle to show the last page number if there's not enough space to show all the pages.
Show current page: (Arrows type only) Enable the toggle to show the page number that the visitor is currently viewing.
Alignment: Choose how the pages and arrows align: Left, Center, Right, or Spread
Choose navigation buttons: Choose whether to show arrows or text as the navigation buttons. For text, click Button Text and enter the text you want to show in the relevant fields.
Direction: Choose the page number direction: Left to right or Right to left
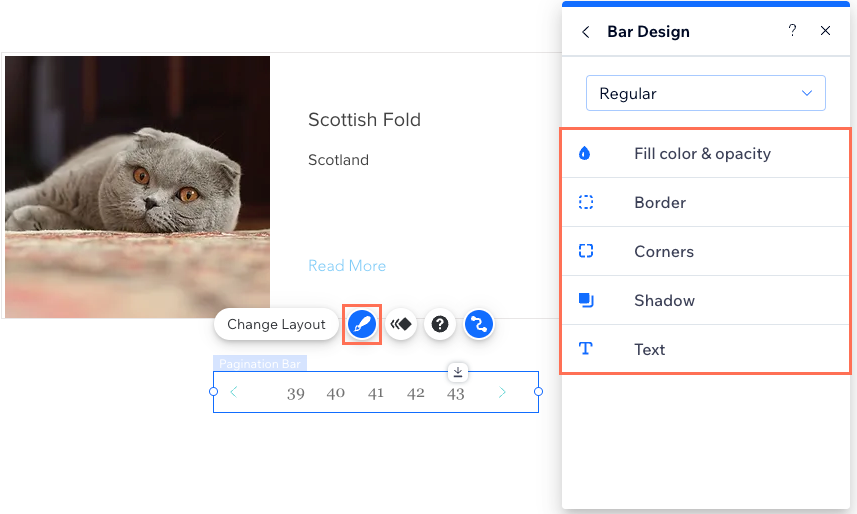
Design
Click the Design icon

on the pagination bar.
Choose a preset design then click Customize Design.
Edit the fill color & opacity, border, corners, shadow, and text used in your pagination bar.
Studio Editor
Go to the relevant dynamic page that can list multiple items:
Click Pages

on the left side of the editor.
Click the relevant dynamic page that can display multiple items at a time.
Note: Pagination bars are not relevant for dynamic item pages that can only display 1 item at a time.
Add a pagination bar:
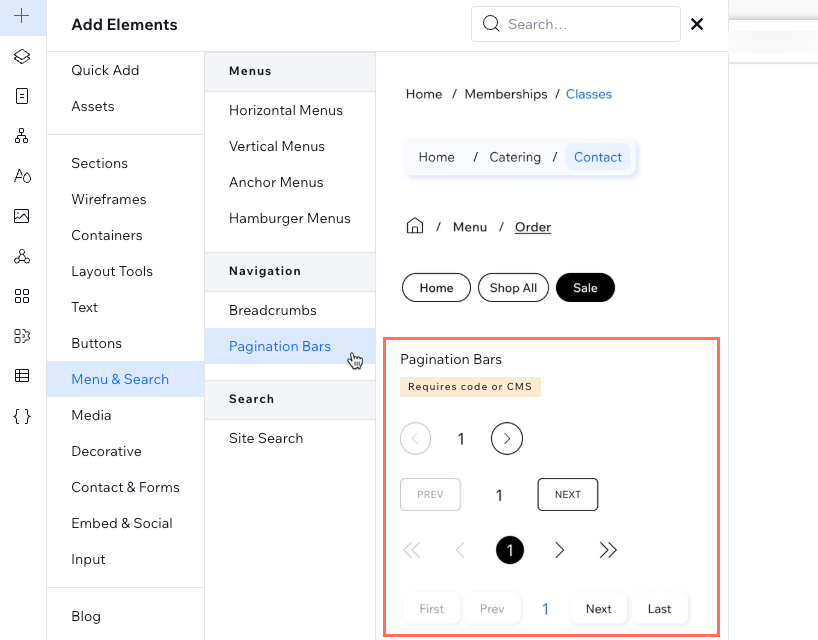
Click Add Elements

on the left side of the editor.
Click Menu & Search and select Pagination Bars.
Click and drag the pagination bar you want to add onto the page.
Customize the settings, layout and design of the pagination bar:
Settings
Choose the type of navigation buttons displayed on your pagination bar.
Click the Settings icon

.
Select an option under Button display:
Text: The bar shows up to four navigation buttons: 'Previous', 'Next', 'First', and 'Last'. You can change the text of each button to suit your needs.
Arrows: The bar shows four sets of arrows as navigational buttons representing: 'Previous', 'Next', 'First', and 'Last'.
Click the Accessible names drop-down and enter text that explains to screen readers what this element is. This text isn't visible on your live site.
Layout
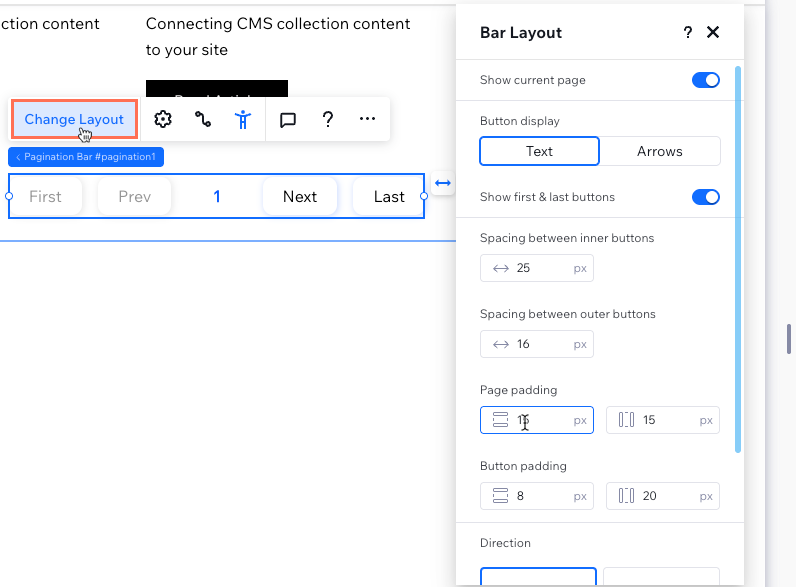
Click Change Layout to adjust the layout and choose from the following options:
Show current page: Enable the toggle to show the page number that the visitor is currently viewing.
Button display: Choose whether the bar displays text or arow buttons.
Show first & last buttons: Enable the toggle to show navigational arrows or text that takes visitors to the first and last pages.
Spacing between inner / outer buttons: Adjust the space between the inner and outer buttons.
Page / button padding: Adjust the padding of the element and the buttons.
Direction: Choose the button direction: Left to right or Right to left
Alignment: Choose how the buttons are aligned: Left, Center, Right, or Justify
Design
Click the Design icon
in the Inspector panel on the right.
Select an option under What do you want to design?
Use the available options to customize the design of the pagination bar (e.g. background fills, borders, corners, icon size).
Step 2 | Connect to the CMS
Connect your pagination bar to the same dataset that connects to your repeater or gallery. Then resize your pagination bar and test it out in preview mode. When it's ready to go live, publish your site.
Wix Editor
Click the pagination bar.
Click the Connect to CMS icon

.
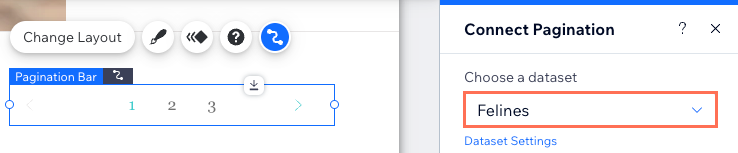
Click the Choose a dataset drop-down and select the same dataset that connects to your repeater or gallery.
(If needed) Adjust the number of items that appear per 'page' in the pagination bar: Note: This is also the maximum number of items that can display per load in your repeater or gallery.
Click Dataset Settings in the Connect Pagination panel on the right.
Edit the Items per load field. Learn more about editing your dataset settings.
Adjust the size of your pagination bar by stretching it or adjusting the borders manually:
Stretch to width: Click the Stretch icon

to expand the width of the bar to the edges of the site.
Manually: Click and drag the edges of your pagination bar to resize it.
Click Preview to test your pagination bar.
Click Publish if you are ready to make the changes go live.
Studio Editor
Click the pagination bar.
Click the Connect to CMS icon
.
Click the Choose a dataset drop-down and select the same dataset that connects to your repeater or gallery.
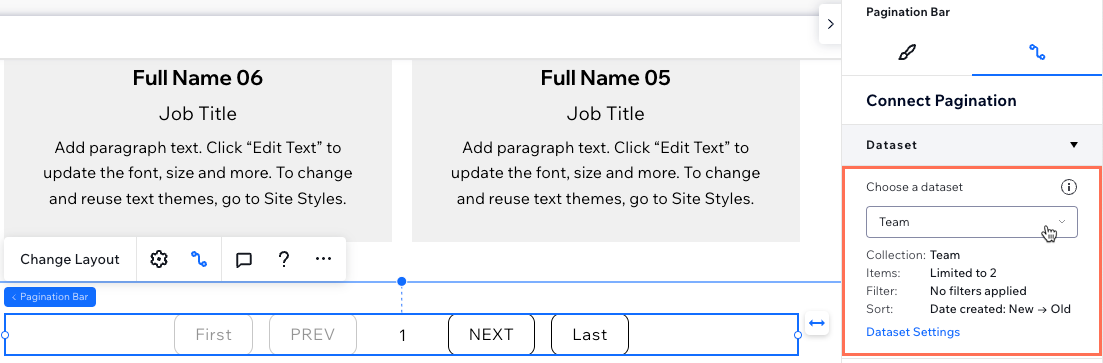
(If needed) Adjust the number of items that appear per 'page' in the pagination bar:
Note: This is also the maximum number of items that can display per load in your repeater or gallery.
Click Dataset Settings in the Connect Pagination panel on the right.
Edit the Items per load field. Learn more about editing your dataset settings.
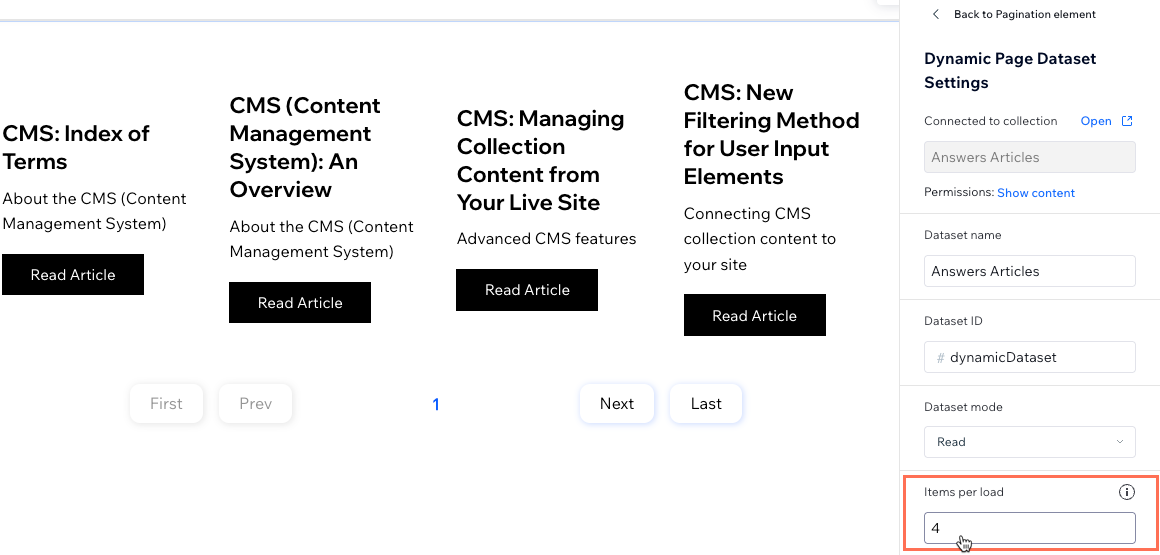
Adjust the size of your pagination bar by stretching it or adjusting the borders manually:
Stretch to width: Click the Stretch icon
to expand the width of the bar to the edges of the site.
Manually: Click and drag the edges of your pagination bar to resize it.
Click the Preview icon

at the top right to test your pagination bar.
Click Publish if you are ready to make the changes go live.
This article is credited to the Wix team - https://support.wix.com/ and we thank them for that!